Learn how to transform fabric shower curtains into fashionable Roman Shades. These DIY Roman Shades add style on a budget to any window.
From this
To this!!!
This post may contain affiliate links. If you buy something through one of those links, at no extra cost to you, but I may get a small commission.
Today I want to share with you my latest and greatest project…Shower Curtain Roman Shades!!! Yep! I kid you not!
As usual, I was on the hunt for beautiful window dressings for my Breakfast Nook. If you have been hanging out with me for a bit, you’ll remember my post about turning my builder grade, pink breakfast area into a fully functional place to eat, work or just relax. Check out our Breakfast Nook makeover.
Well, I have two pretty large windows in this area, each are 72” by 72”, so buying ready-made Roman Shades (aka Roman Blinds) was out of the question. I originally looked for pre-made fabric roman shades, but I kept coming across two separate issues. 1. The fabric wasn’t to my liking and/or, 2. the cost was WAY out of proportion to my budget. I looked at bed sheets, but could not really find a black and white pattern I liked.
Disclosure: As an Amazon Associate I may get a small commission, at no extra cost to you, should you make a purchase.
My project came to a grand total of $124 (without the blackout fabric).
A really great price for 2 custom Roman Shades for very large windows
Notes/Tips
Backing Material
You can use any cotton material. I usually use white because it looks nicer from the street and it won’t fade out over time.
Blackout Shades
If you want to make a blackout shade, I suggest buying a third material. They sell blackout material at Joann Fabrics™ (it is a little pricey) or you could buy black cotton material to put in between your shower curtain and the backing fabric.
Dowel Rods
4-5 dowels per shade at approximately $1 per dowel
What you will need per window
Matching thread
12 small plastic drapery rings
3 Pulleys
1 Cord cleat
Polyester cord (5 times the length of your shade)
3/8” diameter wooden dowels the length will depend on the width of your shade
1″×2″ x 6′ pine board – the length of your inside measurement of your window
Iron
Staple gun
Step-by-Step Instructions
[table id=3 /]
Step 1 – Launder material
I first washed and dried the 2 sheets and the shower curtains (just to ensure than no shrinkage would occur after they were stitched together).
Shrinkage afterwards would cause your stitching to pucker and not lay right. Boo!
Step 2 – Sew material (Large Windows)
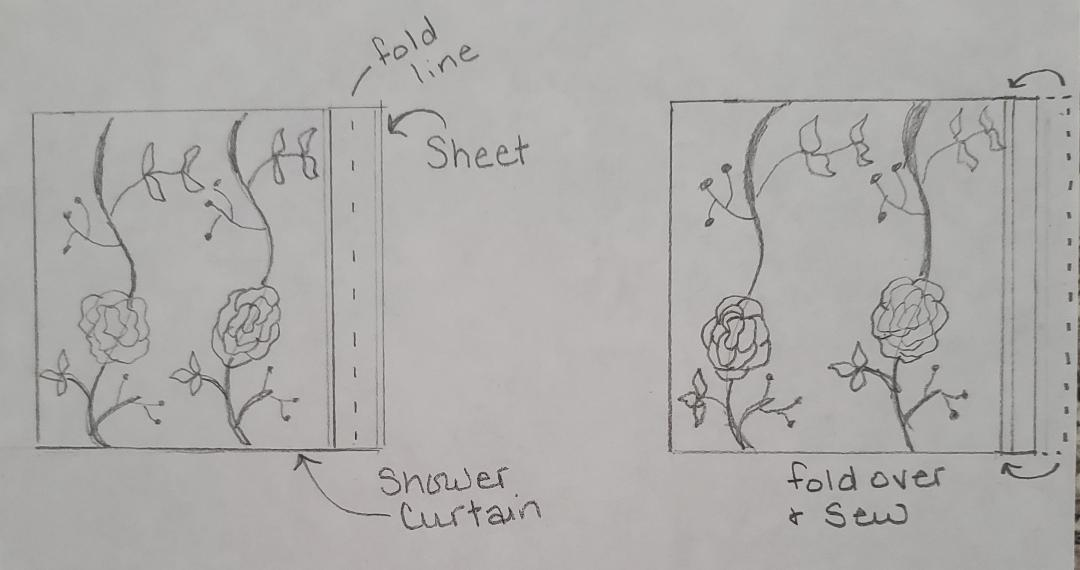
First, I laid the backing fabric (sheet) wrong side up on my living room floor (because it is the biggest floor space I have available).
Place the shower curtain right side up on top of it – the sheet was slightly larger than the shower curtain, but I needed the extra width to fit in the window properly.
I folded the curtain over the sides of the curtain fabric
Stitch together one long straight seam.
Repeat with the other side.
Press flat with a cooler temperature iron so as not to scorch your fabric.
Continue to Step 3
Love the drawing? I forgot to take pictures while I was making this project. Ha!
Step 2 – Sew material (Small Windows)
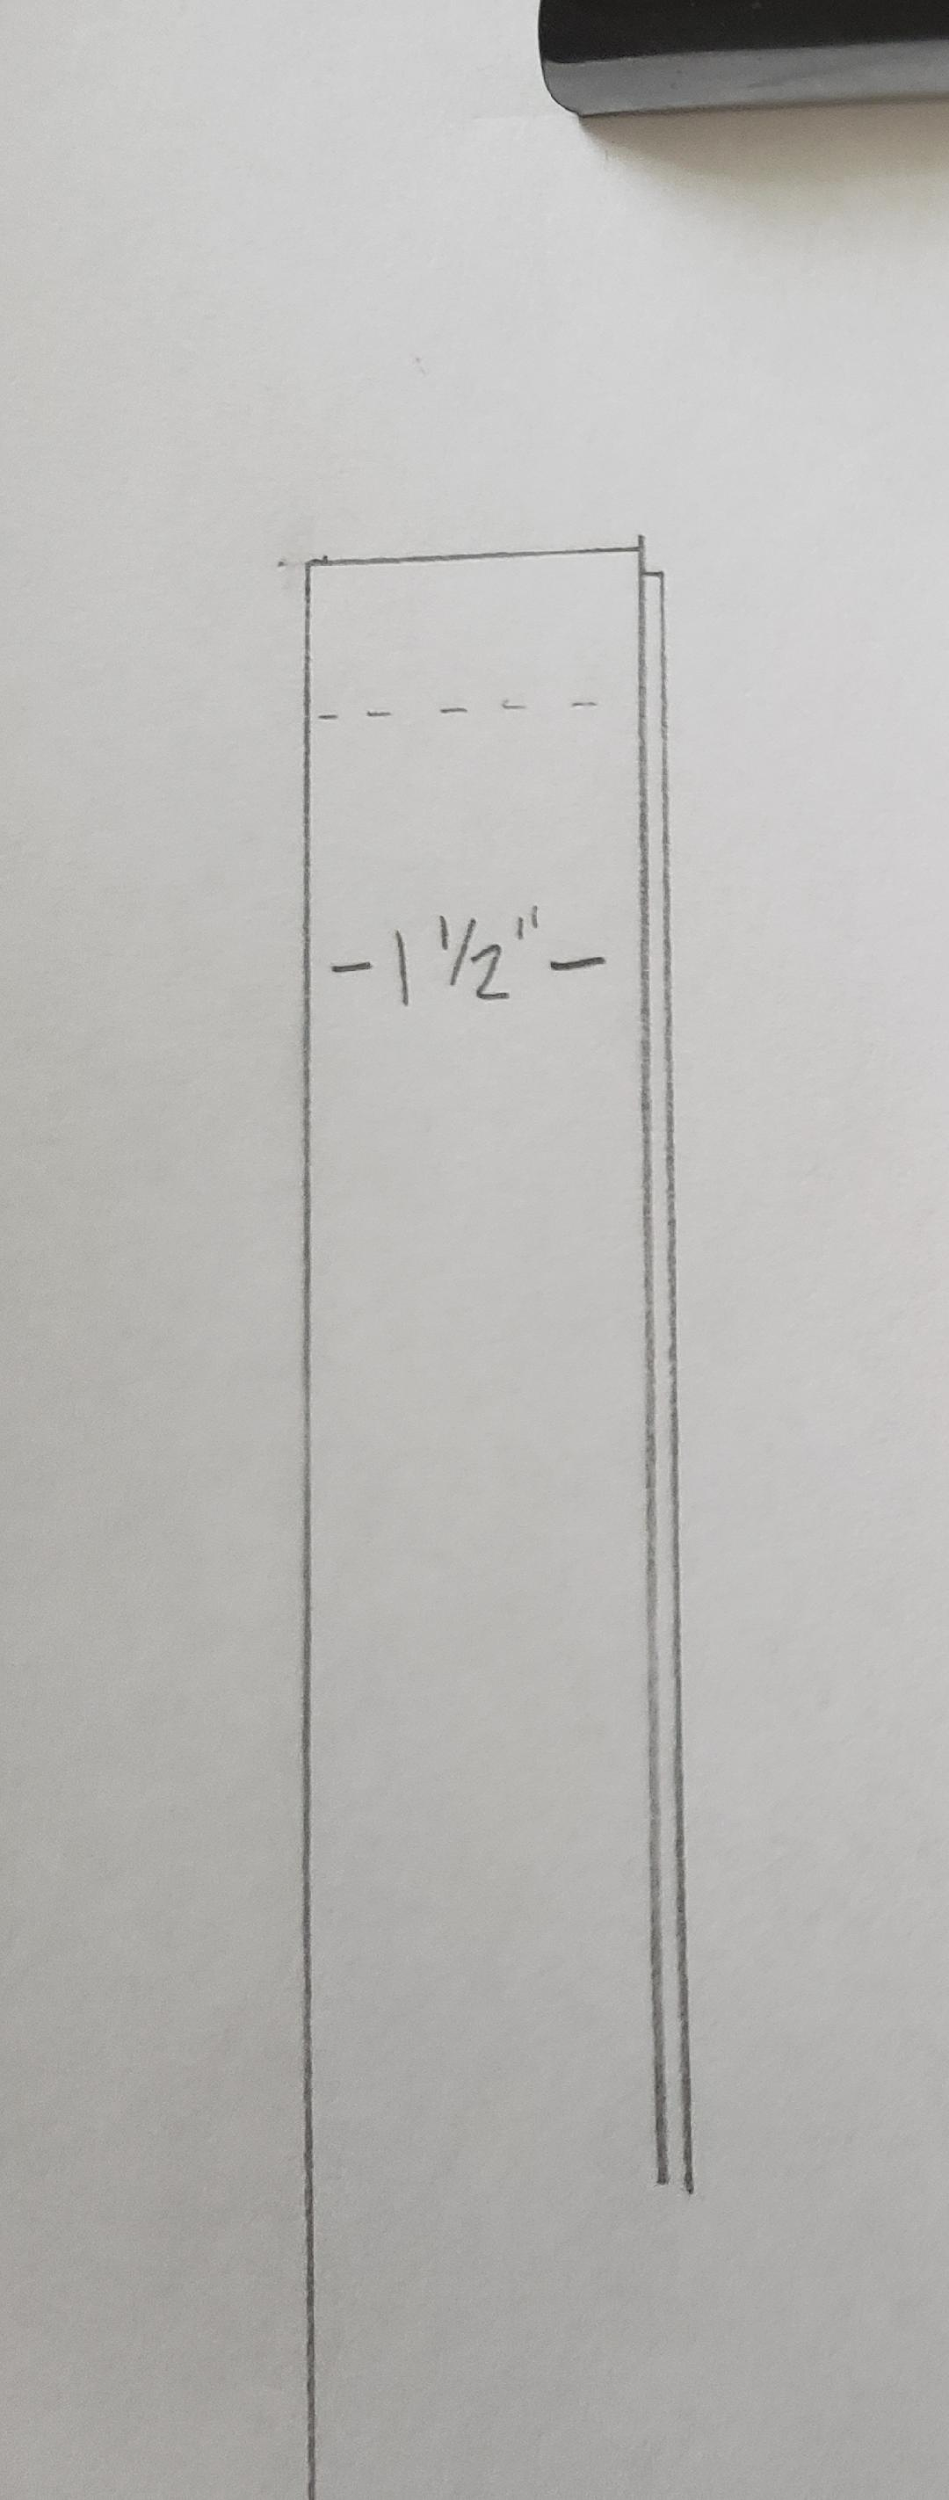
If you are doing smaller windows and you do not need the extra fabric on the sides, cut both (shower curtain and your backing fabric) the width measurement of the window plus 1 ½ inches. This will give you enough fabric to stitch up the sides.
After you cut you fabric to the desired width, measure your window height and cut your fabric height that measurement plus 1 ½ inches.
Lay your backing fabric right side up on a flat surface.
Lay your shower curtain fabric on top of your backing fabric with the right side down (both fabrics should be right sides together).
Stitch a 5/8” seam around 3 sides (side, bottom and side) leaving the top of the curtain open.
Clip the corners (this helps to decrease bulk in the corners).
Continue to Step 3
Turn your piece right side out and press.
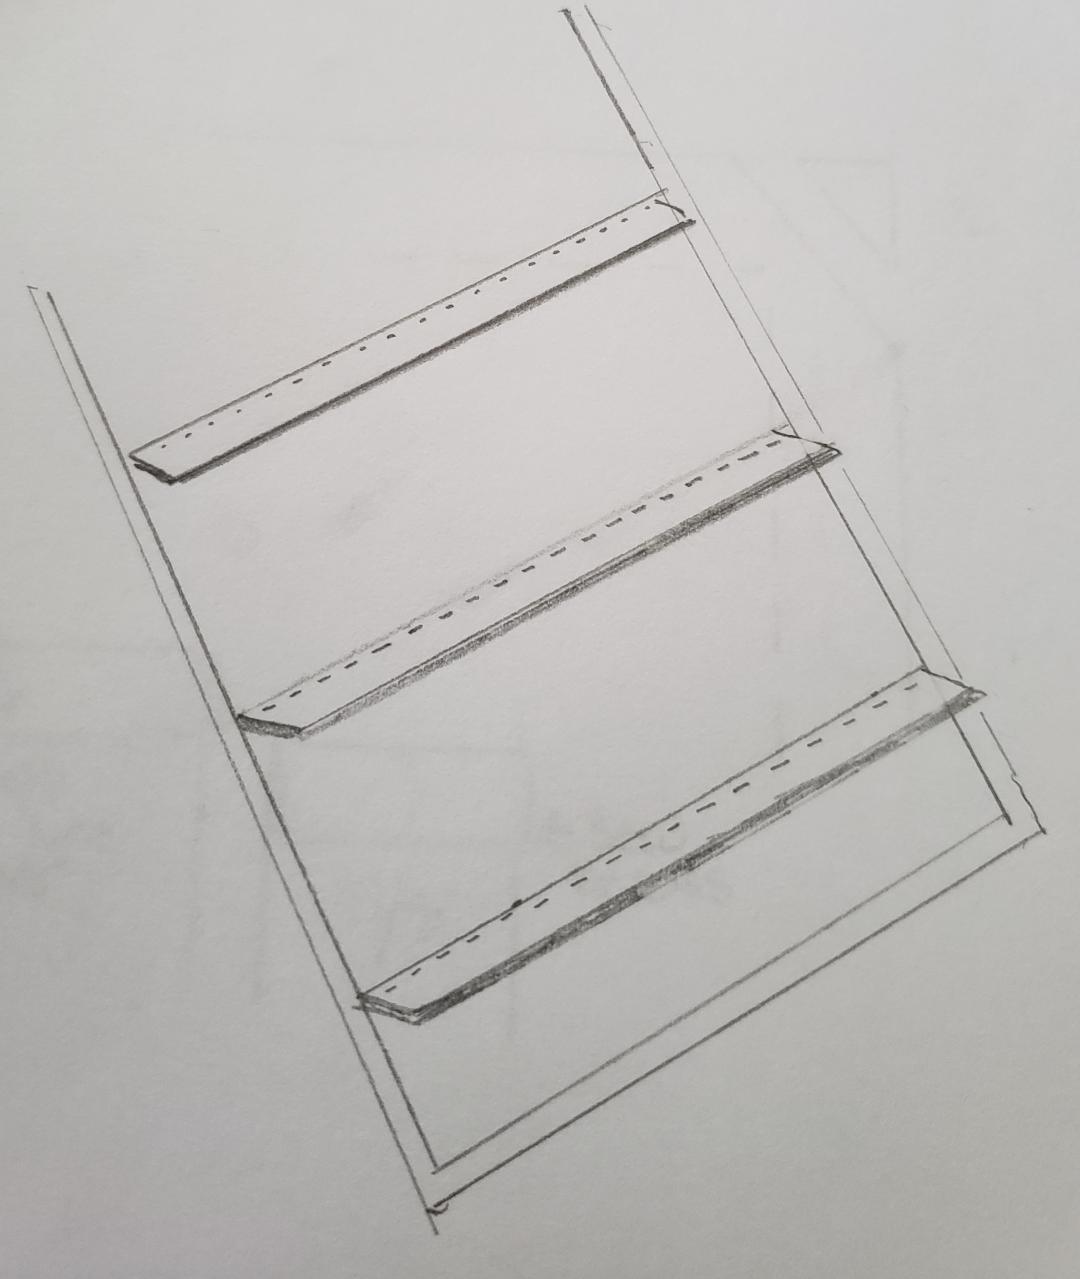
Step 3 – Measure dowels
It’s time to measure for the dowels. They should be evenly spaced 8”-12” from each other and the top dowel should be at least 10” from the top.
To determine how far from the bottom your lowest dowel should be, divide you dowel interval length by 2 and add 1 to it.
Mark your dowel places with either fabric chalk or pins.
So… my shade was 48” long and I decided that I would space my dowels every 9”.
I measured the first one 7” from the bottom and added 3 more dowels 9” apart until I was left with 14” at the top of the shade.
Whew! Isn’t math GREAT?!
Step 4 – Make Dowel Pockets
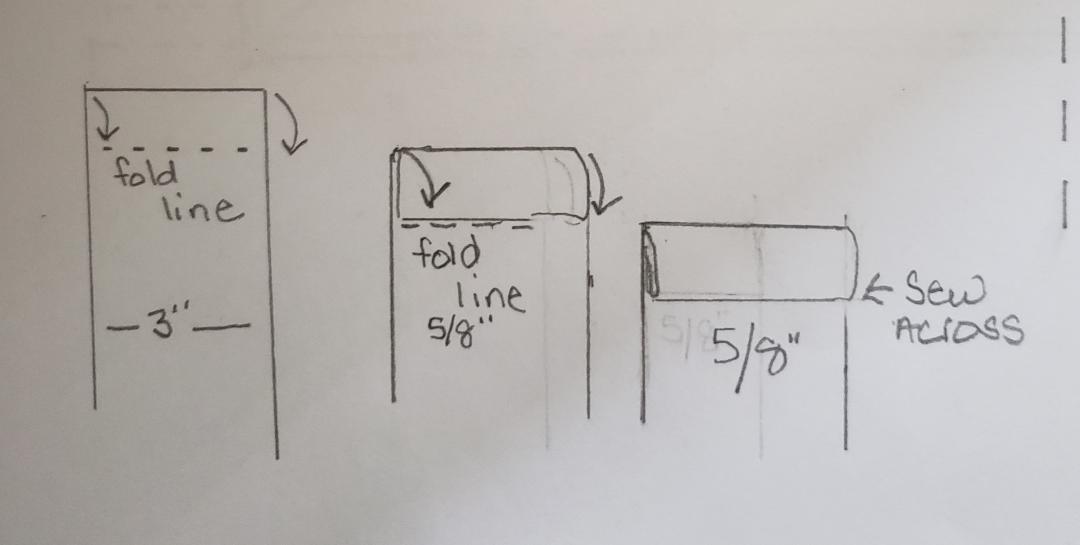
Using strips of scrap fabric, (I used some extra sheet fabric) cut strips measuring 3″ wide and 1¼” longer than the finished width of your shade.
Fold the ends in 5/8” and then 5/8” again.
Sew the folds to make a hem.
Press.
Fold your strip in half length-wise. These will be the pocket for your dowels. You will need to make as many pockets as you have dowels (determined in step 3). In my case I needed to make 8 for both windows.
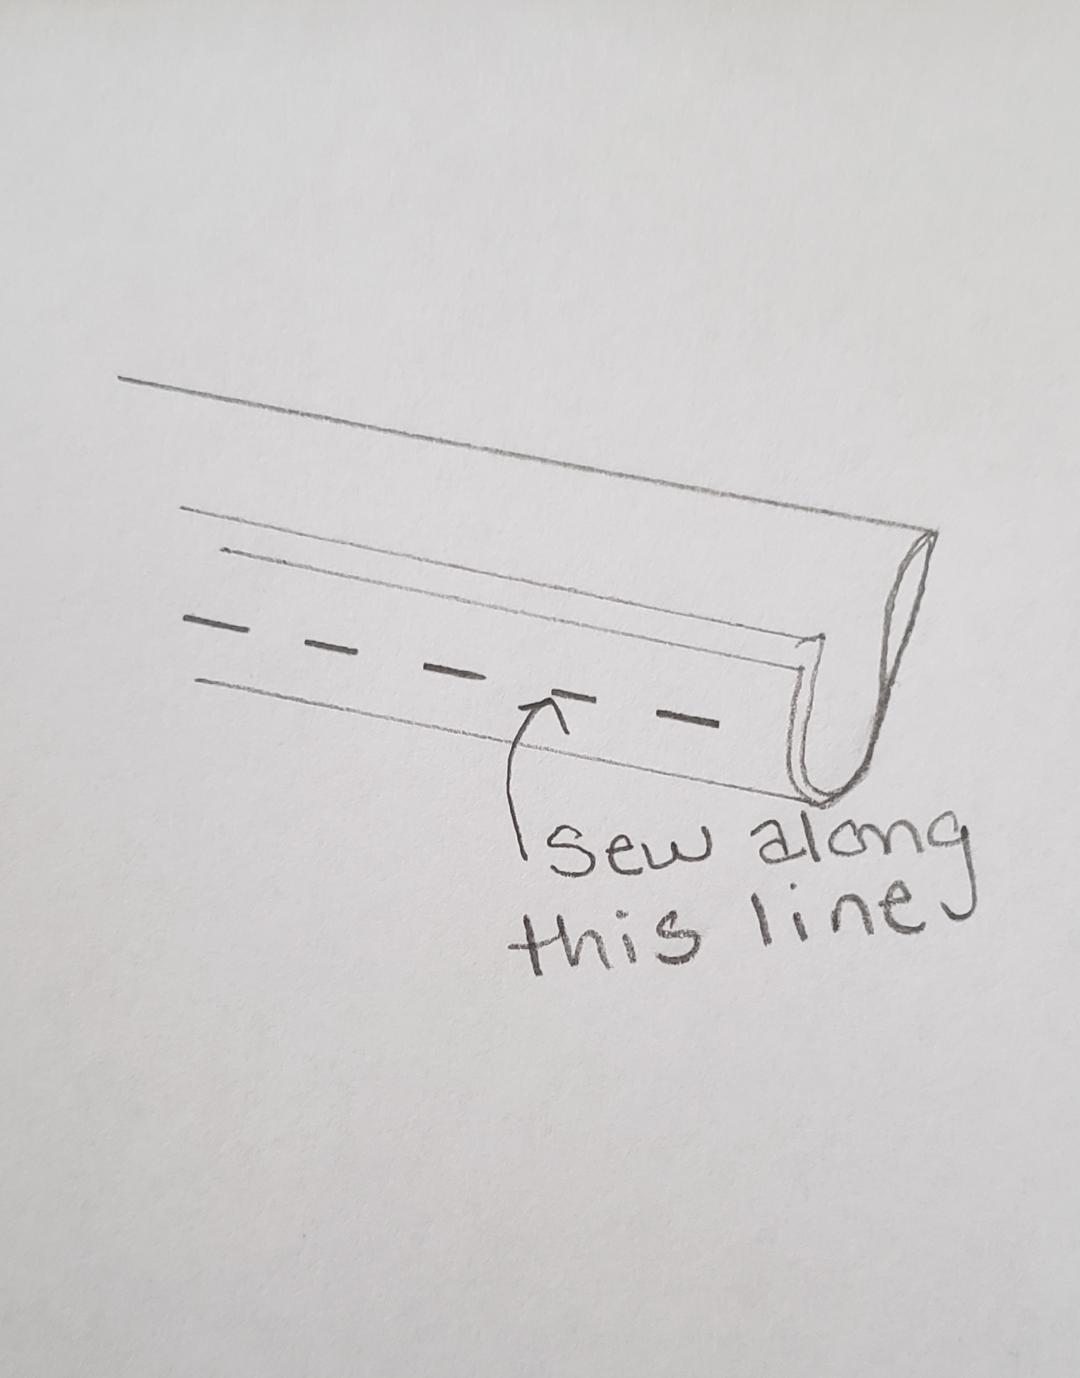
Fold the cut side in half the long way
Flip the strip over and pin it along the markings you made in step 3.
Pin them in place facing in and toward the bottom of your shade.
Sew along the side you just folded in.
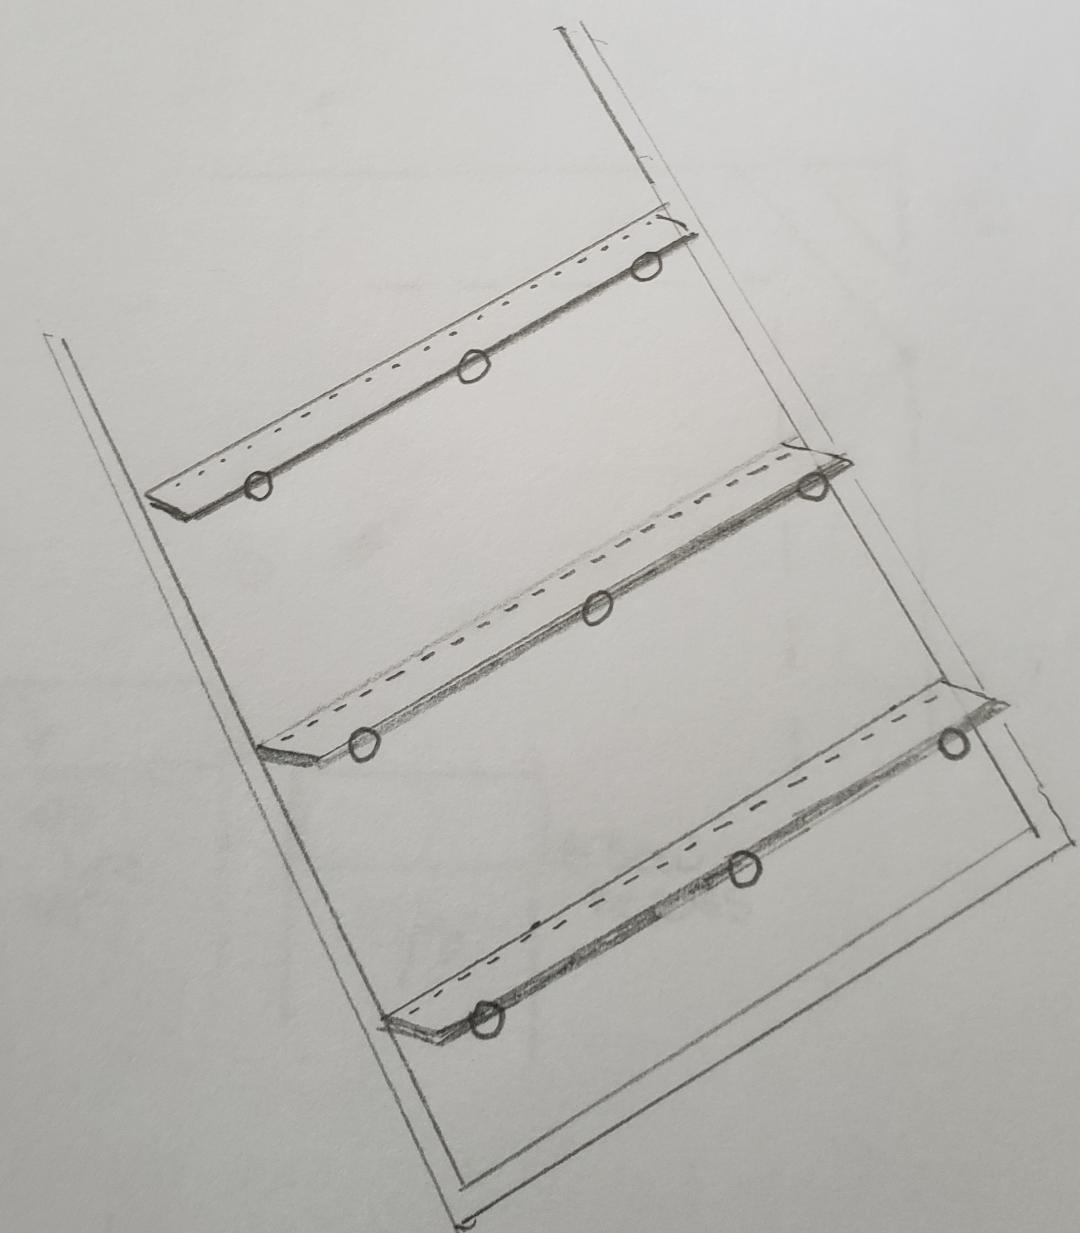
Step 5 – Add plastic rings
Sew the plastic rings by hand to your dowel pockets. (Do not sew into the pocket causing it to be sewn shut – I’m talking from experience.)
Place one in the center and one about 2″ from each end, keeping them lined up in vertical columns down the length of your shade
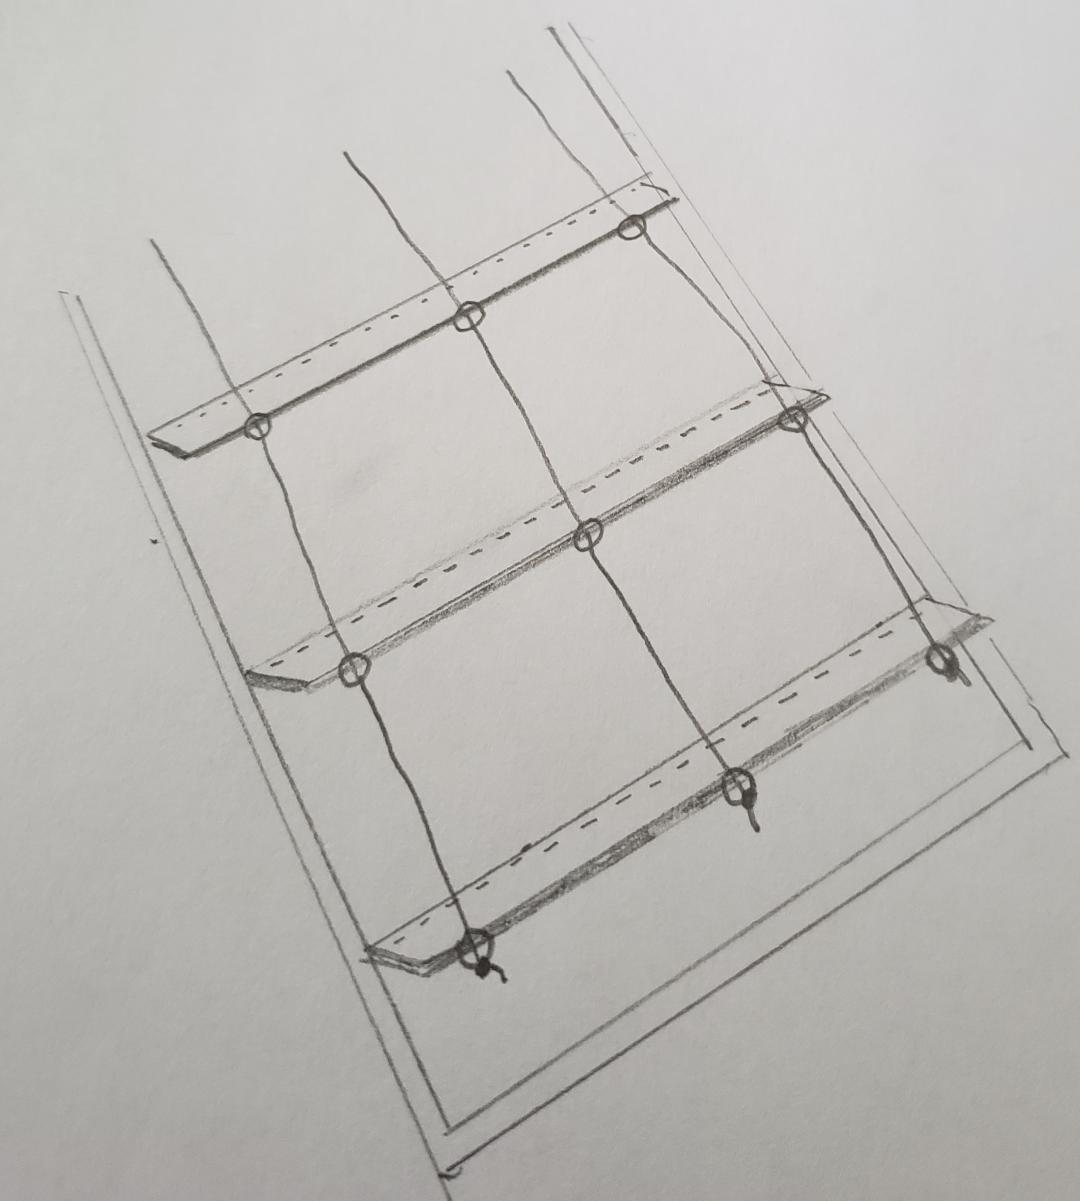
Step 6 – Add cording
Cut 3 strings of cording 3 times the length of your shade. For example, if your shade is 48” long, cut 3 strings 144” or 12’.
Tie each cord to one of the 3 rings on the bottom dowel pocket. I put a drop of glue on the knot to help it stay tied.
Thread the cords, vertically, through each dowel pocket ring to the top of the shade.
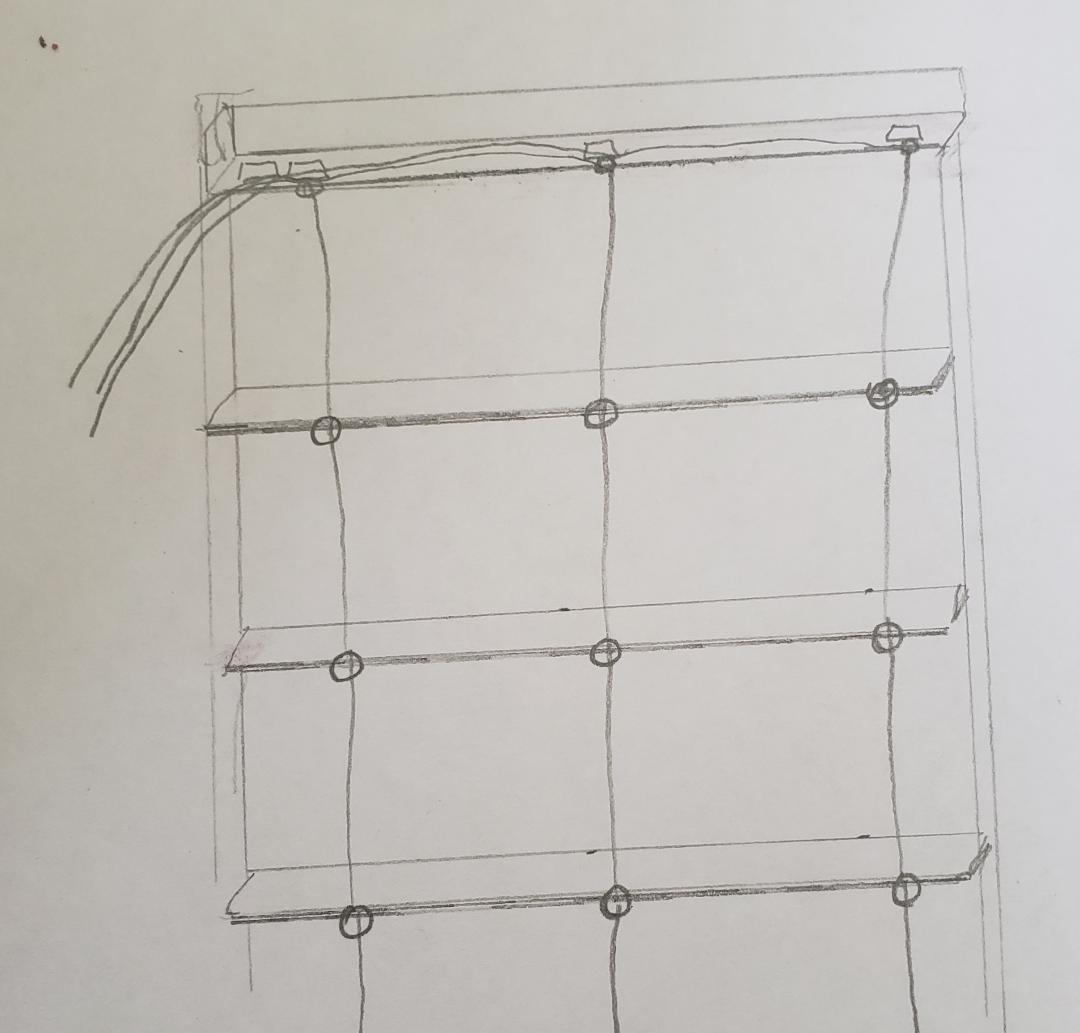
Step 7 – Add pulleys
Cut the 1×2 board to a 1/2″ shorter than the width of your shade and window.
Place it, horizontally, at the top of your shade.
Determine which side you want your cord to hang. You will want to put your cord lock on the side where your cords will hang.
Pre-drill screw holes with a drill bit slightly smaller than that of your screws.
Screw the 3 pulleys to the 1×2 in the same spots that you placed your plastic rings on the dowel pockets (one in the center and one two inches from the end on both ends).
Fold over your unfinished shade edge about a 1/2″ and staple to the 1×2 on the opposite side of where you screwed in your pulleys.
Step 8 – Thread cord
Next, you’re going to thread your three rows of cotton cord through the pulleys.
Determine which side you want your cord to hang.
The first cord should be threaded through all of the pulleys.
The second cord goes through the middle and last pulley.
And the third cord goes through the last pulley only.
All three cords should pass through one pulley when you’re done.
Next to the last pulley, mount the cord lock.
I found this YouTube video to be most helpful in threading a cord lock.
Step 9 – Attach shade
Attach your shade to the inside top of your window casing using 1 ½” wood screws.
Pre-drill your holes first with a drill bit slightly smaller than that of your screws.
Thread all 3 of the cords through the window blind cord knob.
Tie a knot in the end and place the knob over the knot.
– Danielle
Hi, I’m Danielle!
I am the designer, writer and diy’er behind this blog. I enjoy decorating my home for practically nothing by doing most of the work myself, finding new and imaginative ways to make it beautiful and by watching for killer sales. I find humor almost anywhere and can laugh at myself through it all. I have learned that most projects don’t go exactly as intended, but can be more beautiful than the original plan.
Re-Fabbed Boutique – Beautiful, quality clothing for women of all shapes and sizes!!
We use cookies to ensure that we give you the best experience on our website. If you continue to use this site we will assume that you are happy with it.
You can revoke your consent any time using the Revoke consent button.