Create this custom diy wood beach signs on a budget in under one hour using materials from the Dollar Tree!
Beach décor is so popular right now, especially as summer draws near!
We have been so busy over here getting ready for the summer season!
Between pressure washing and flower planting, I barely have time to breathe!
Thank goodness I did my spring cleaning early!
All I have to do now is my weekly cleaning, which only takes me about 20 minutes a day! Yay! You can find my weekly cleaning checklist here.
Enough about cleaning talk…let’s get to the fun stuff!
One of my first diy craft projects of summer is this cute little beach sign!
I mean isn’t it SO cute?!
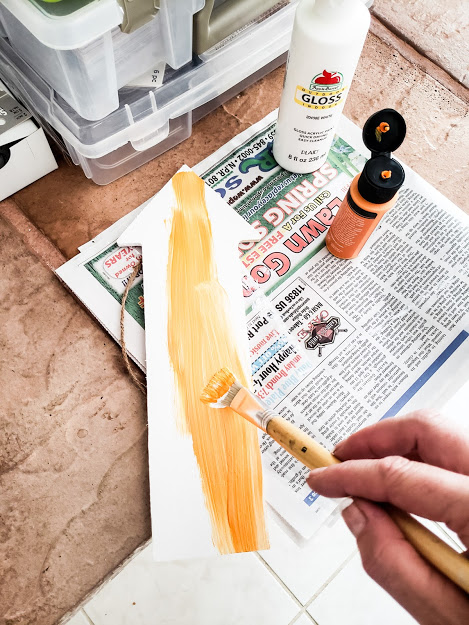
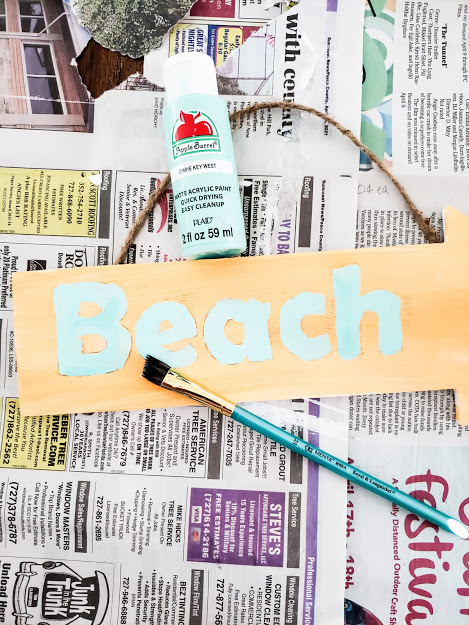
I bought the wooden arrow sign at the Dollar Tree™.
They have many different shaped signs. This one came with a rope hanger! Bonus!!!
I thought this one would be so cute to show the direction to the beach! 😊
I painted it white using Apple Barrel brand by Plaid™.
I have a TON of Apple Barrel colors!
Walmart sells them for around fifty cents each, y’all!
This is only a background color to help my top color pop!
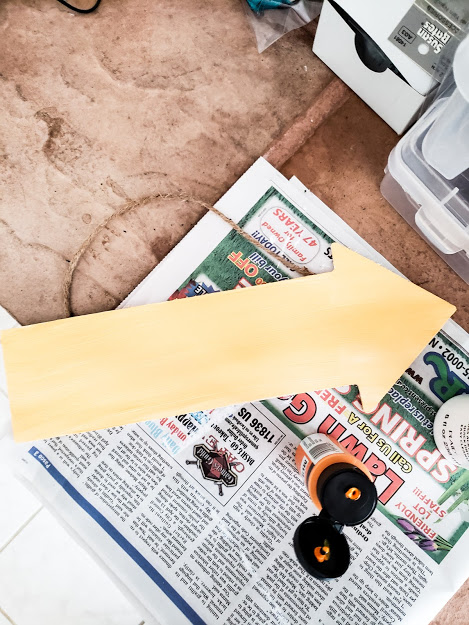
You can use any color you want for the top coat. I decided to paint my little sign orange (my favorite color). 😉
I brushed the top color on lightly to let some of the white come through.
This way it looks a little weathered.
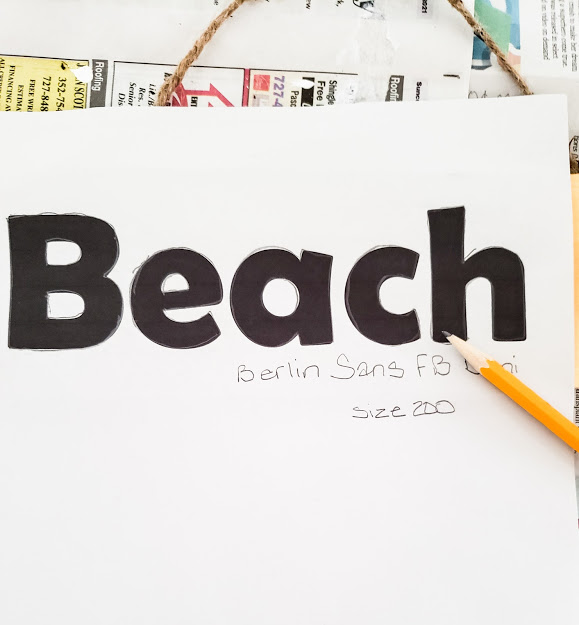
Now, if you have a home computer or laptop and a printer, you can print out your letters using any font you wish.
I chose Berlin Sans FB Demi in size 200.
I felt that choosing this font would be easier to transfer onto my sign because the letters were thick and did not have intricate thin lines to try to paint.
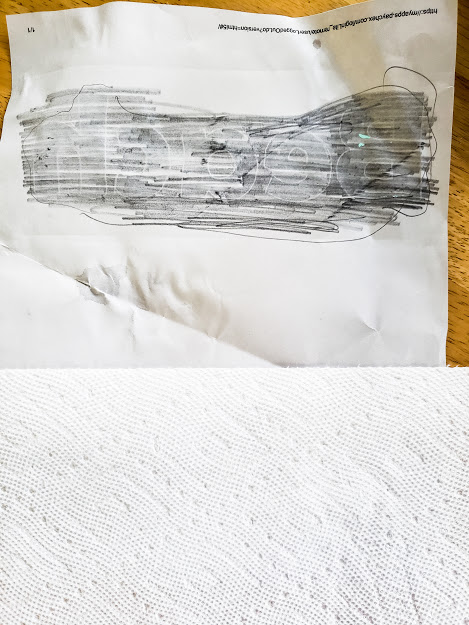
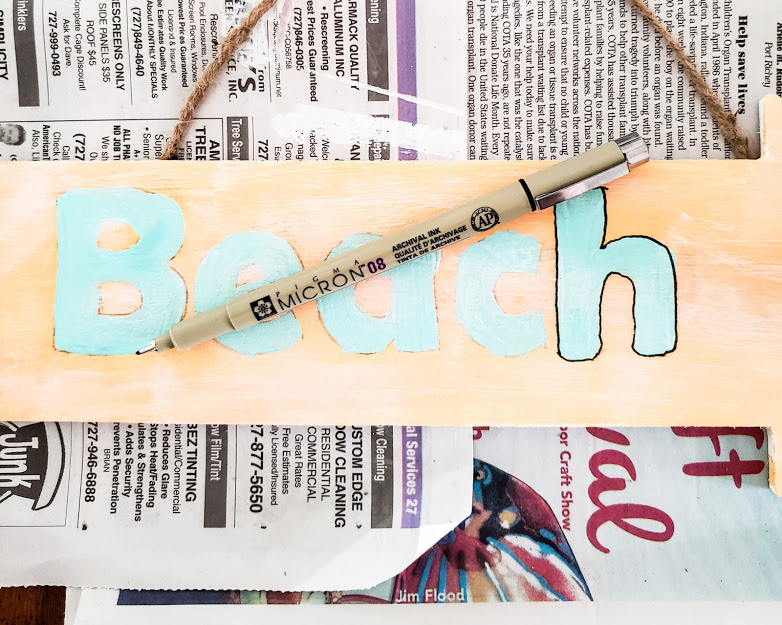
Next, you will want to turn the page over and scribble with a #2 lead pencil covering the letters completely.
I call this “starving artist’s carbon paper.”
I placed the paper right side up on the sign and traced the letters onto the wood.
Unfortunately, I did not get a picture of the transfer, but I did take one of it painted.
You can see the pencil marks on the edges of the letters.
I chose Apple Barrel Key West paint color.
Isn’t it great?! I LOVE the turquoise color against the orange!
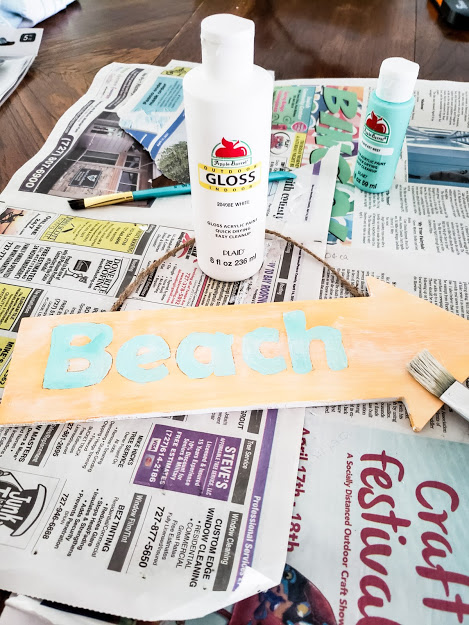
After my sign was dry, I dry-brushed my white lightly across the top of the whole sign.
Once that dried, I outlined the letters with my Micron pen from Pigma in a size 08.
This is how it looks right now.
I think I might lightly sand it to wear away some of the paint.
I would like to try to make it look like it has been showing the way to the beach for years! 😊
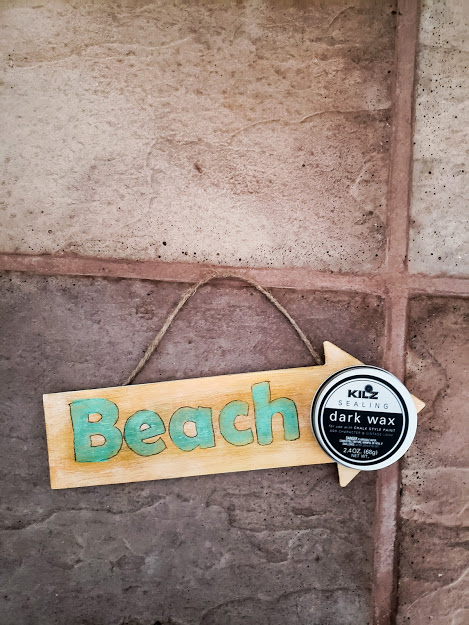
The last step was to seal my sign using dark wax by Kilz™.
The wax helps to protect the wood if you choose to hang it outside.
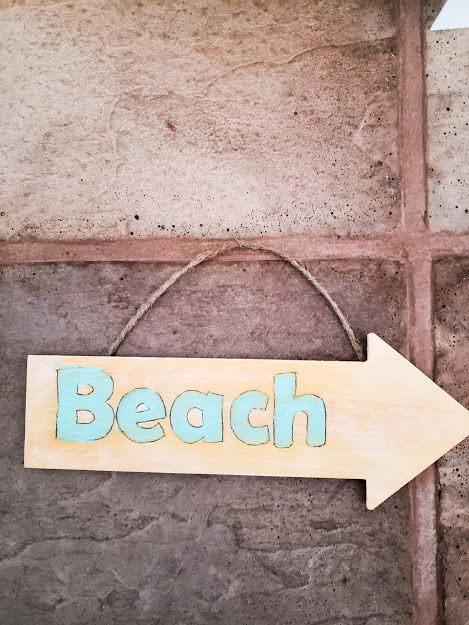
Well…here it is! My cute sign all finished! Isn’t it great?!
I hope you decide to make your own diy wood beach sign on a budget.
If you do, please comment and send me a picture! I would LOVE to see it!
–Danielle
Hi, I’m Danielle!
I am the designer, writer and diy’er behind this blog. I enjoy decorating my home for practically nothing by doing most of the work myself, finding new and imaginative ways to make it beautiful and by watching for killer sales. I find humor almost anywhere and can laugh at myself through it all. I have learned that most projects don’t go exactly as intended, but can be more beautiful than the original plan.
Re-Fabbed Boutique – Beautiful, quality clothing for women of all shapes and sizes!!
We use cookies to ensure that we give you the best experience on our website. If you continue to use this site we will assume that you are happy with it.
You can revoke your consent any time using the Revoke consent button.