I was on Pinterest when I came across this idea to build storage benches in the corner of this little nook. GENIUS!!!
So, I drew up a plan with the dimensions that would fit the corner of the room, figured out a materials list and off to Lowe’s I went. I think I was actually skipping! 😀
Building the banquette seating was part of our Breakfast Nook Remodel. Take a look at the steps I took to remodel the Nook.
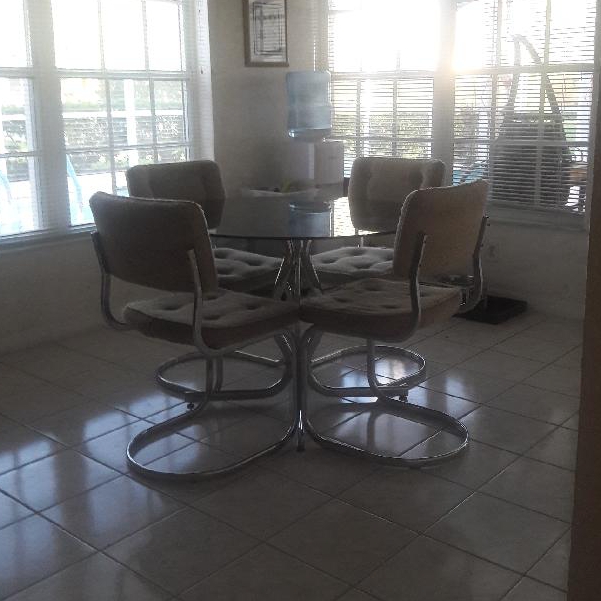
From this…
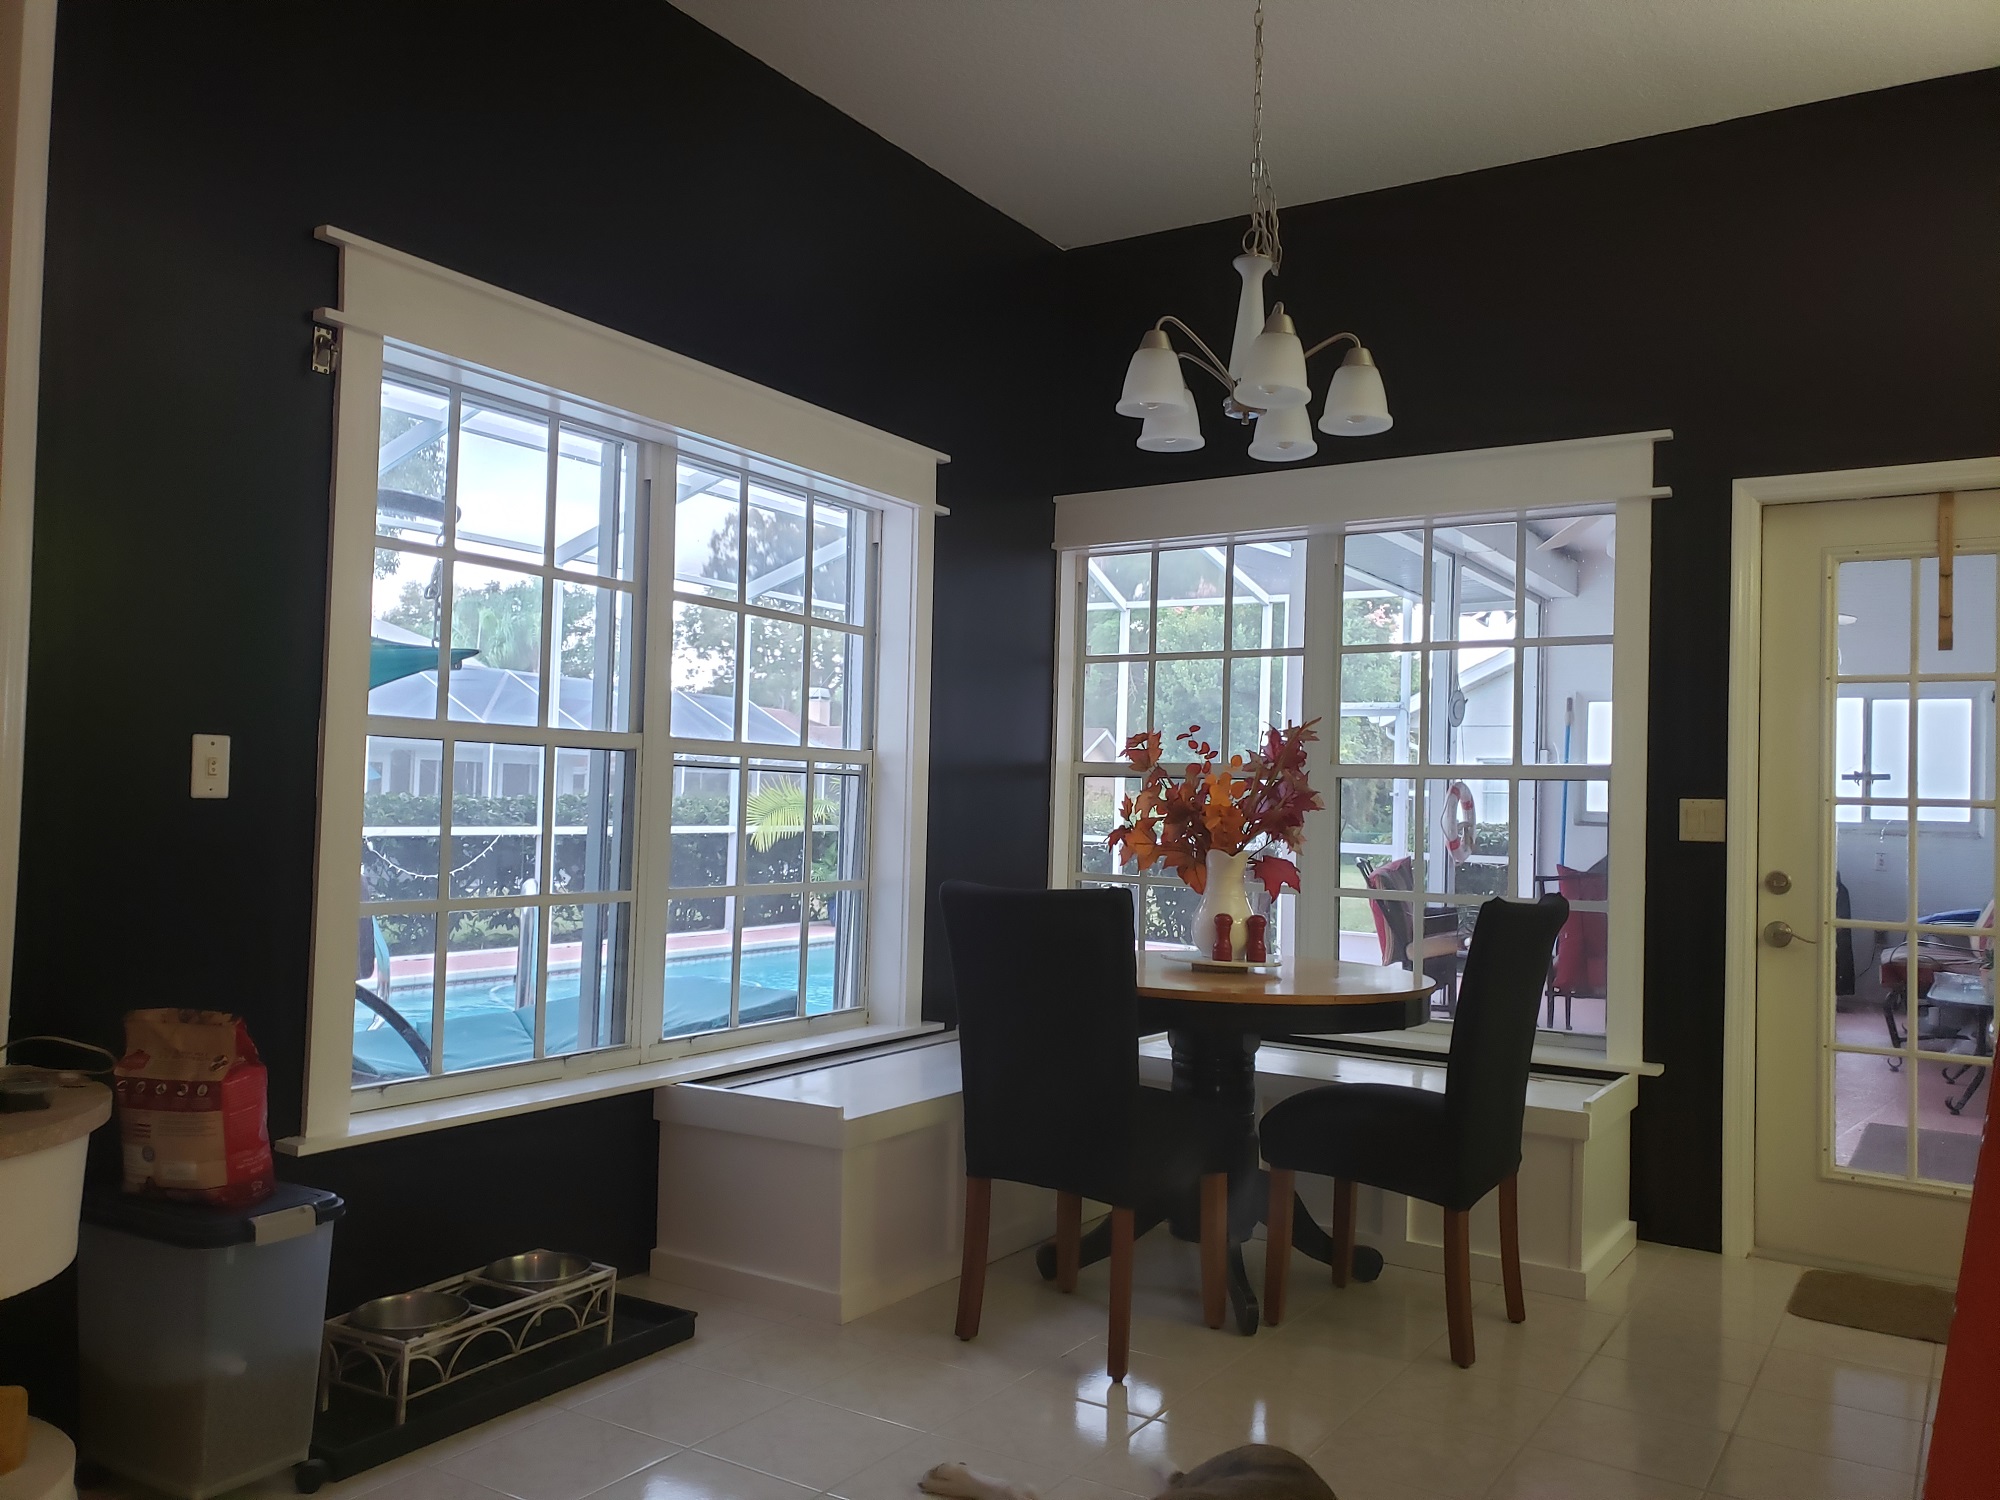
To this…
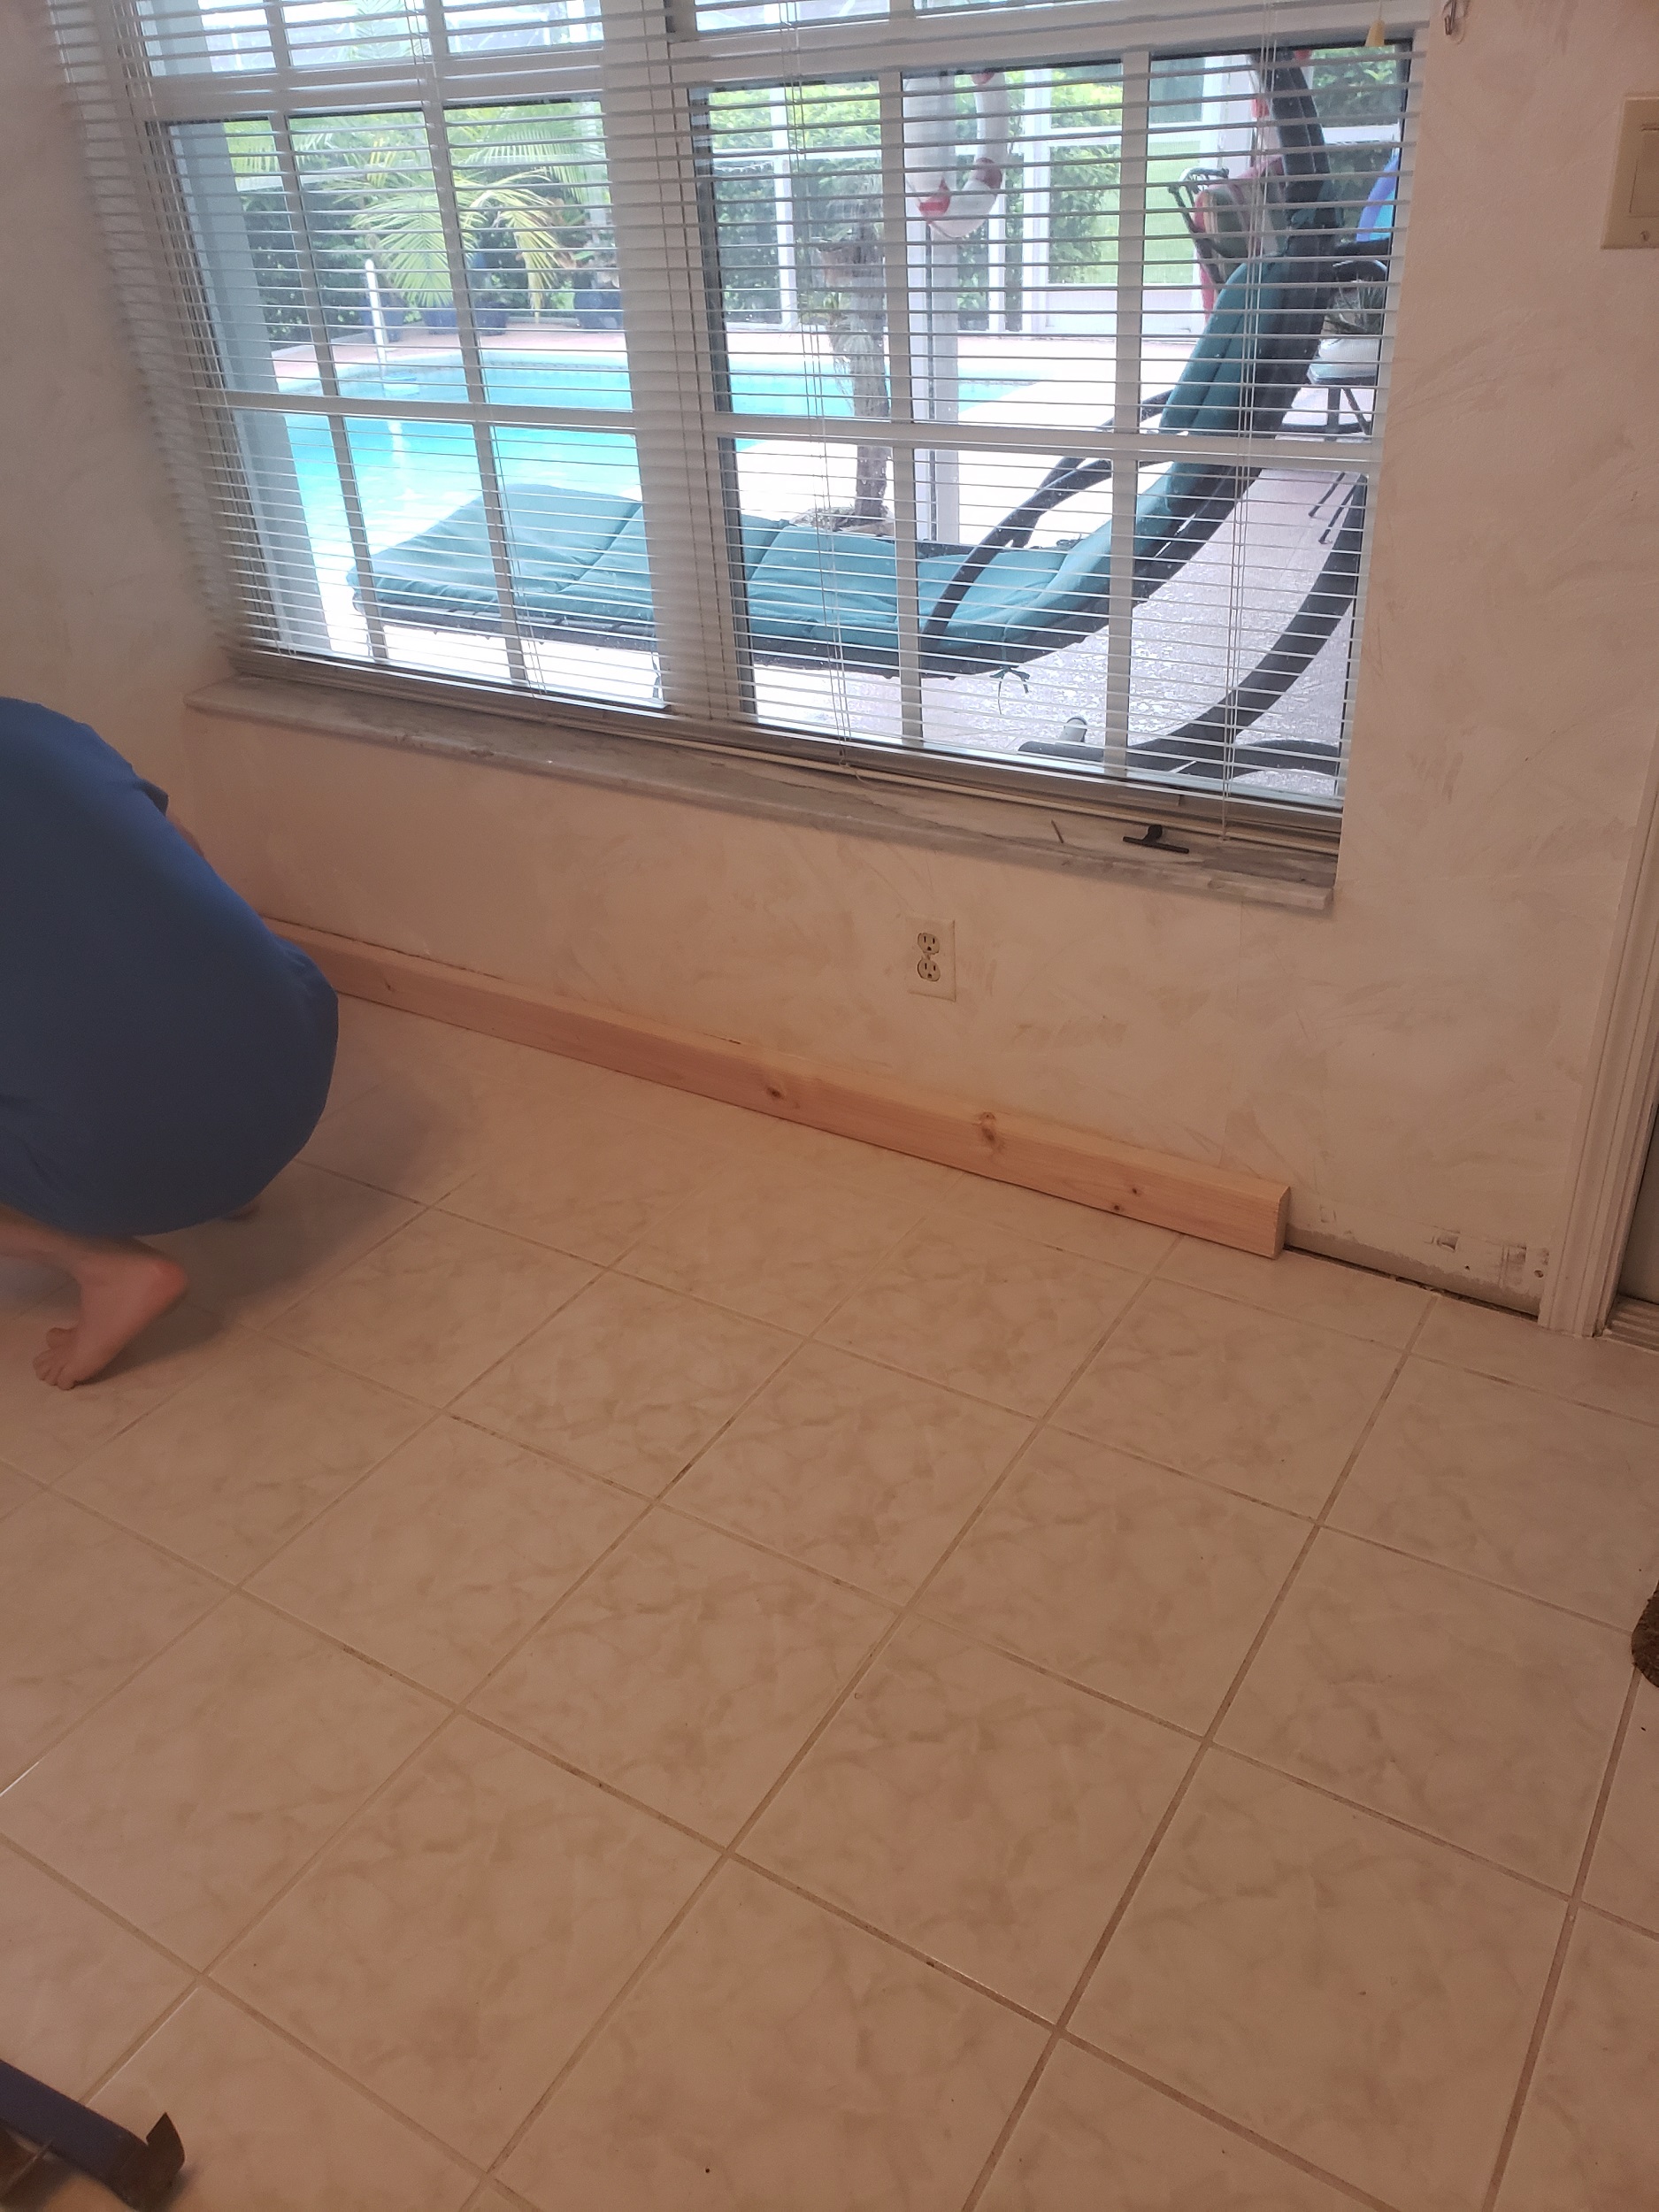
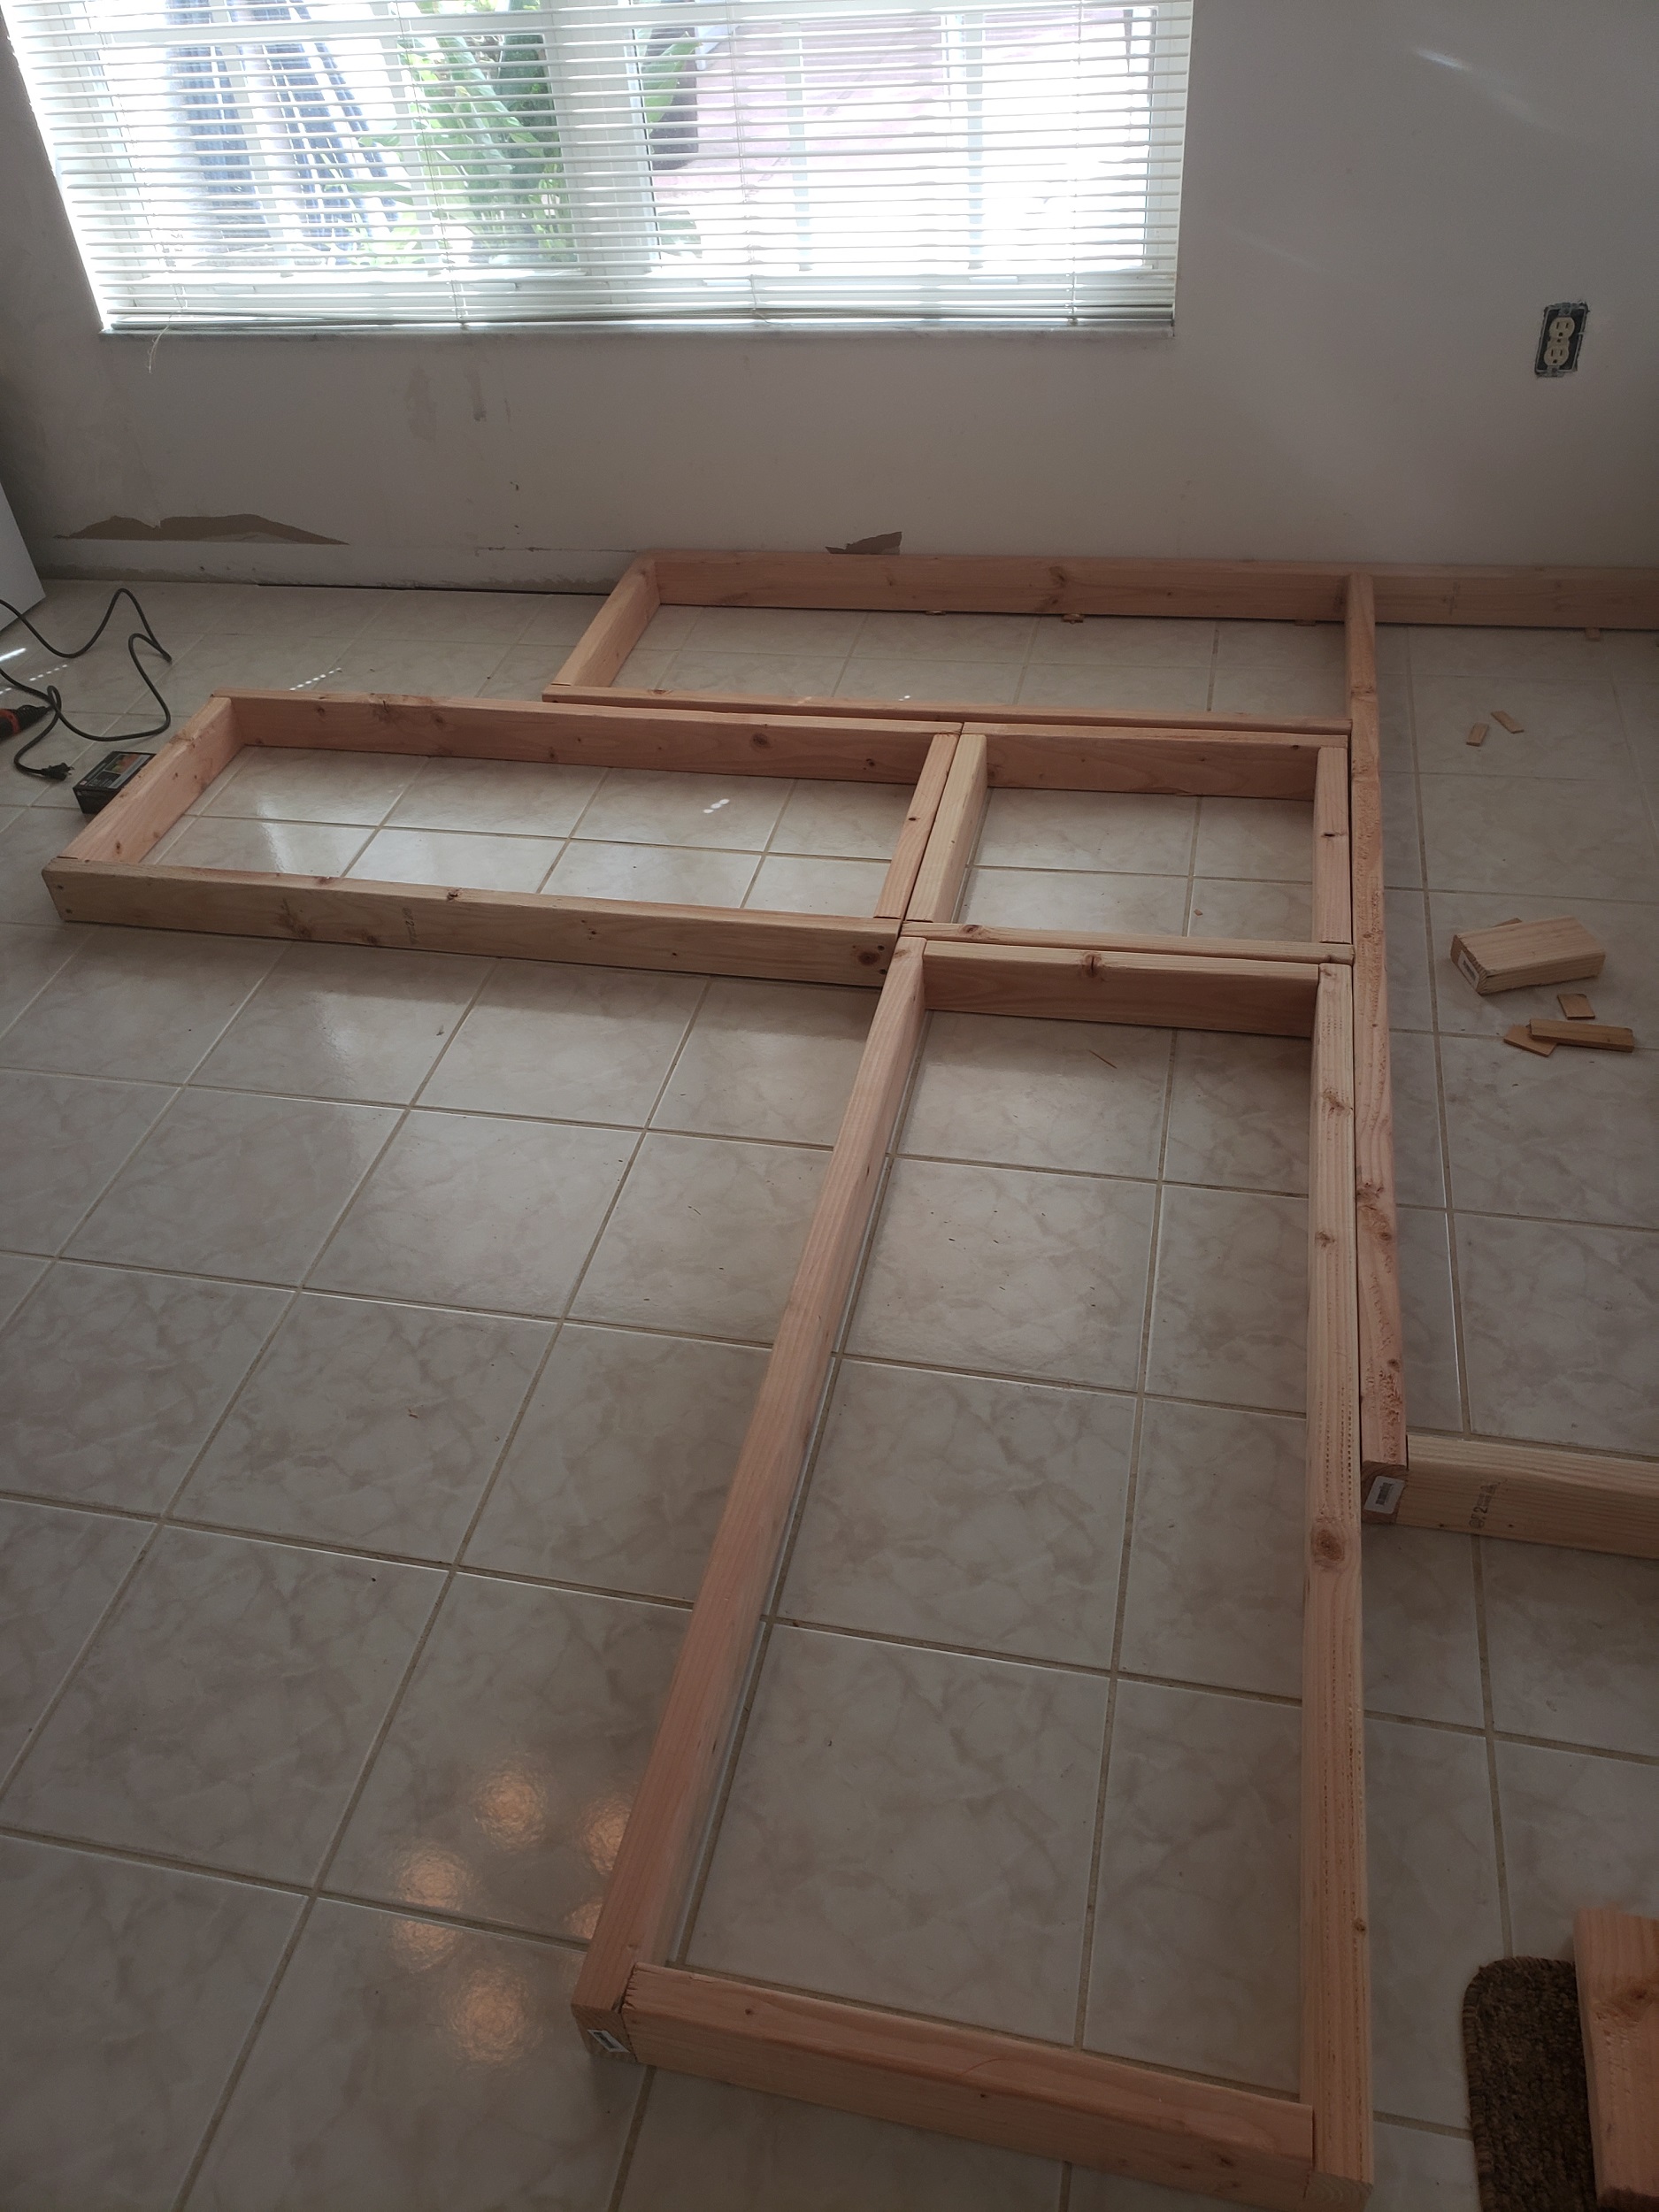
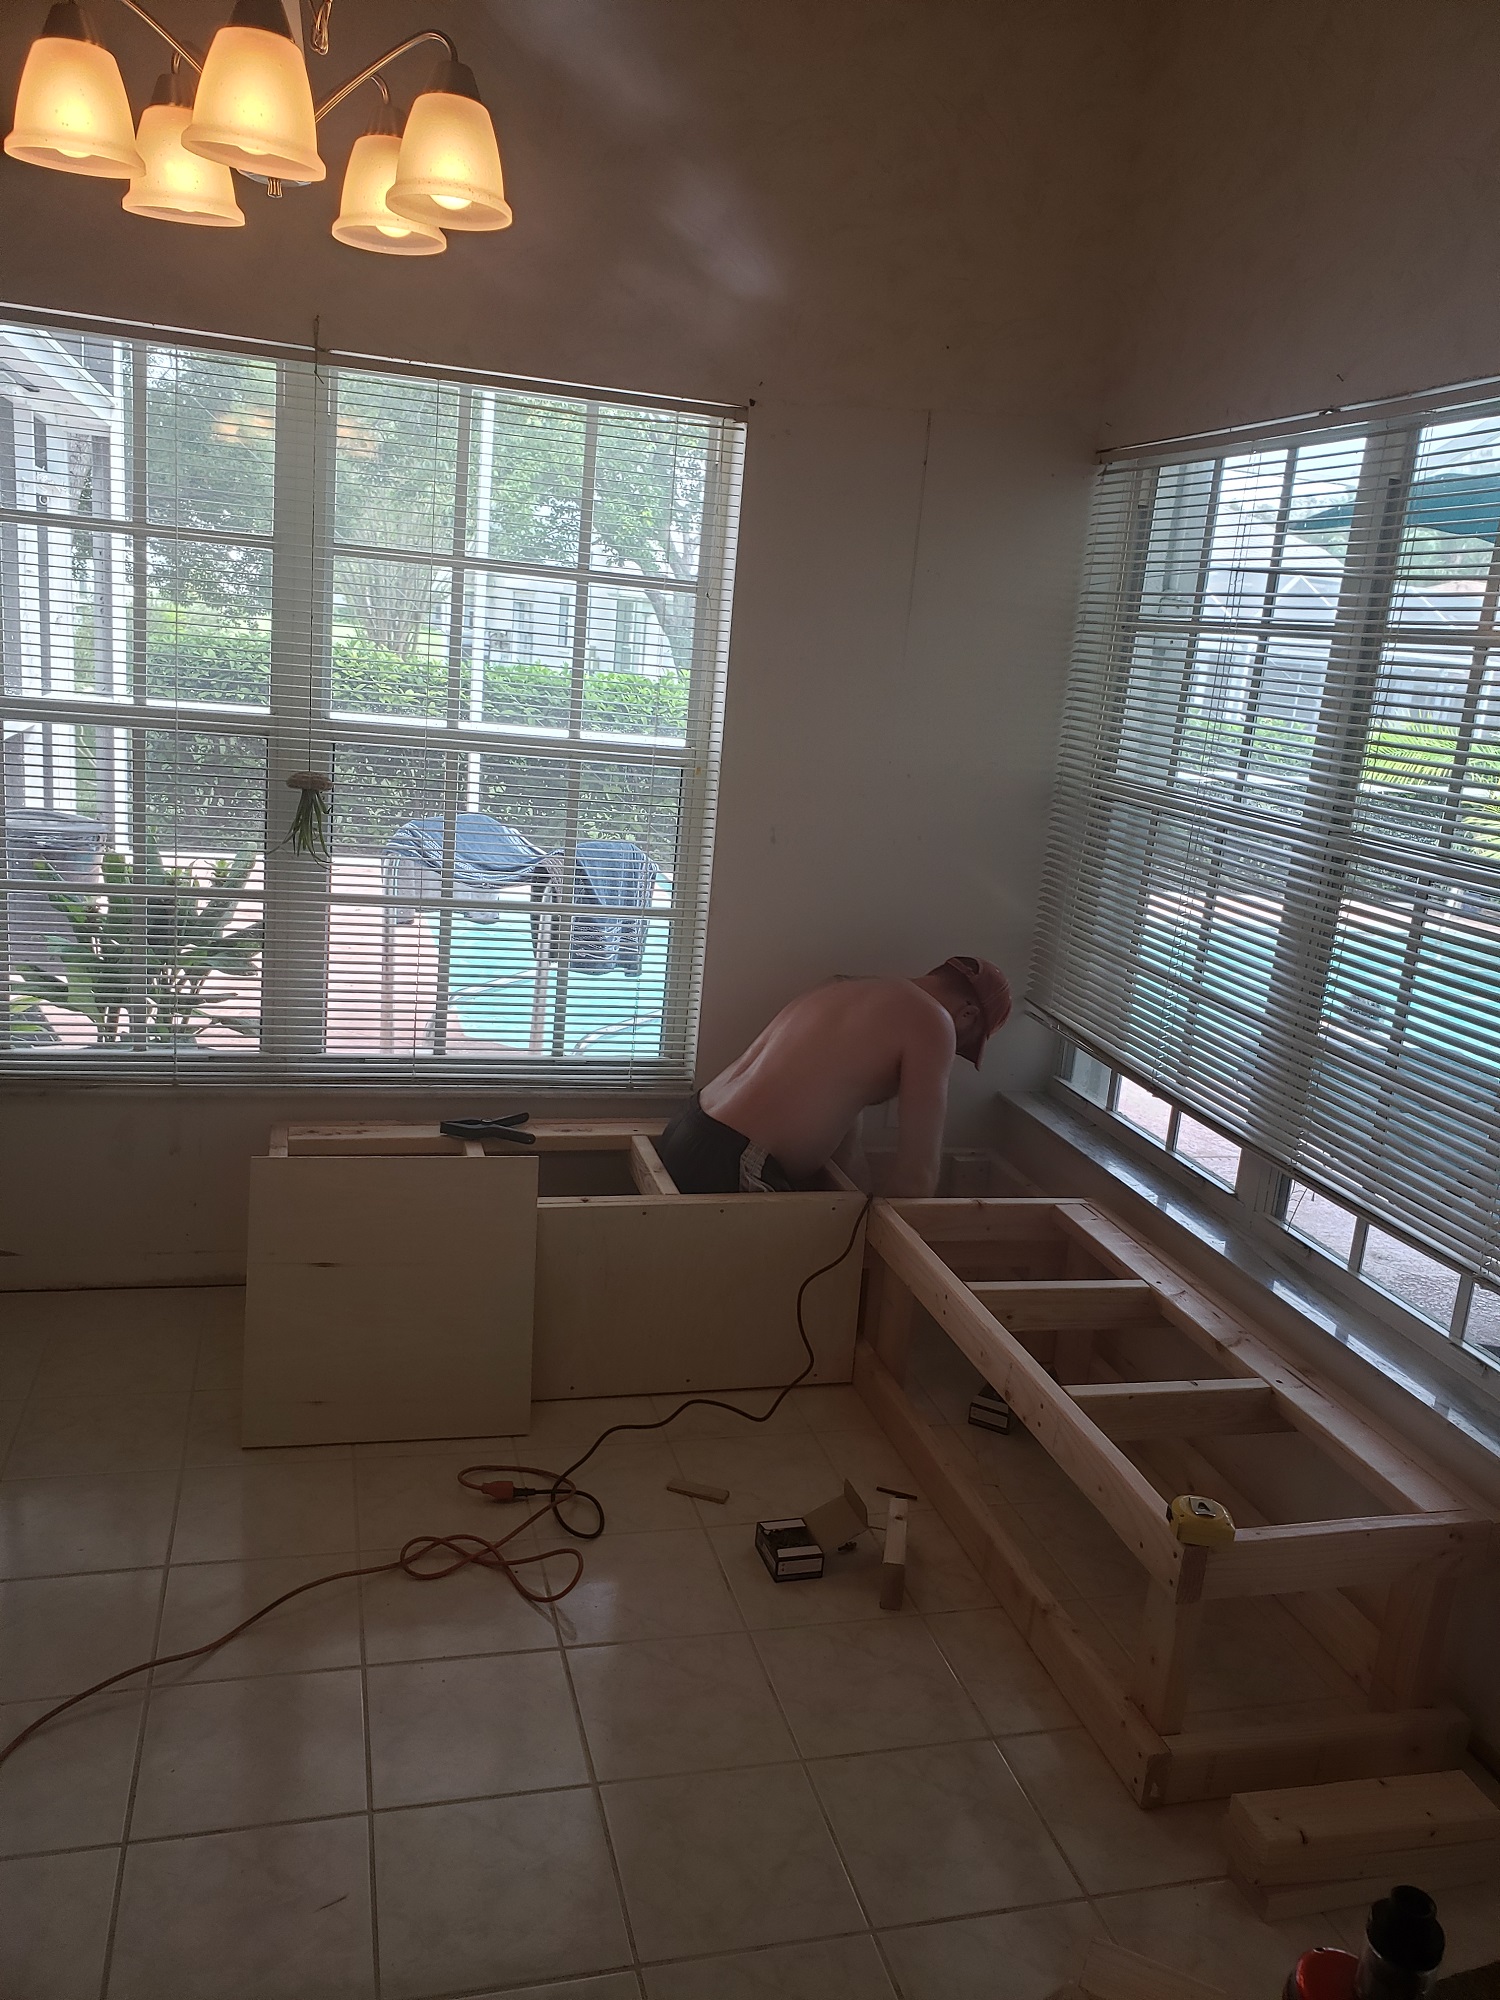
We started off by removing the baseboards and placing the first of many 2×4’s in place. He made me promise not to get him in these shots, but hey I think my boy is a handsome dude! Ha!
As you can see, I have not yet removed the lovely wallpaper. It’s in the plan…just further down the list. These two electrical outlets proved to be a bit of a challenge. We decided to have the one on the right inside the storage bench. We were going to have to cut the bench down in the corner to accommodate the electrical socket on the left.
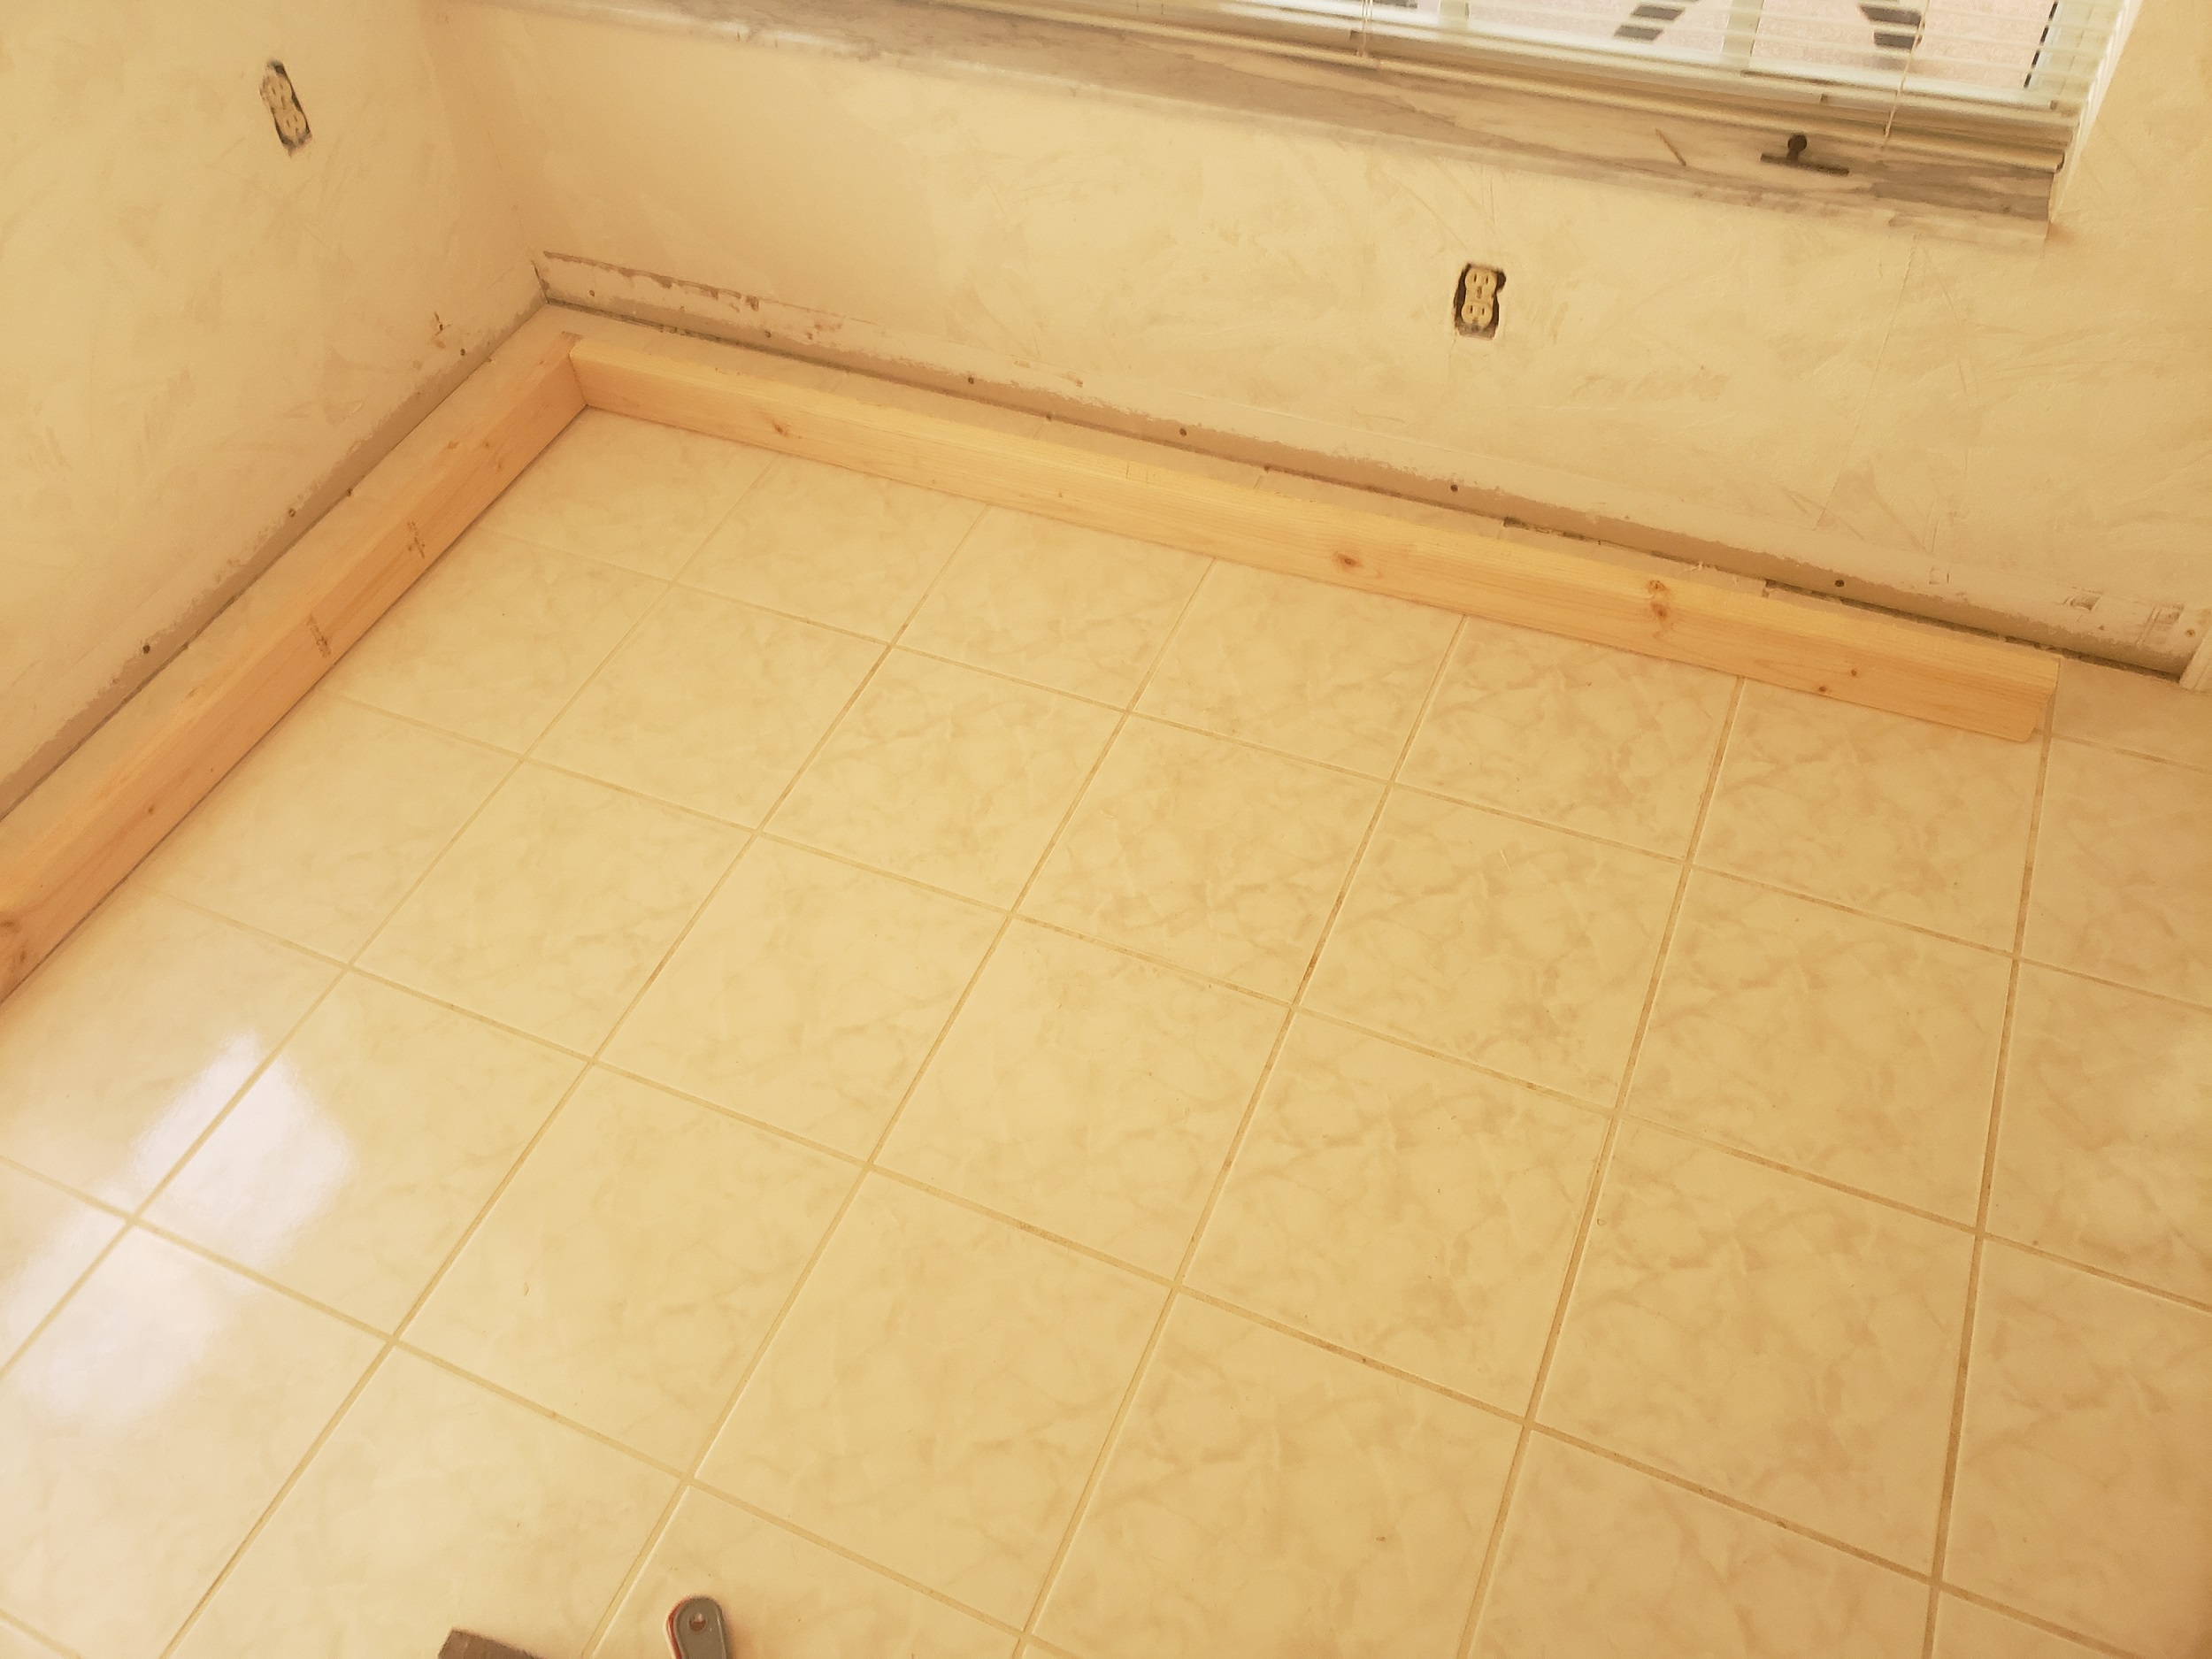
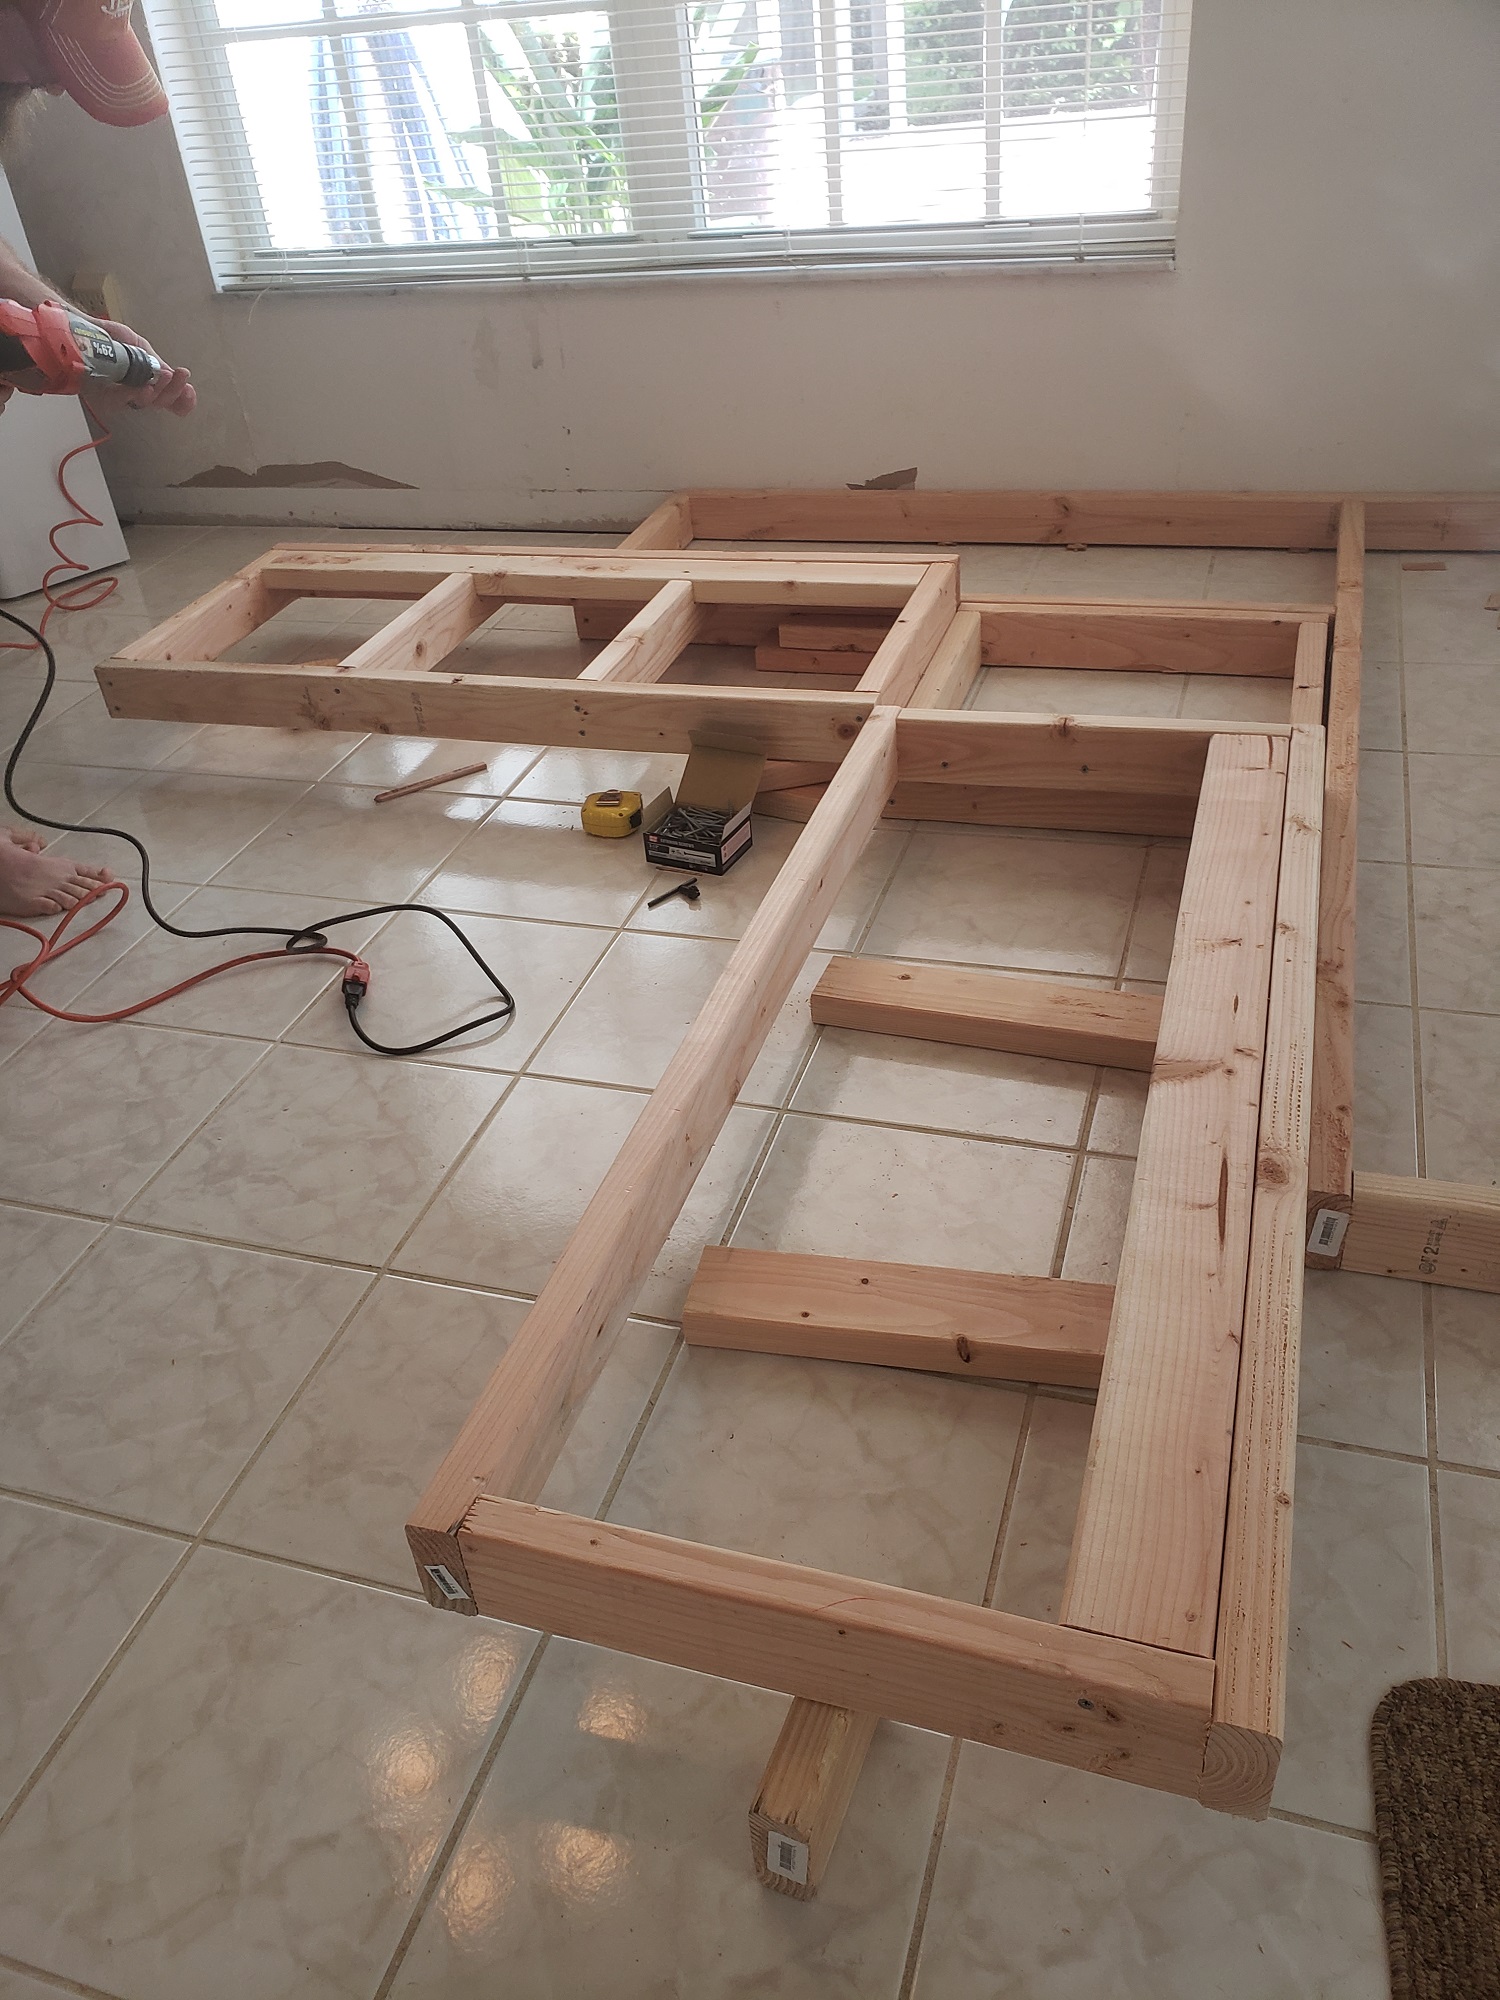
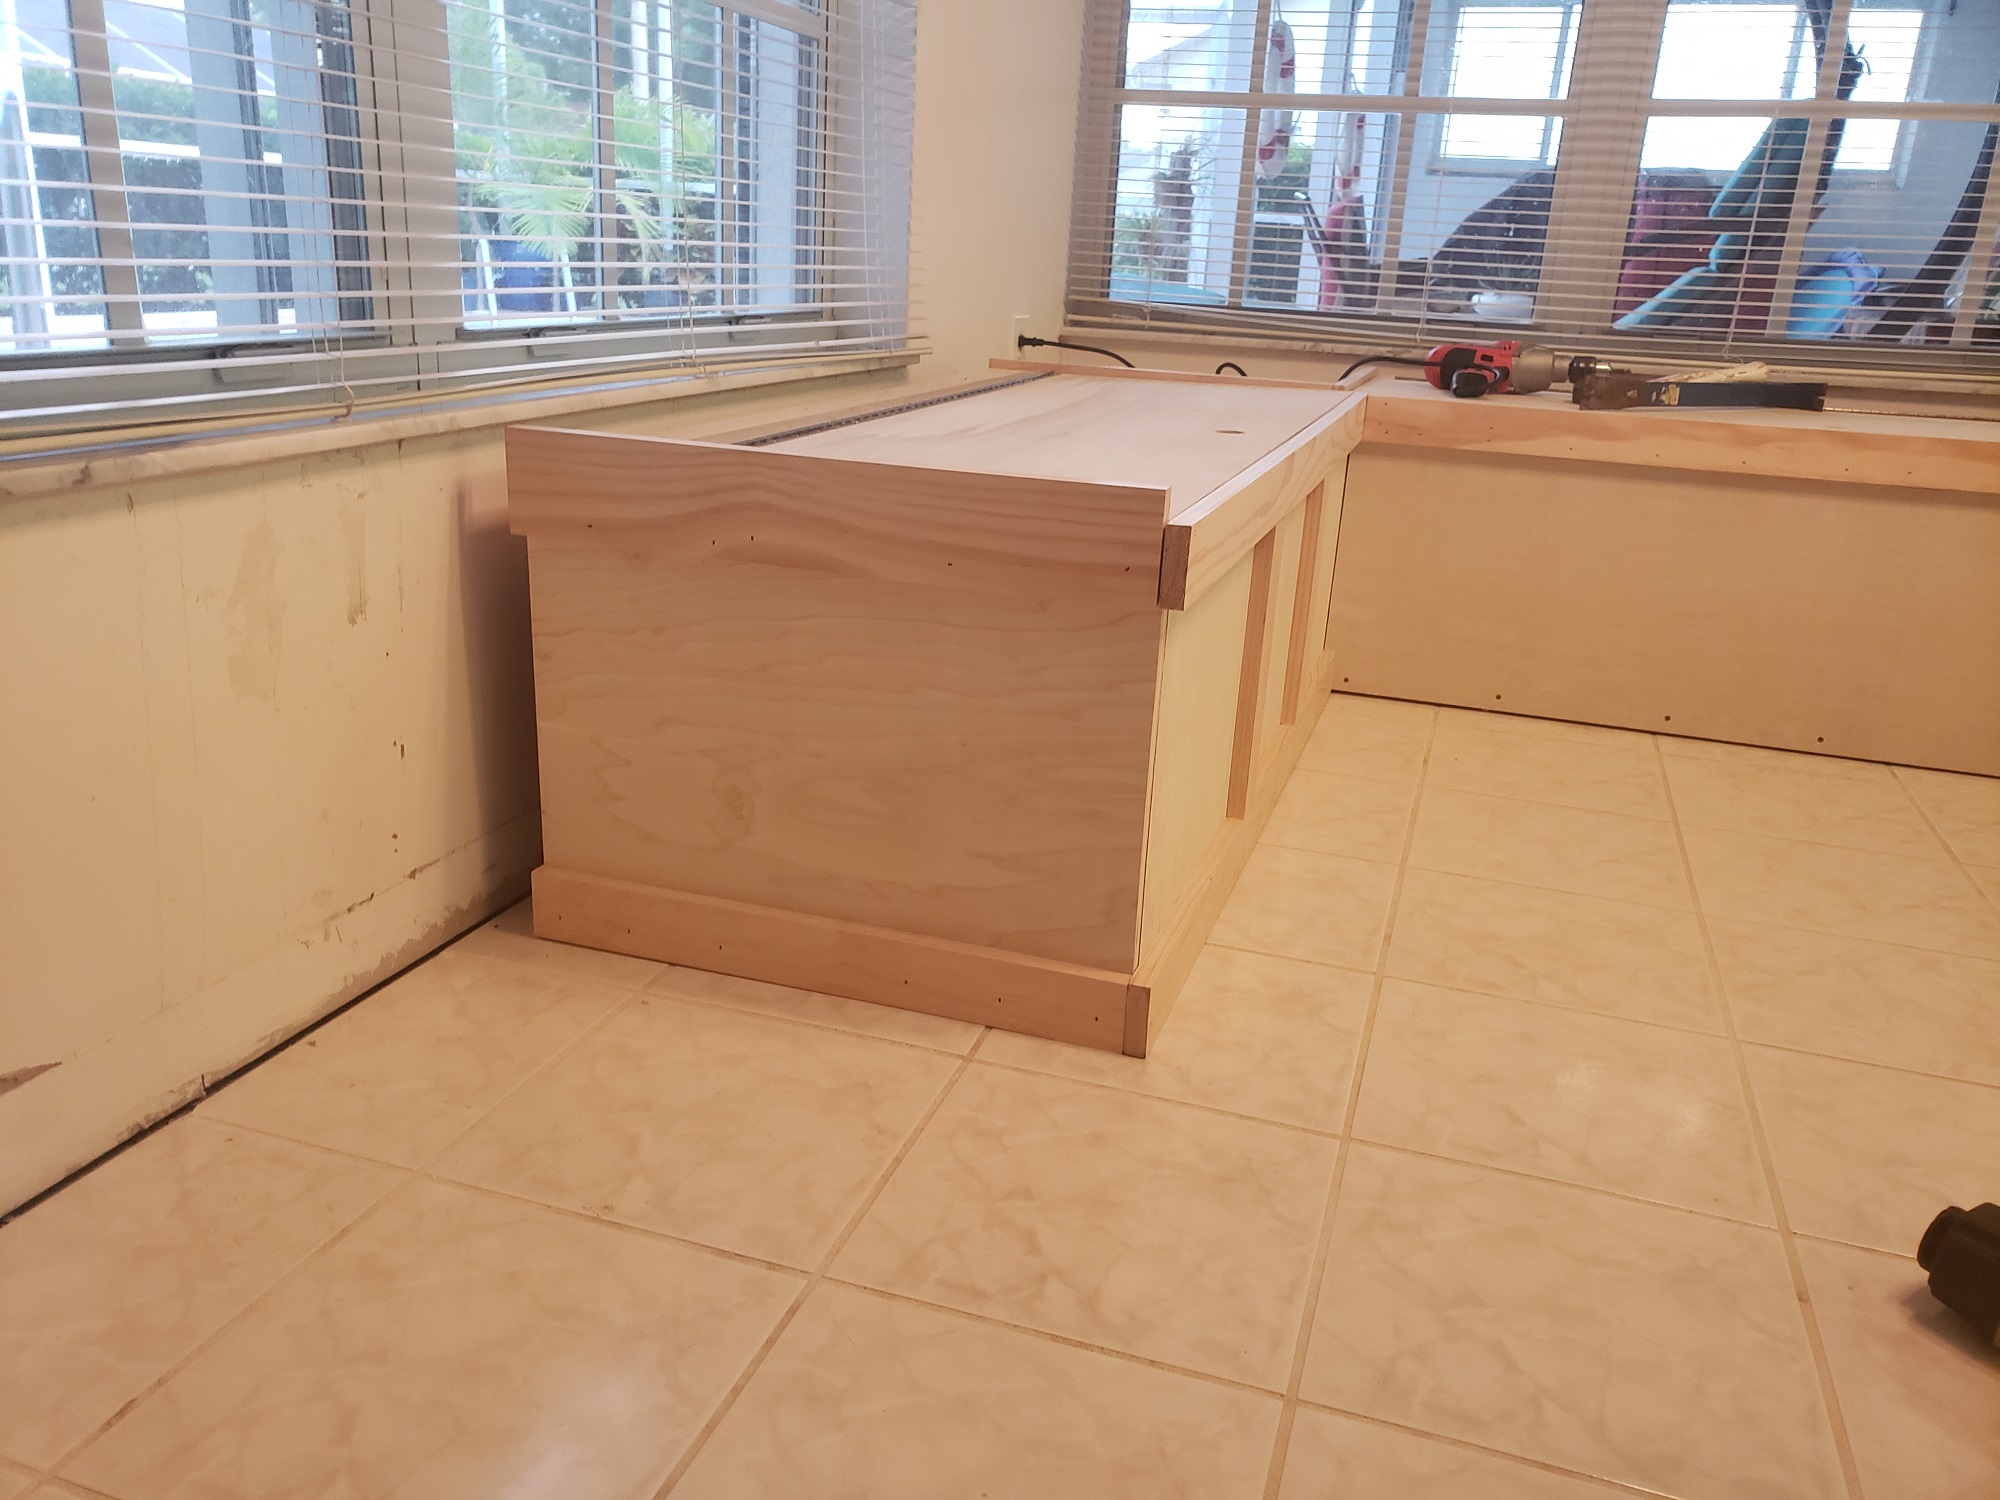
And so, the building begins…we made the base and the top out of 2×4’s with a stationary corner piece built into the top.
The pieces were laid out to make sure they fit perfectly. If there is anything I know, it’s that my son is a perfectionist! I have no IDEA where he gets that from! ;0)
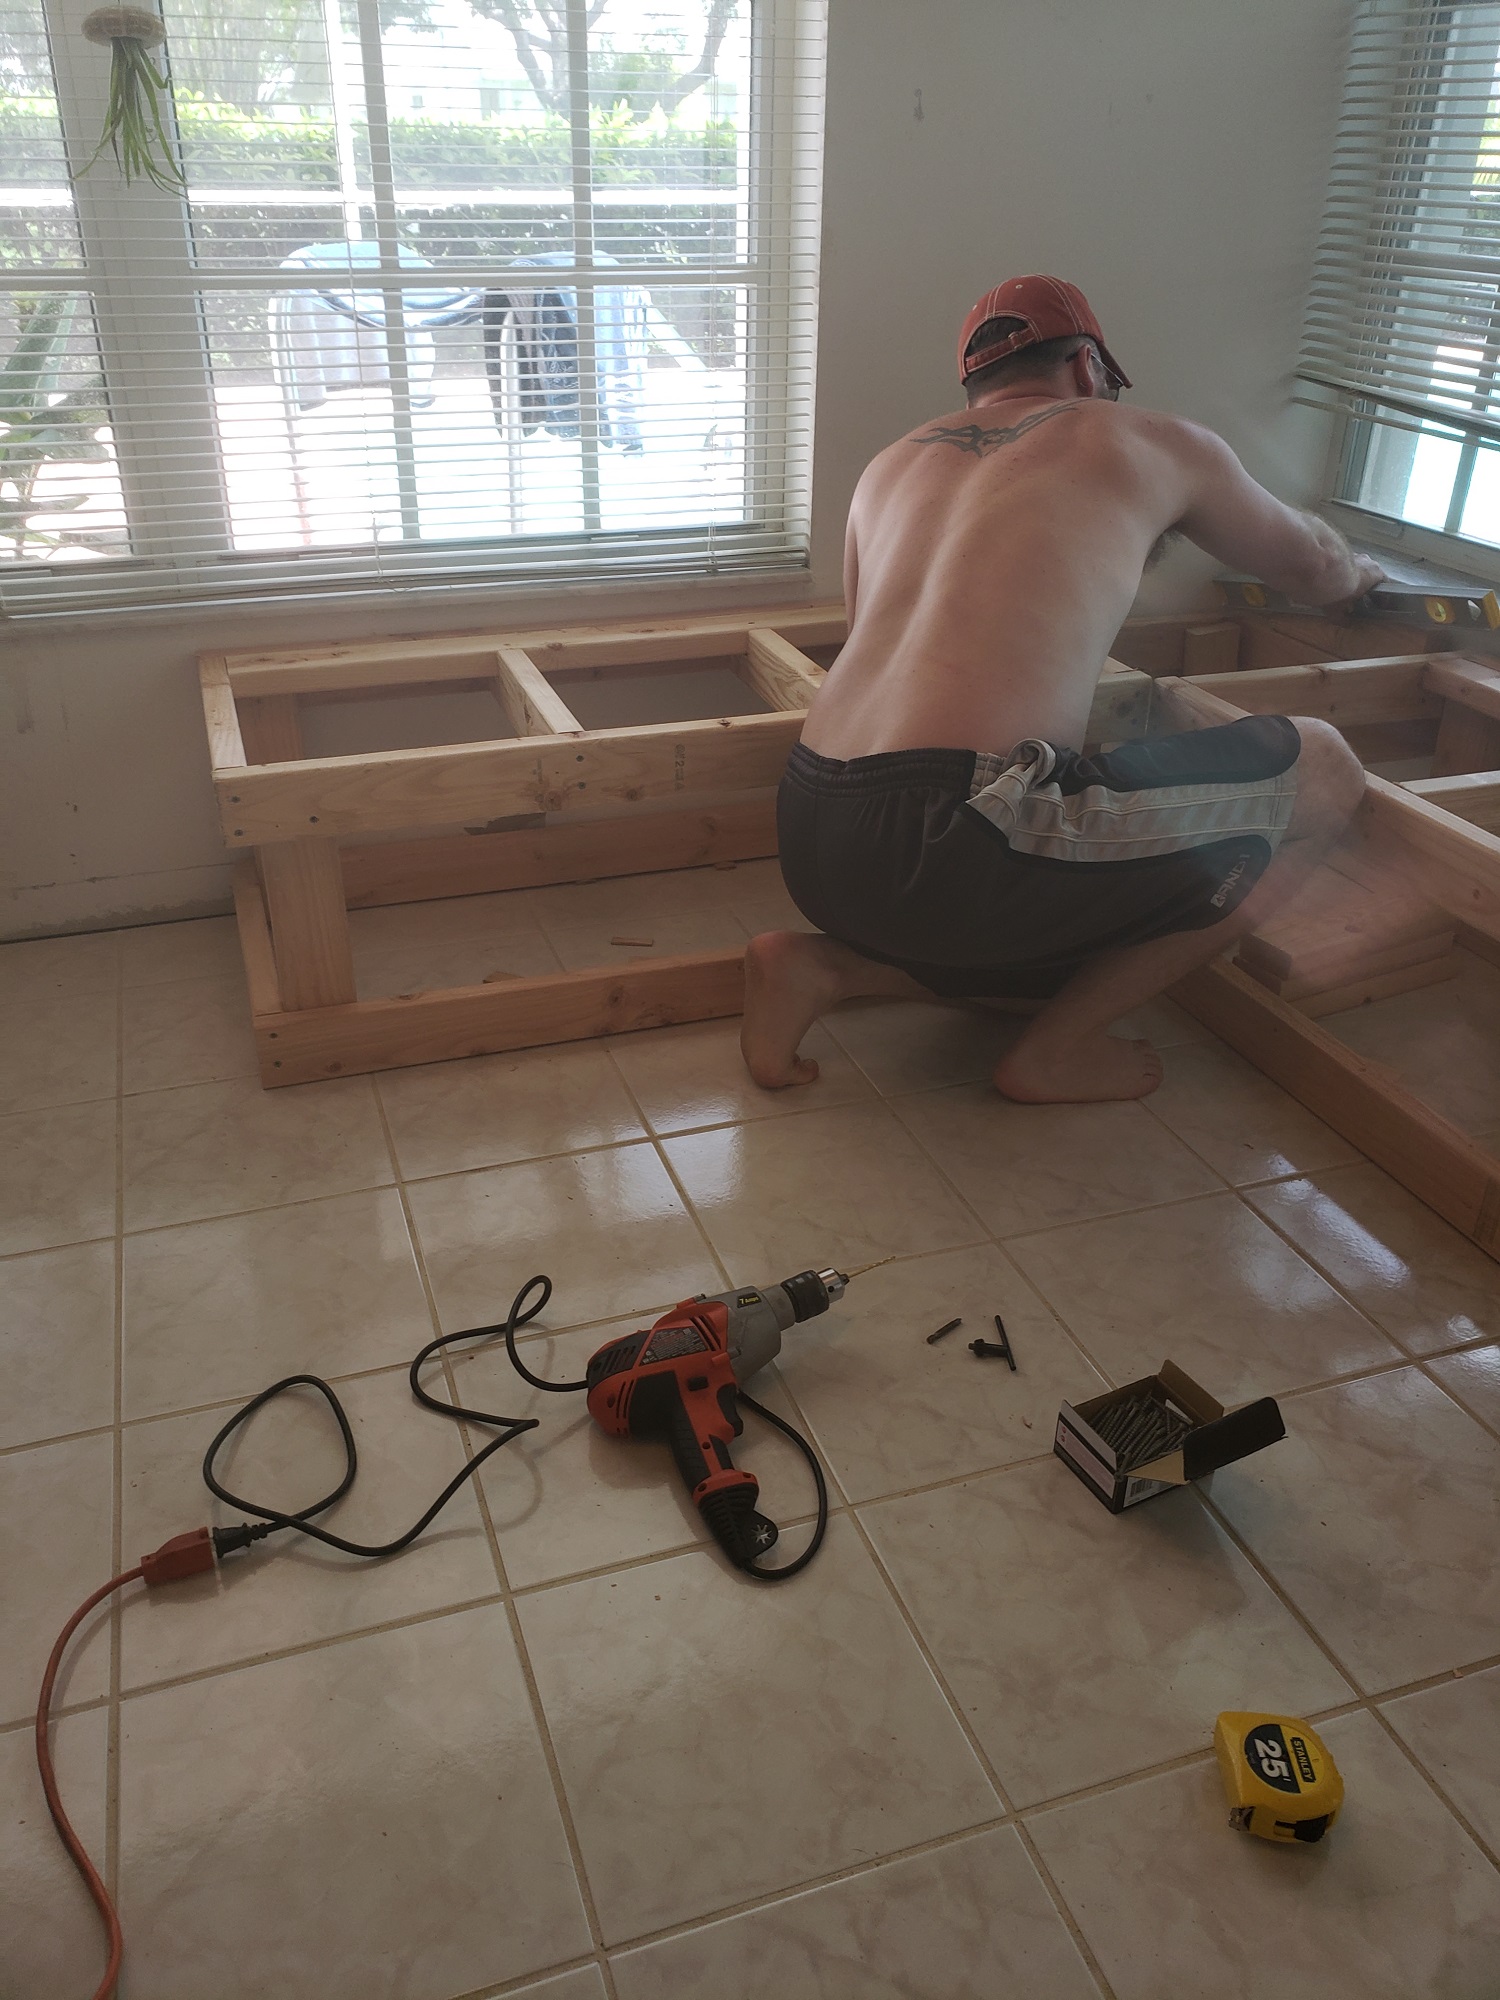
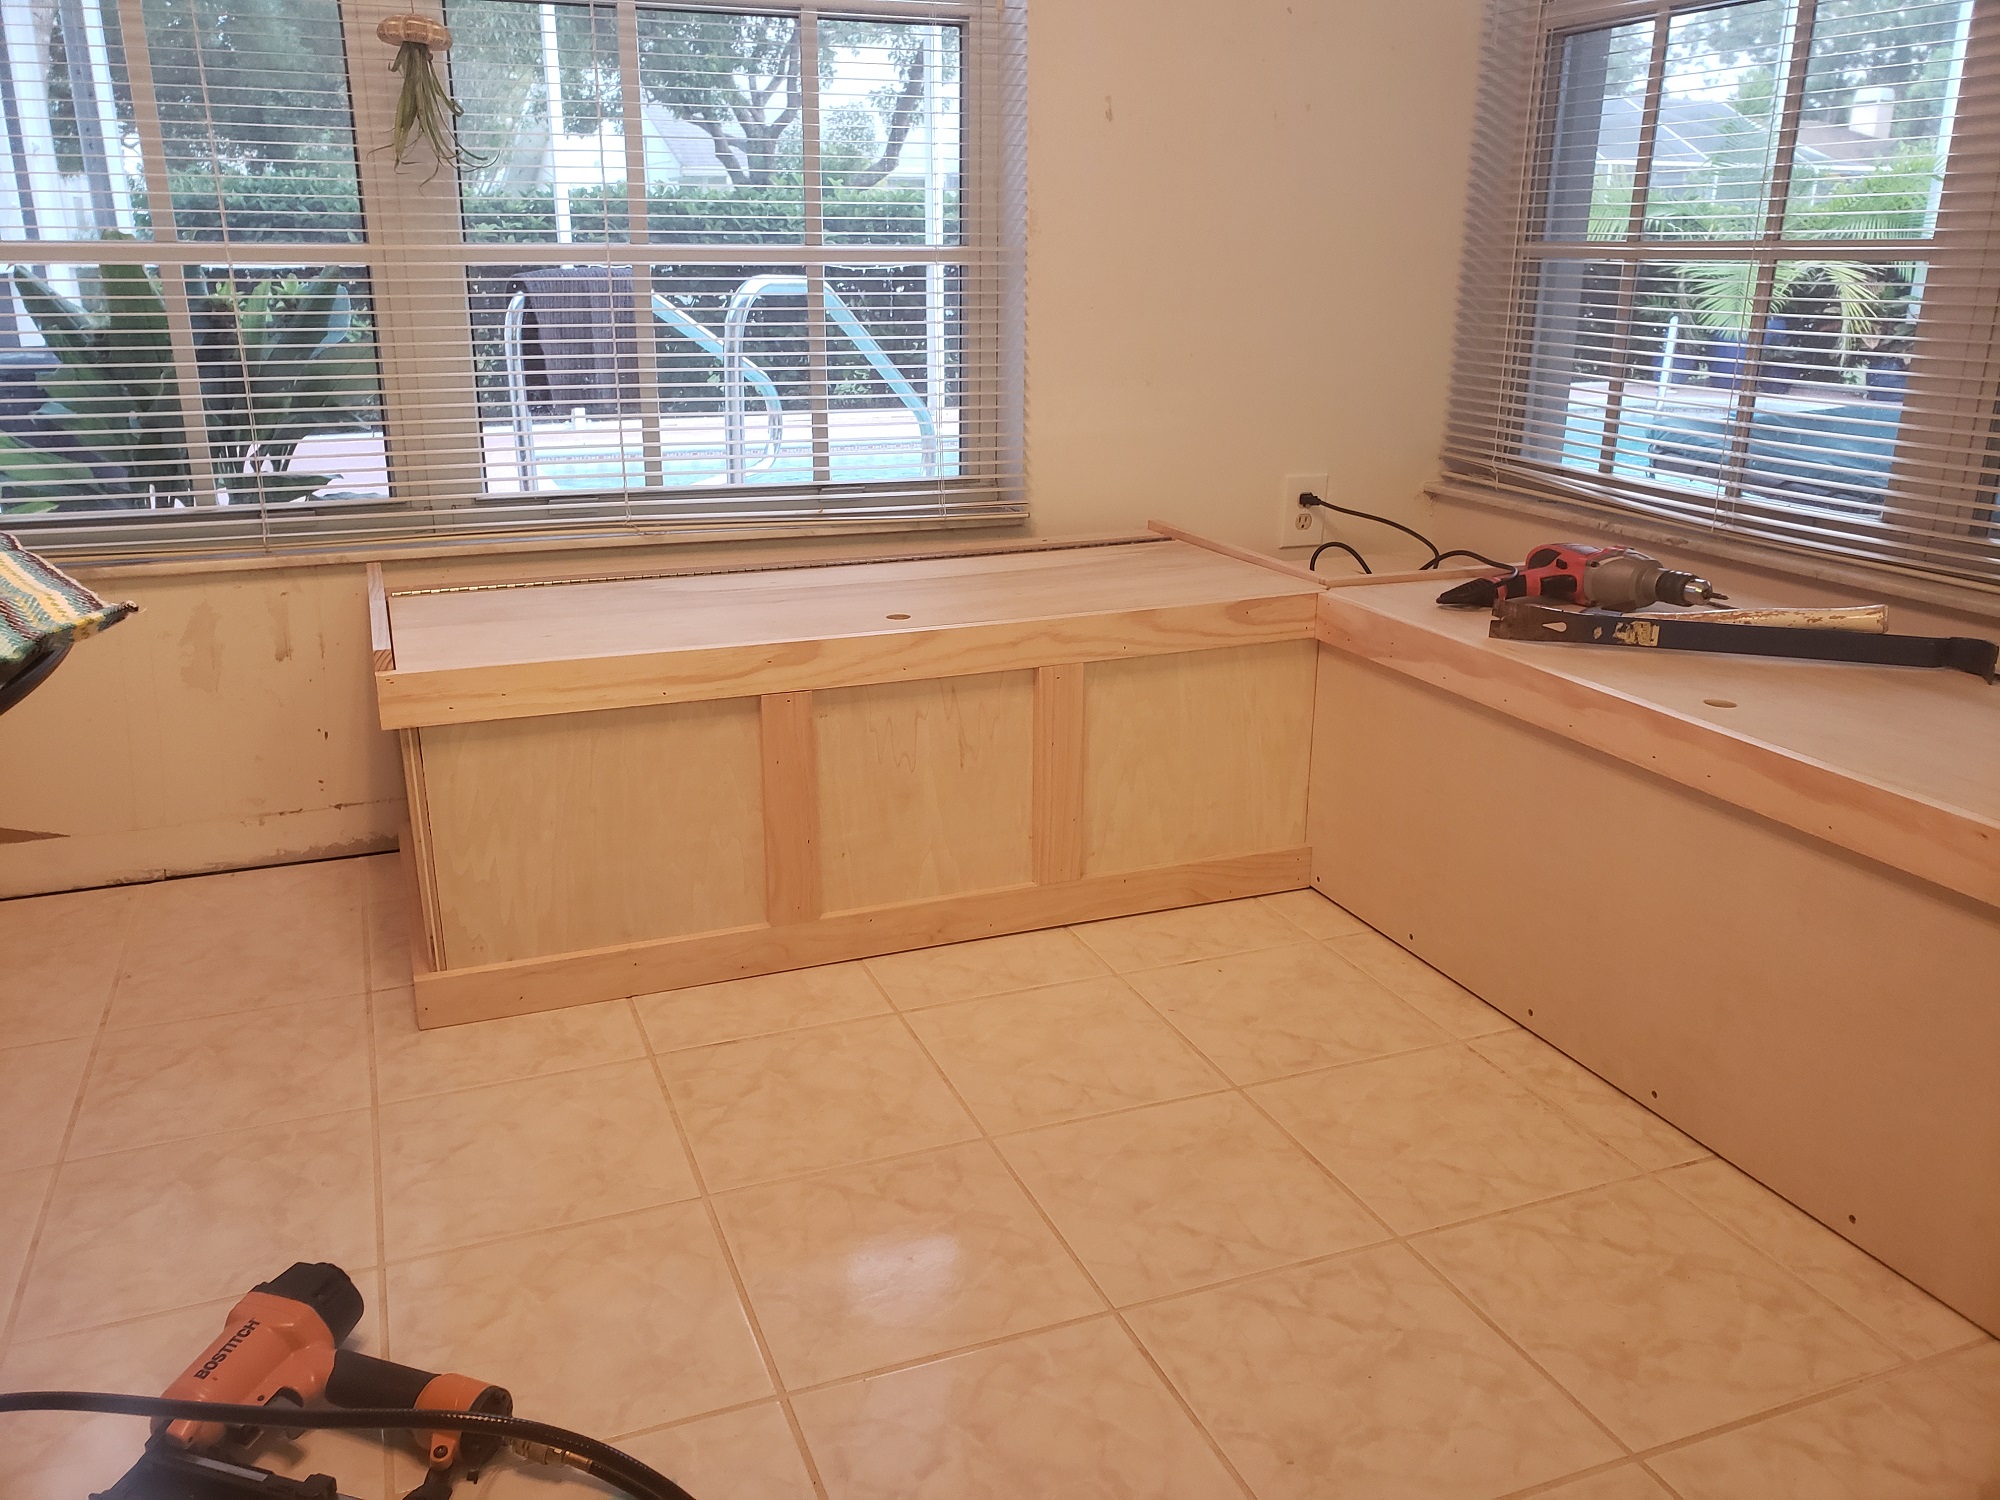
He built the structure mostly by himself (with me handing him items…scalpel…clamp…). I knew that my job would be to finish them out with trim and paint.
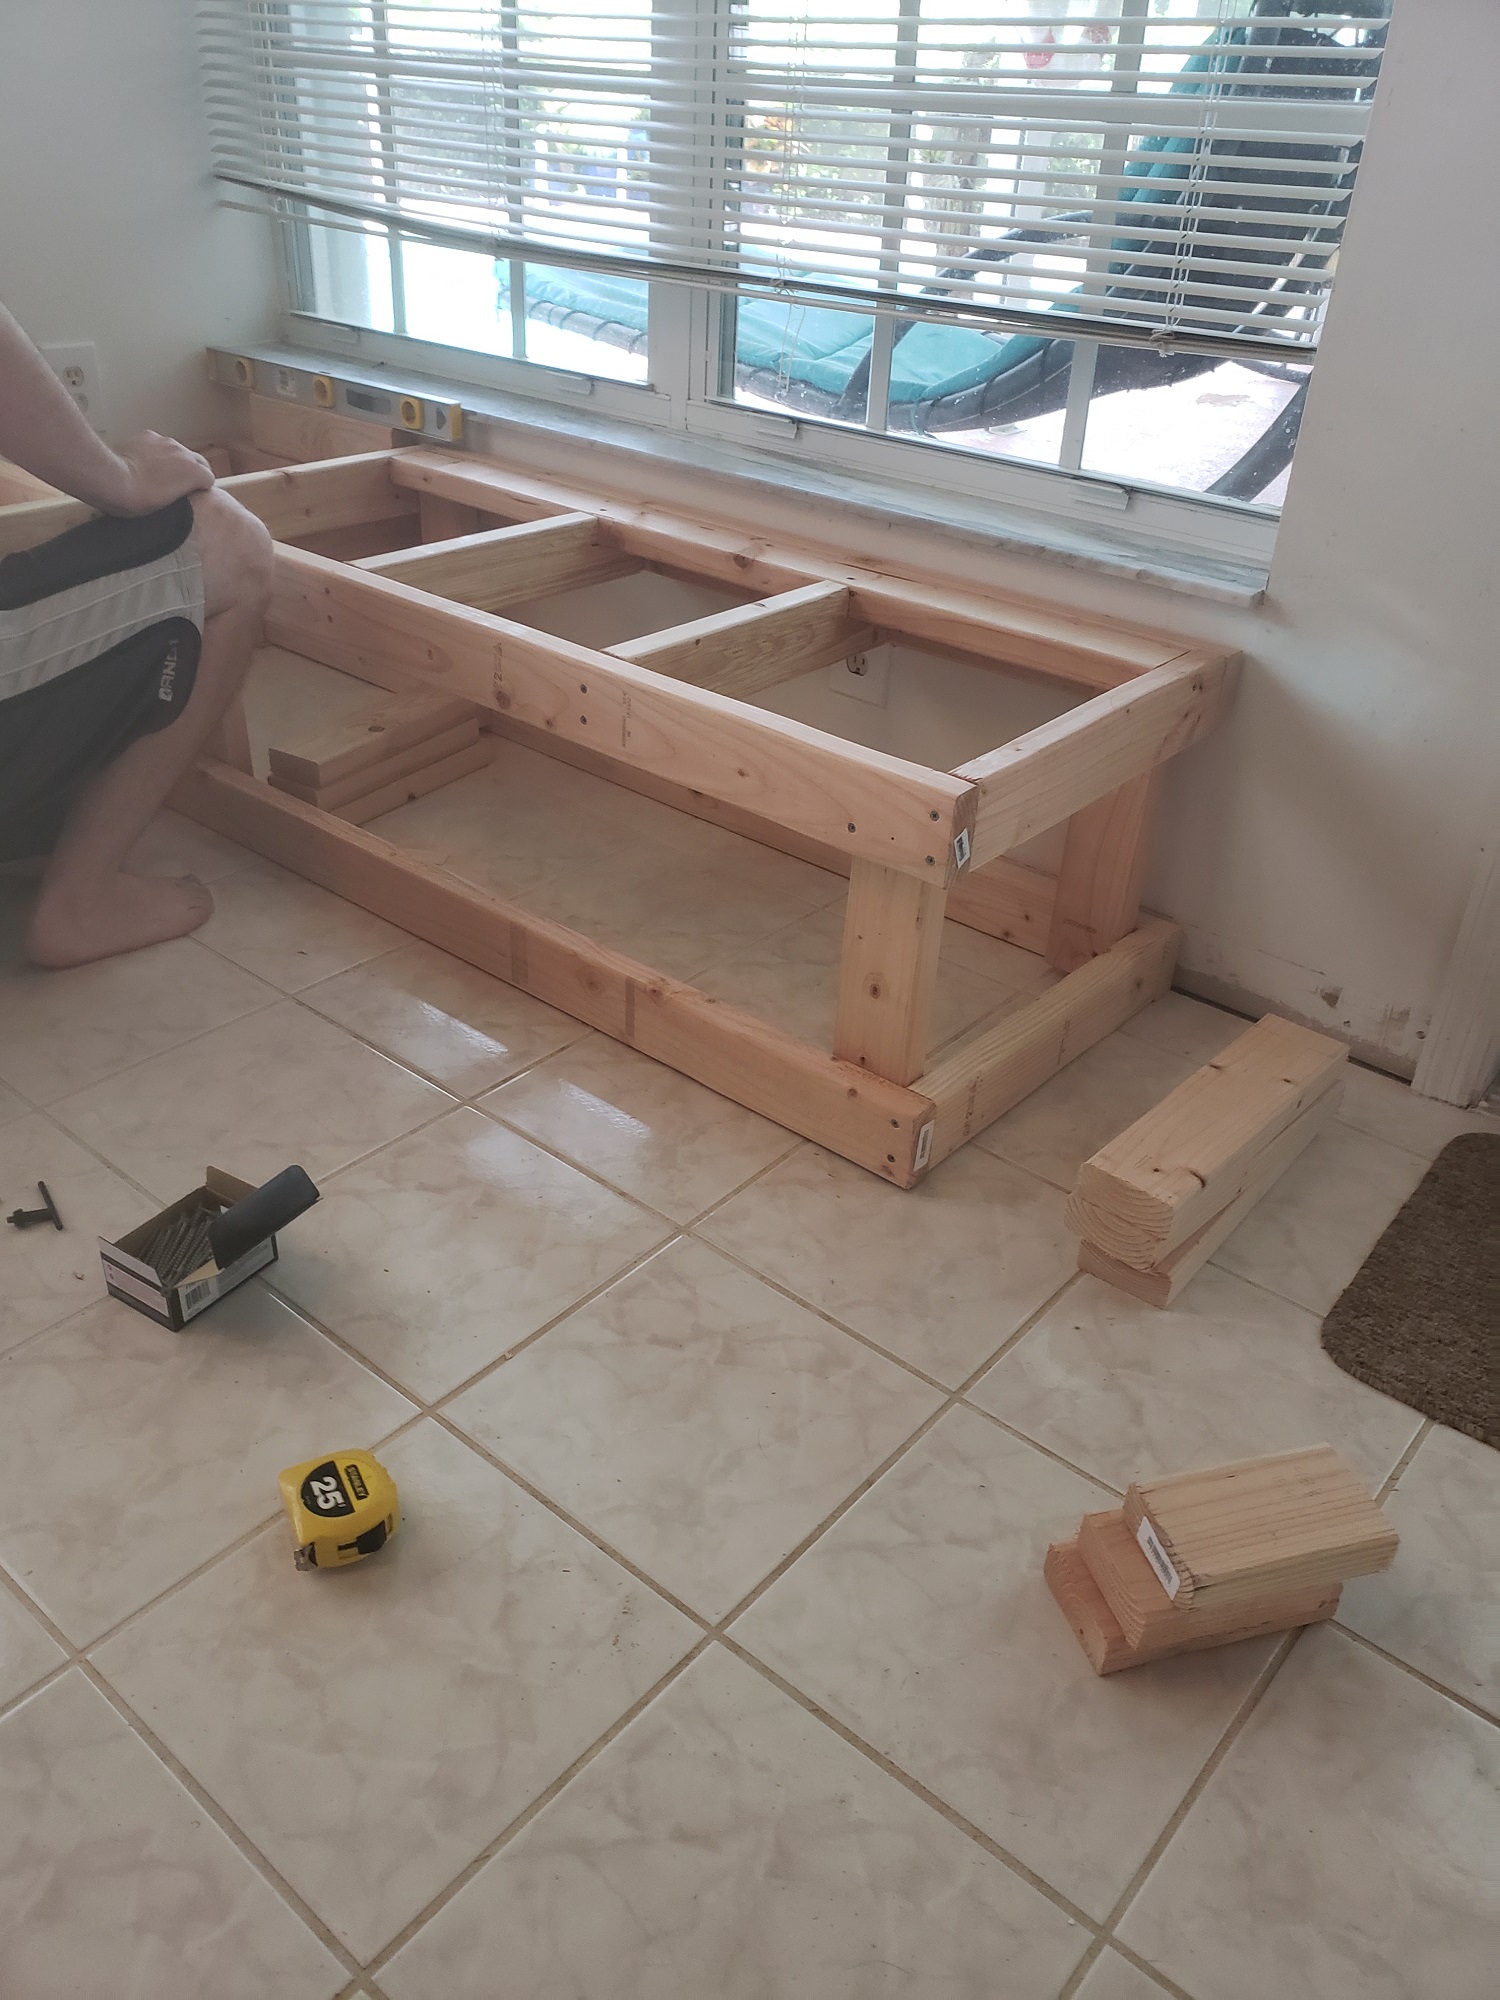
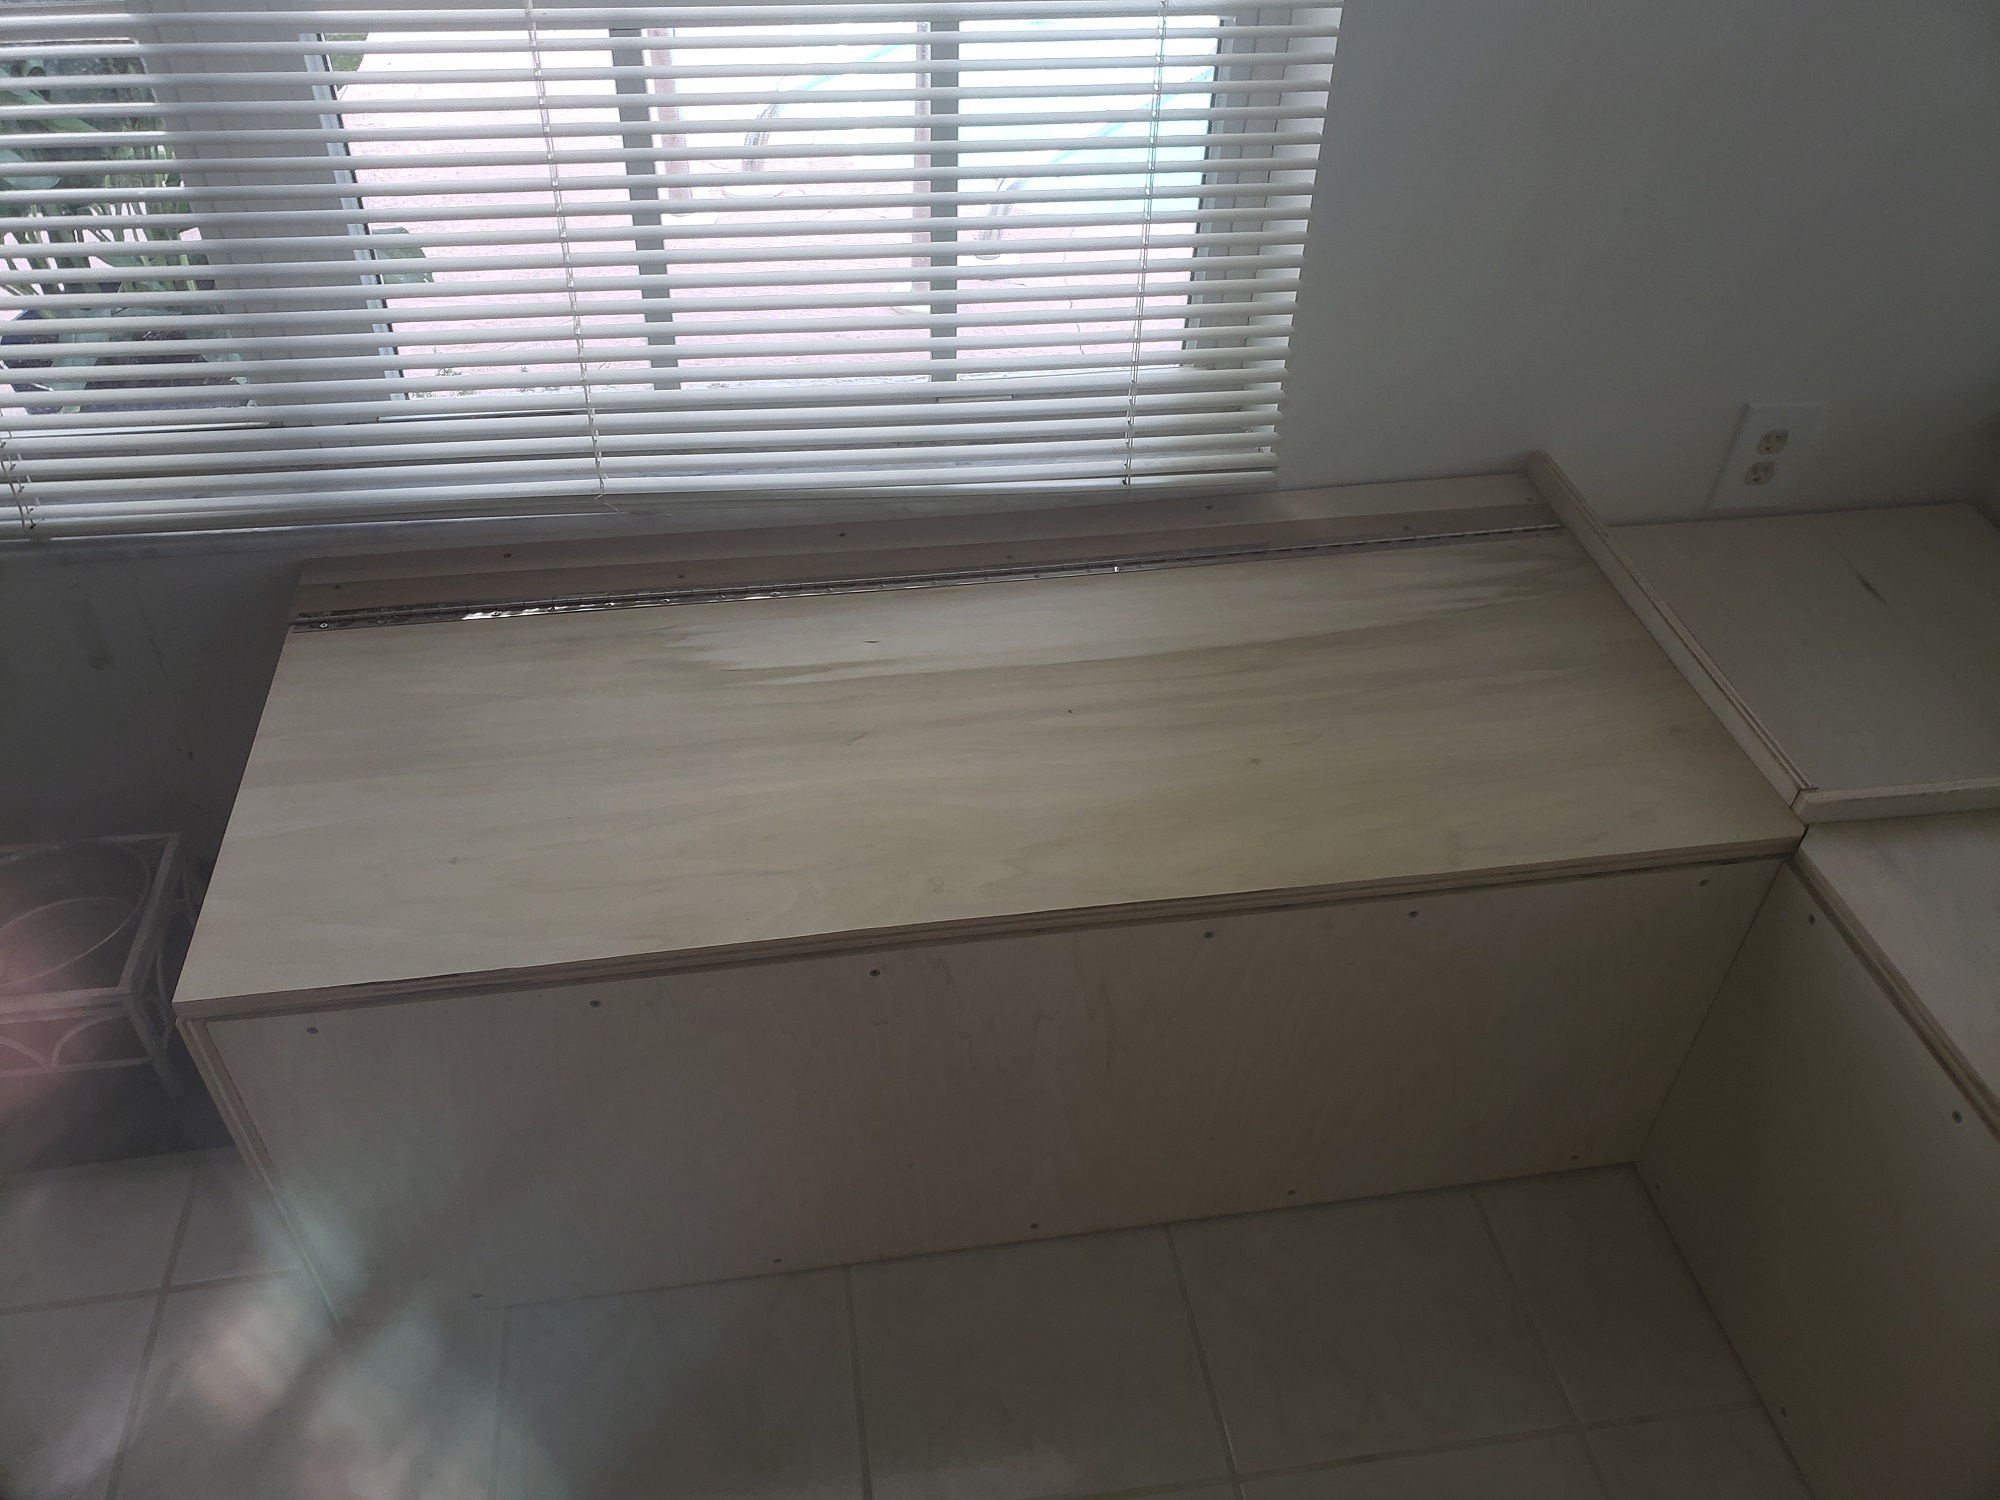
The sides and the lids are made out ¼ inch plywood that he cut with a circular saw. If you aren’t handy with a saw or if you don’t own one, the good people at Lowe’s will cut it for you. They will tell you that it won’t be exact, but I have never been disappointed yet!
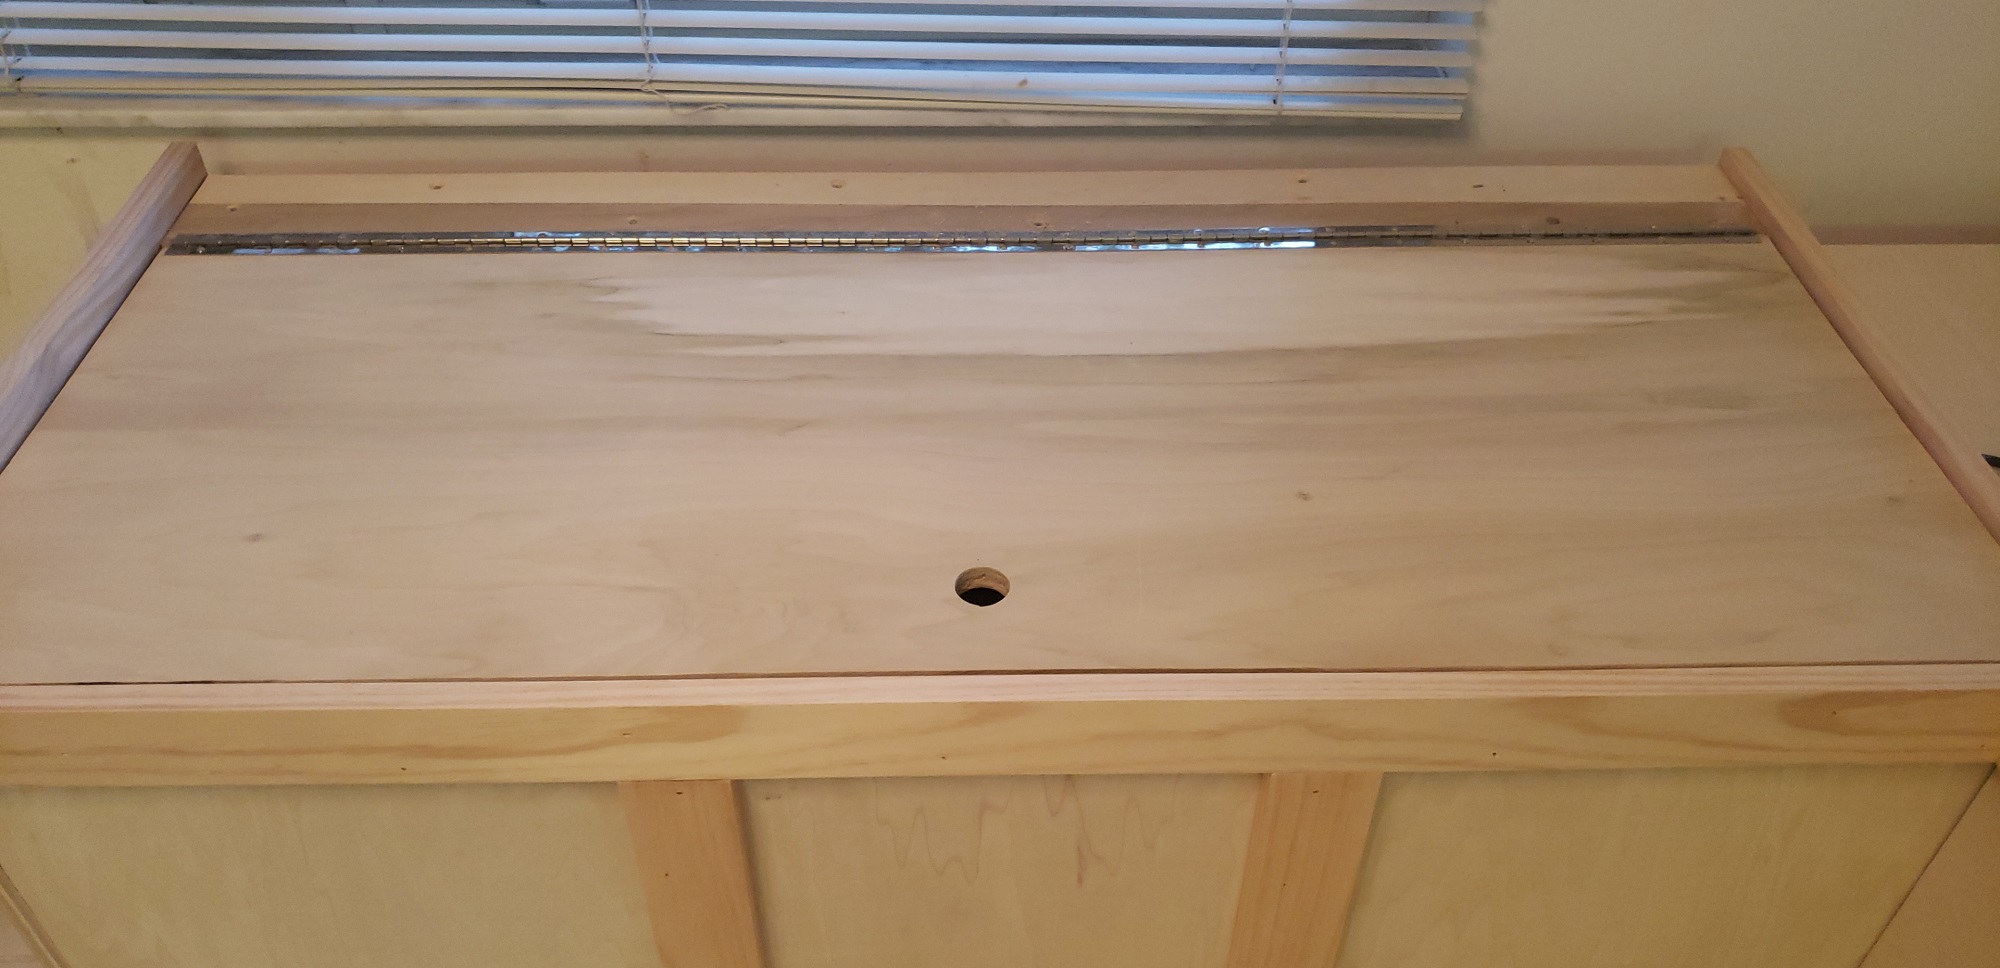
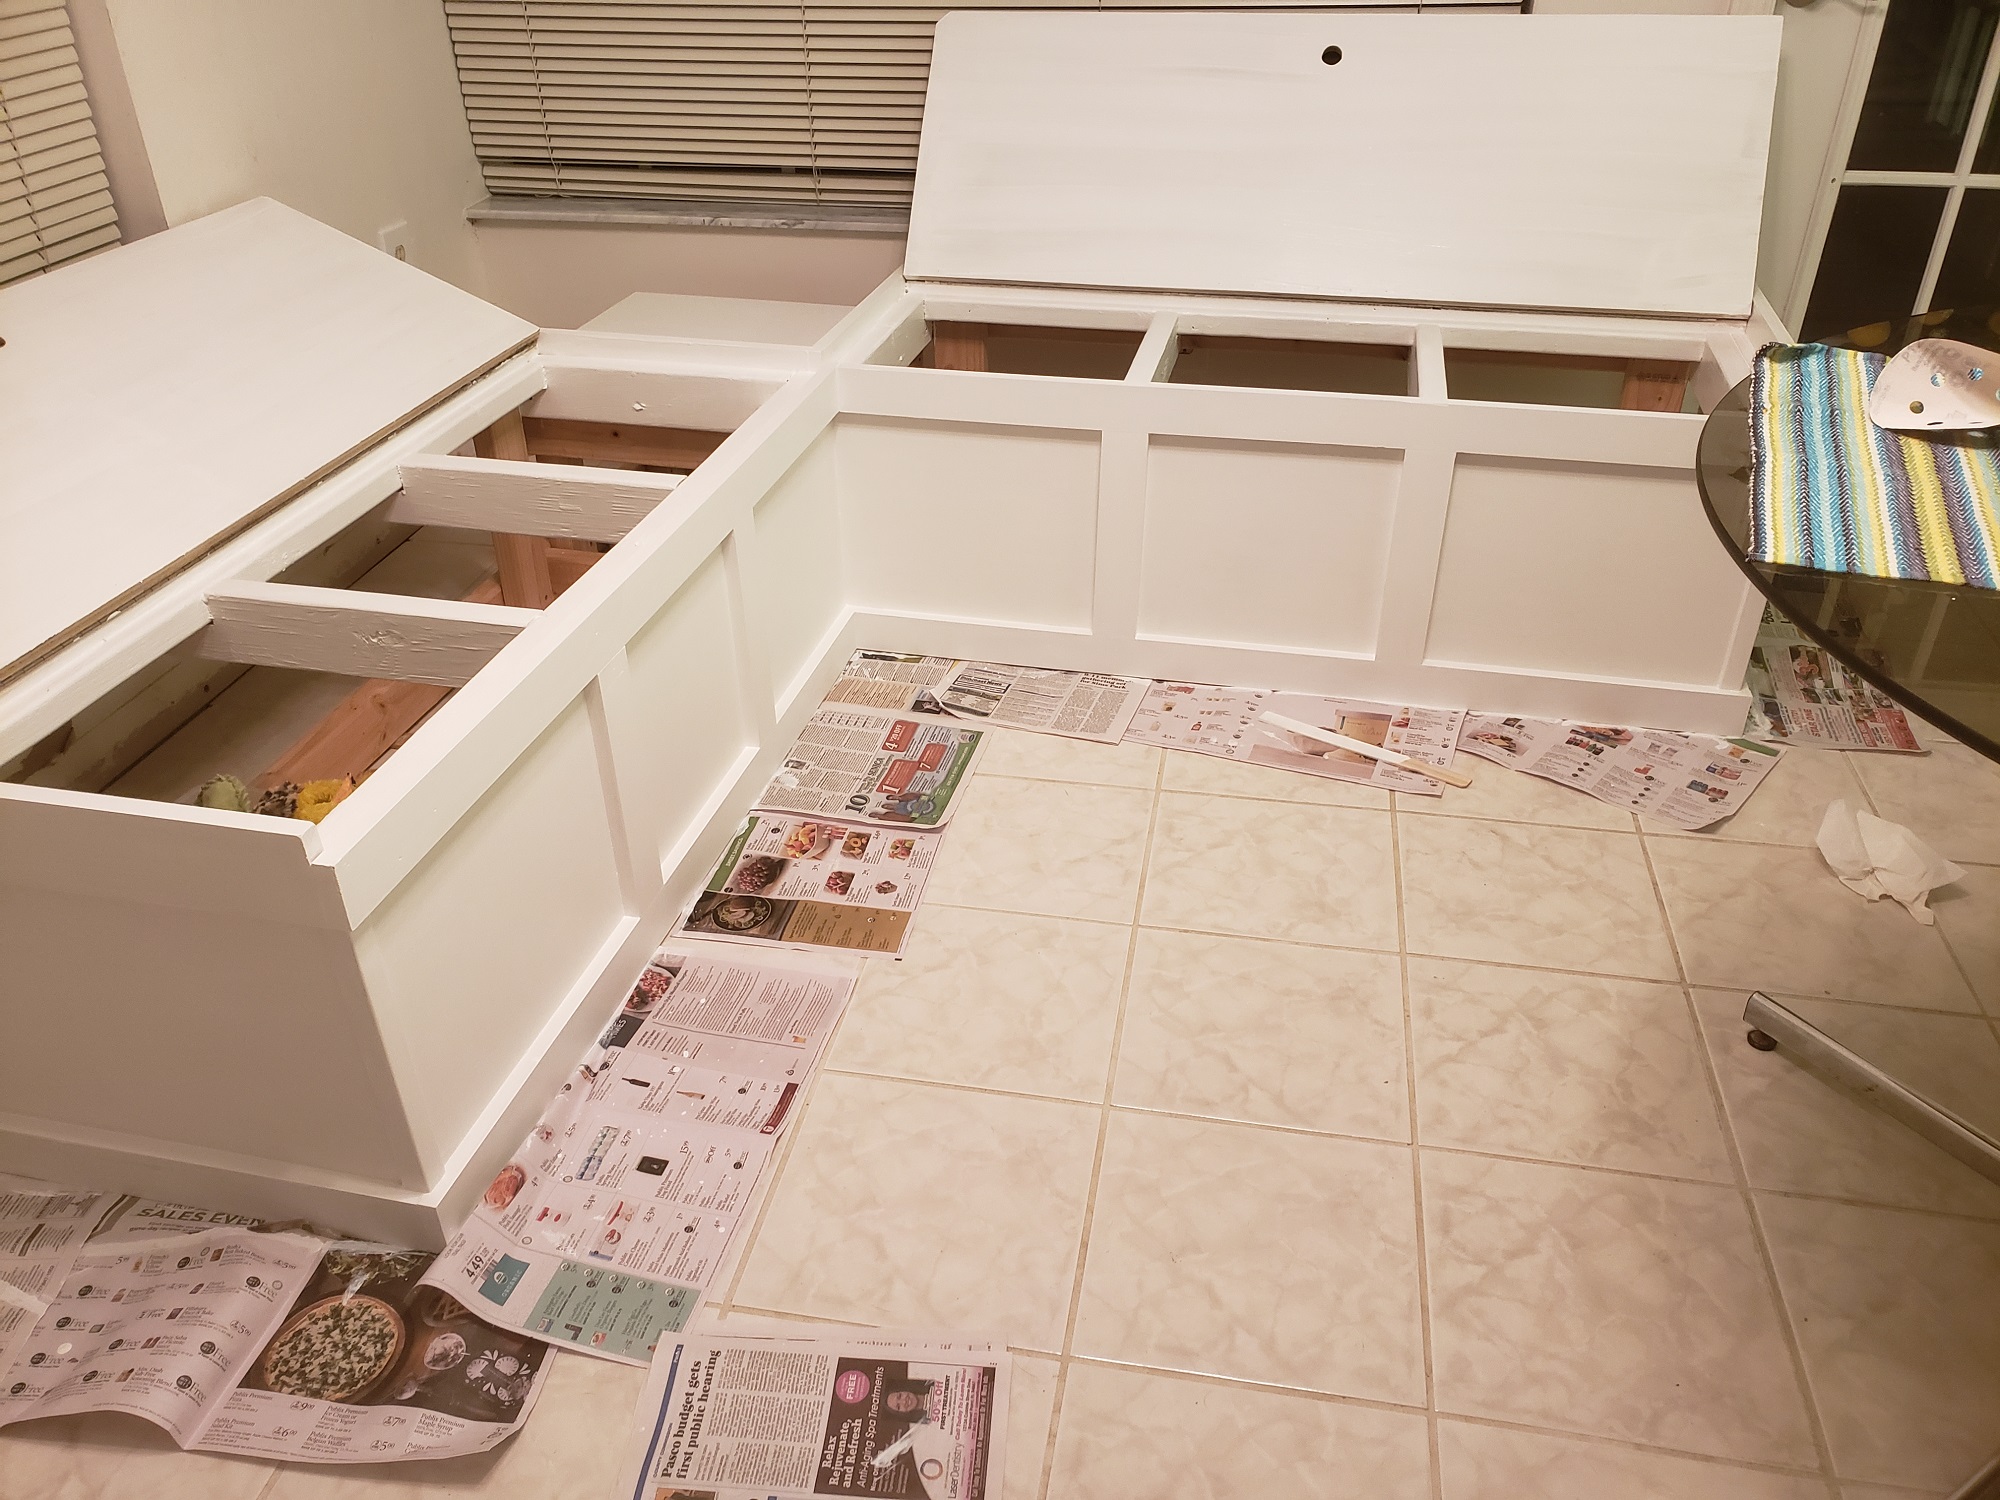
The lids are securely fastened with piano hinges
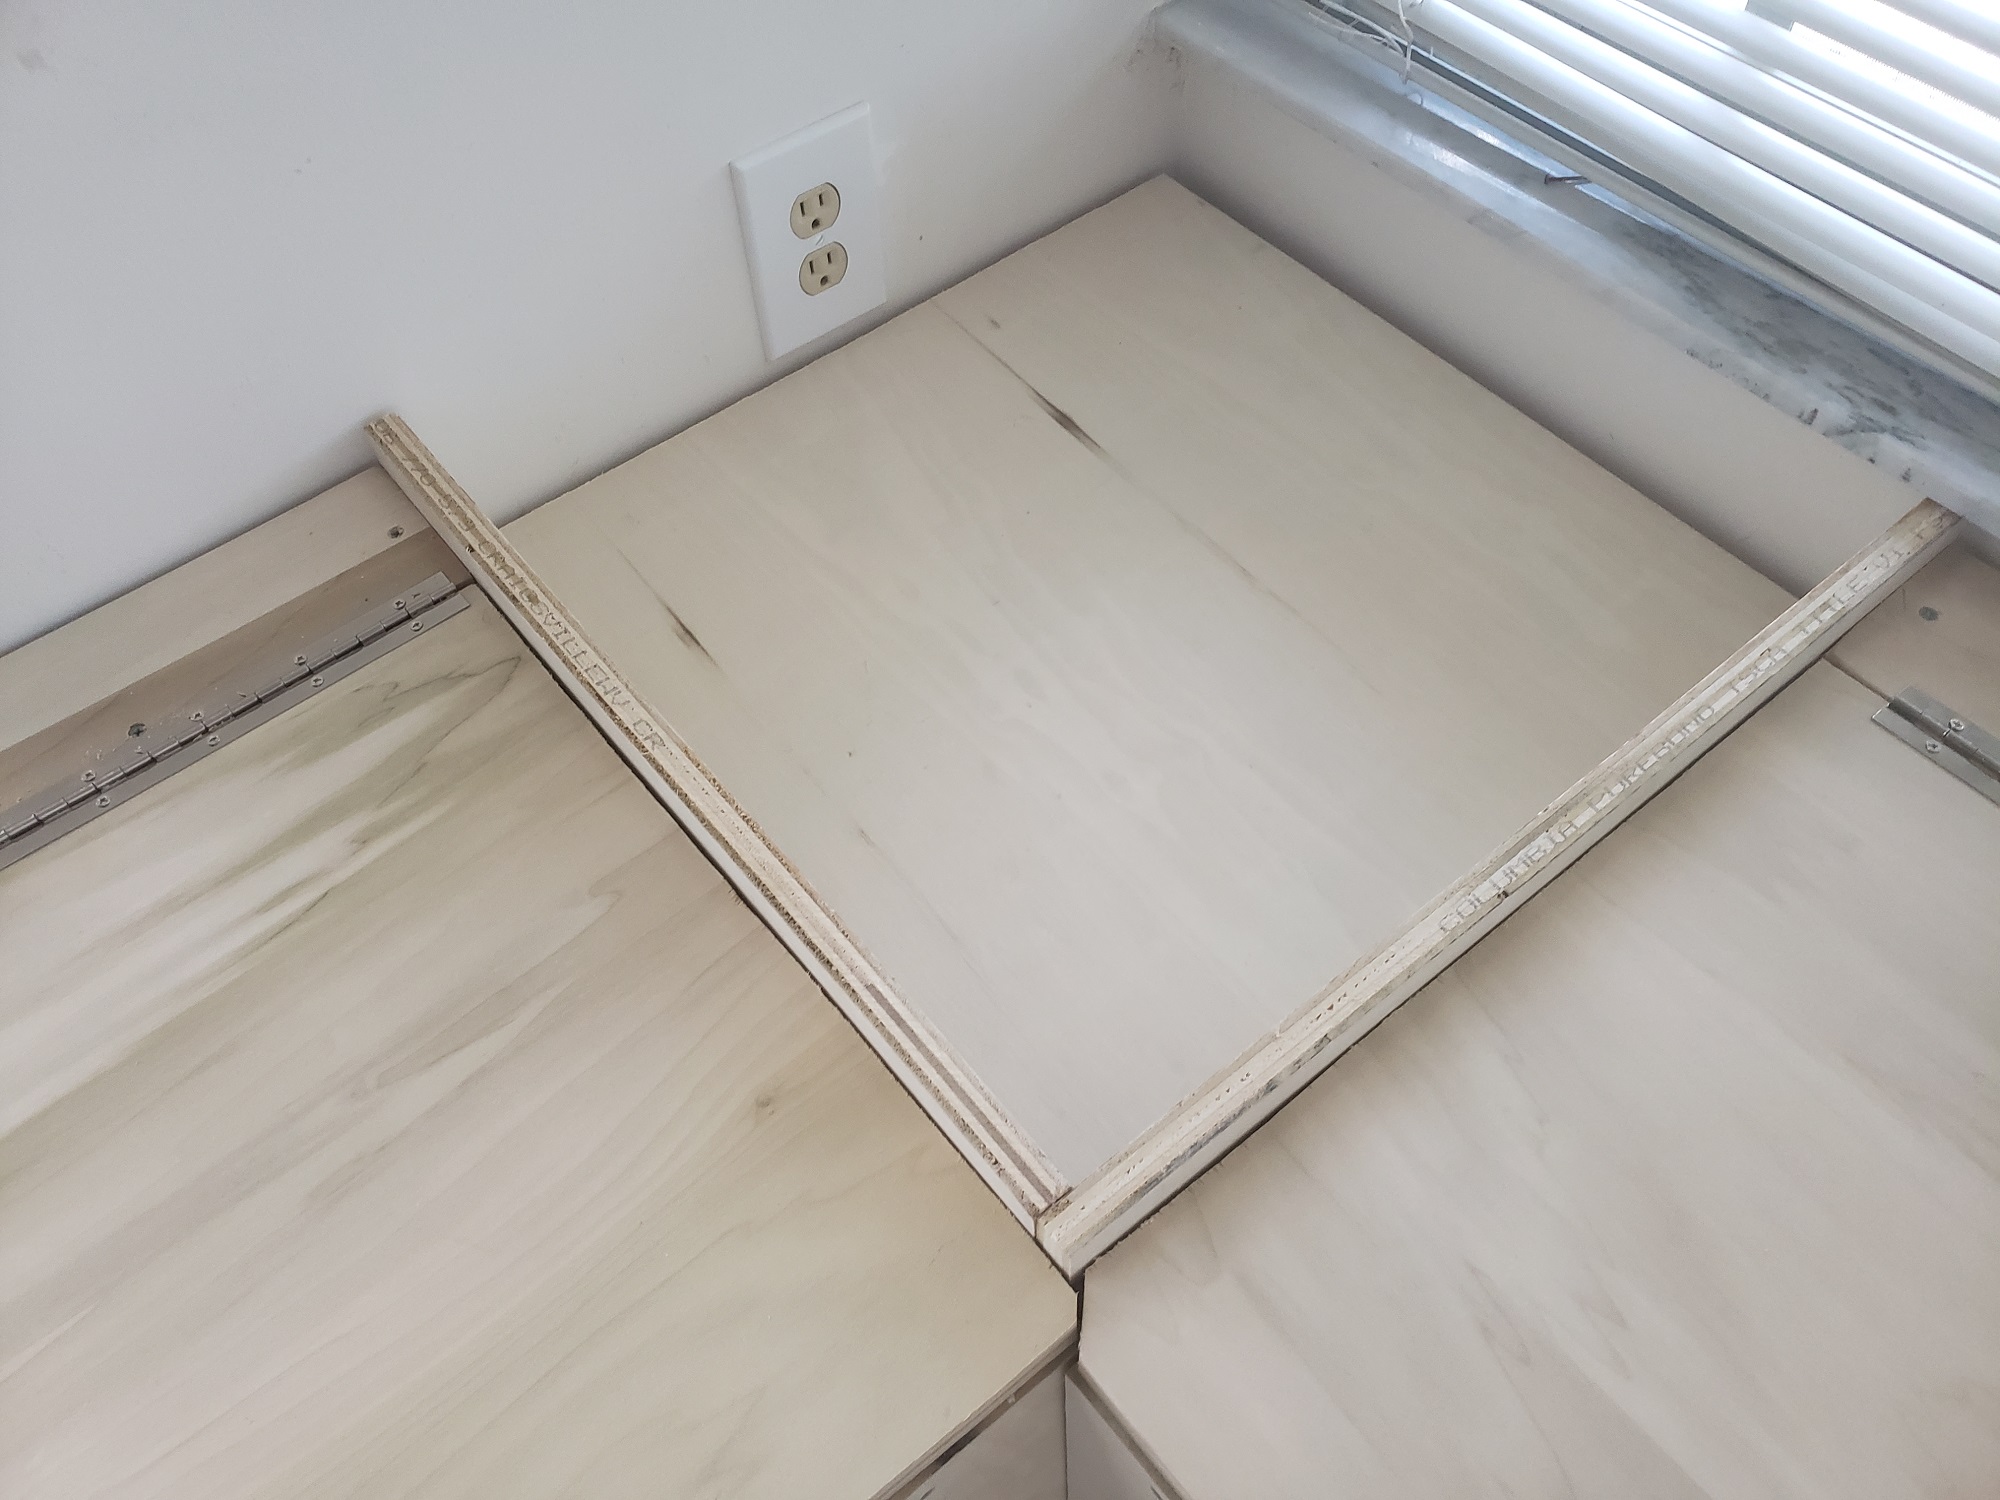
Here you can see how the corner is cut lower to accommodate the electrical socket. Not quite sure what I can plug in there, but if I ever need to…
The day came sadly that my son and his lovely wife had to go back home. I hate good-byes. They said they had a great time sight-seeing and going to the beach (It wasn’t ALL work). Now it was up to me to finish these bad boys.
I used 1×3” poplar boards. I chose poplar for the tight grain and smooth finish it creates when painted.
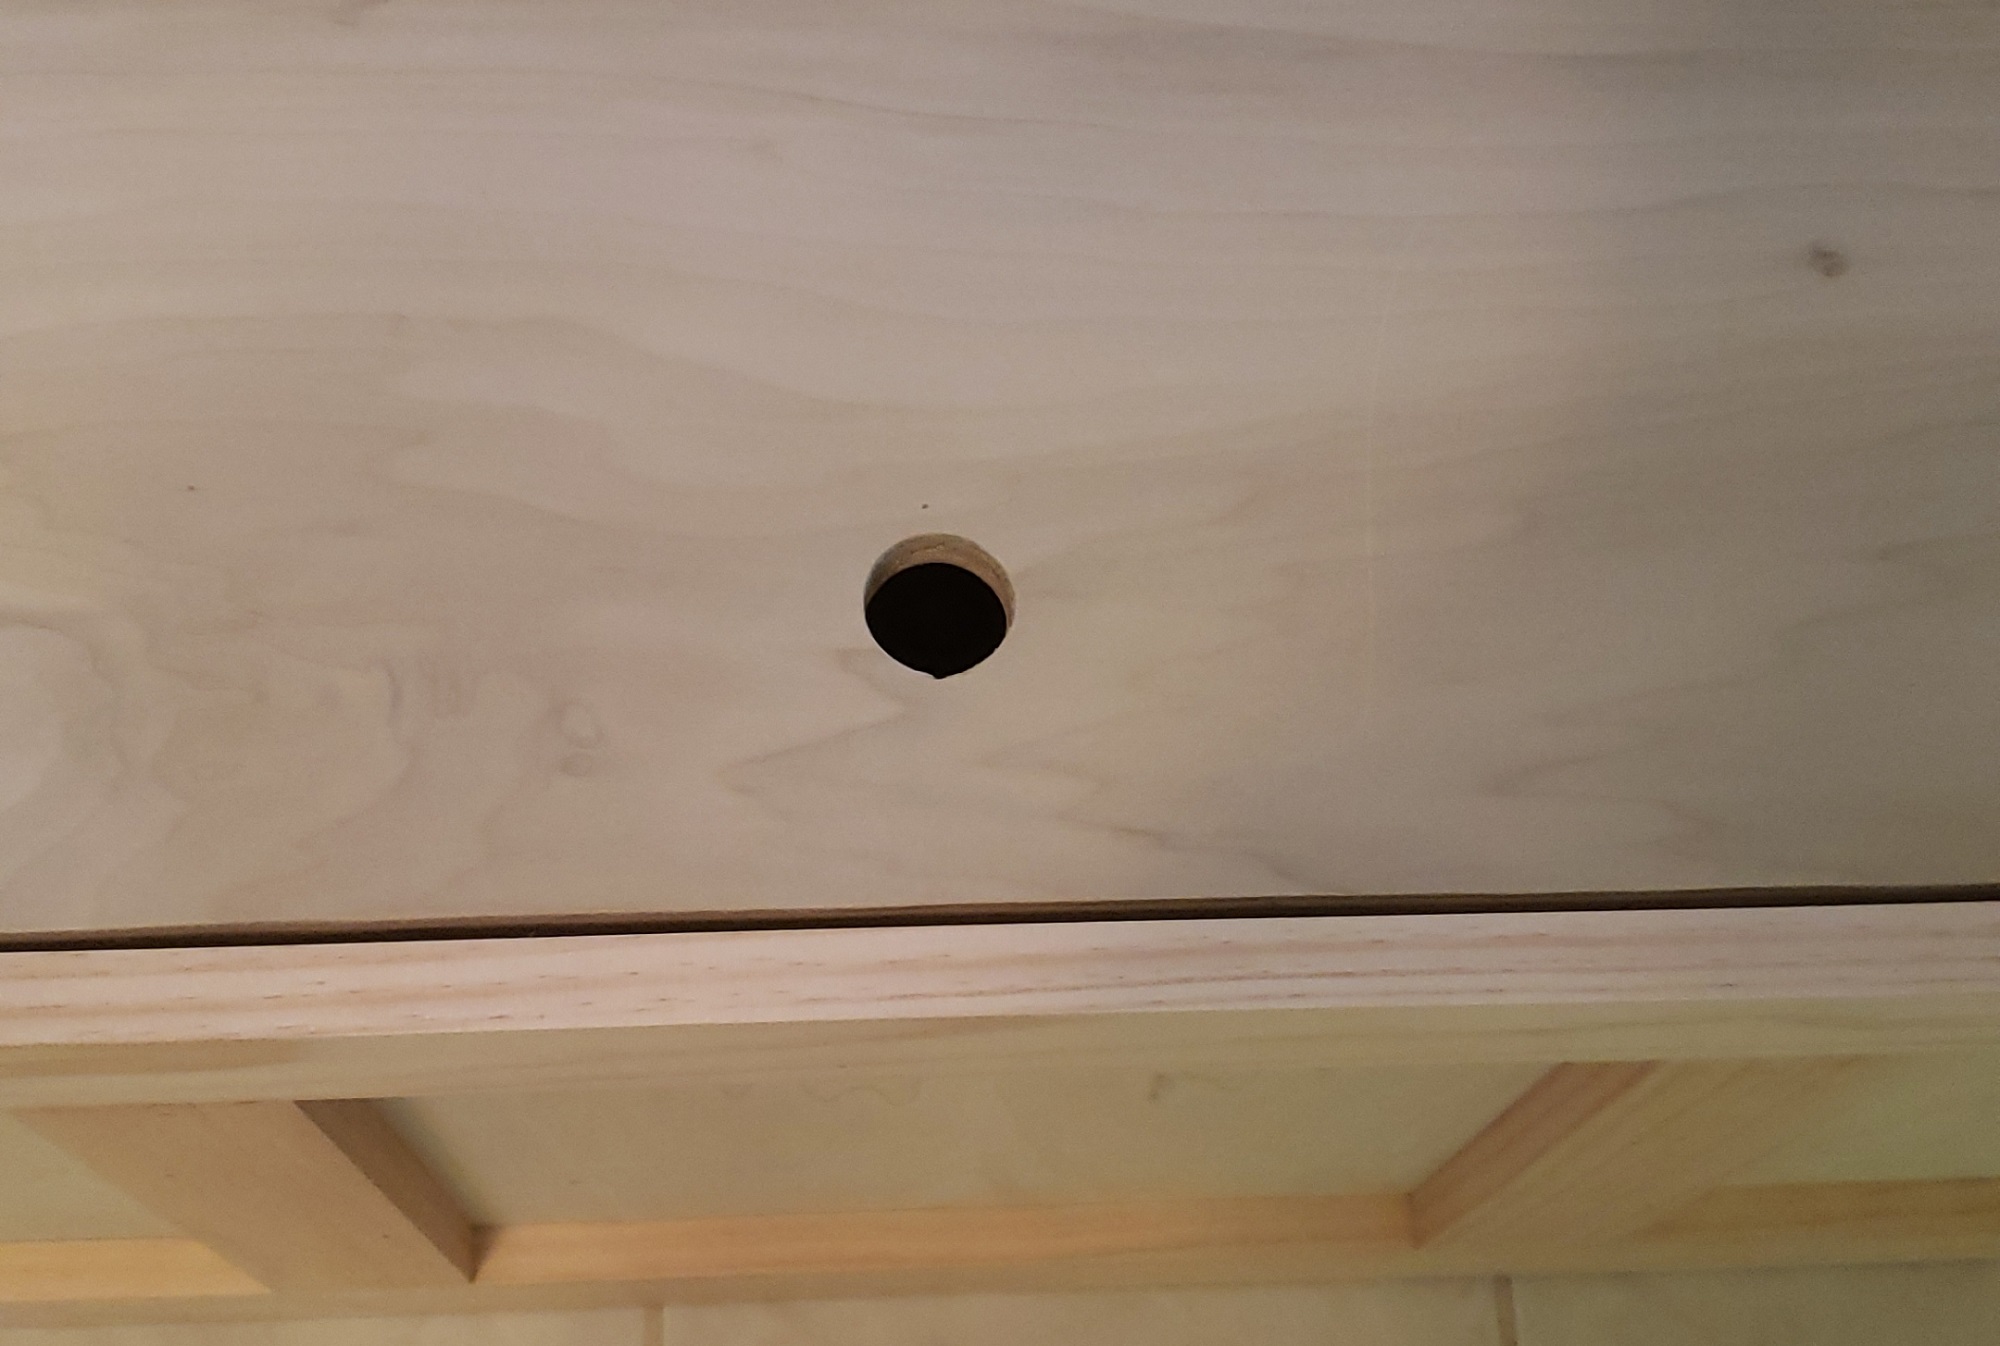
I then used a hole saw bit on my drill to create these to help me open the lids. You can see the piano hinge best in this shot. Make sure you have an electric drill with a screwdriver bit for this job! There are 48 screws in each hinge! Whew!
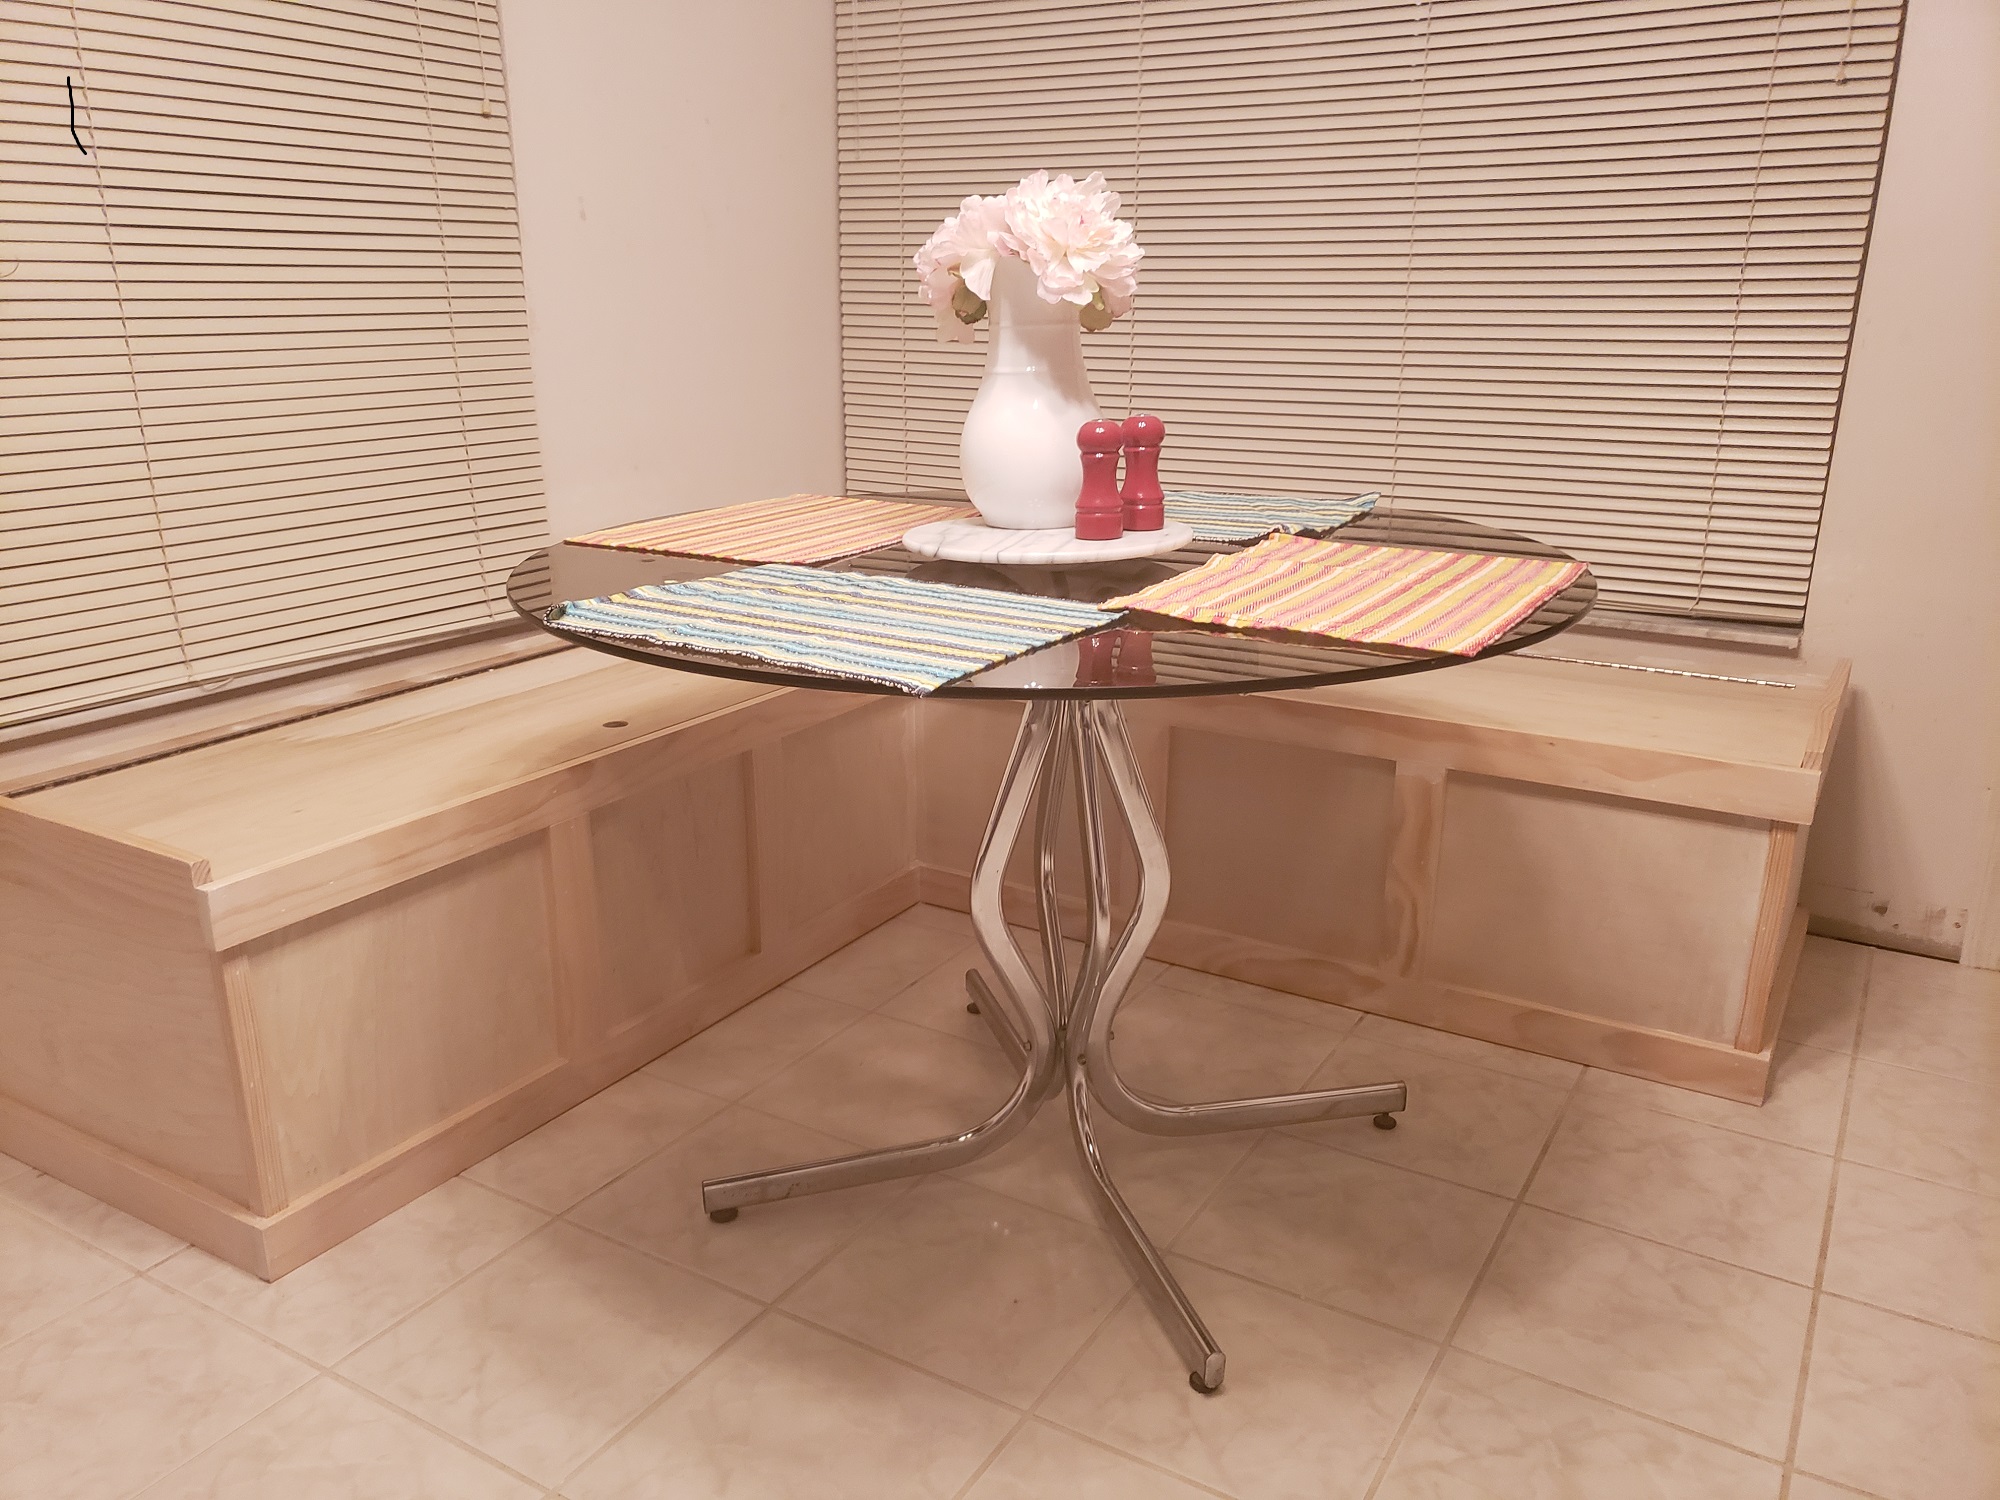
I think they turned out better than okay!
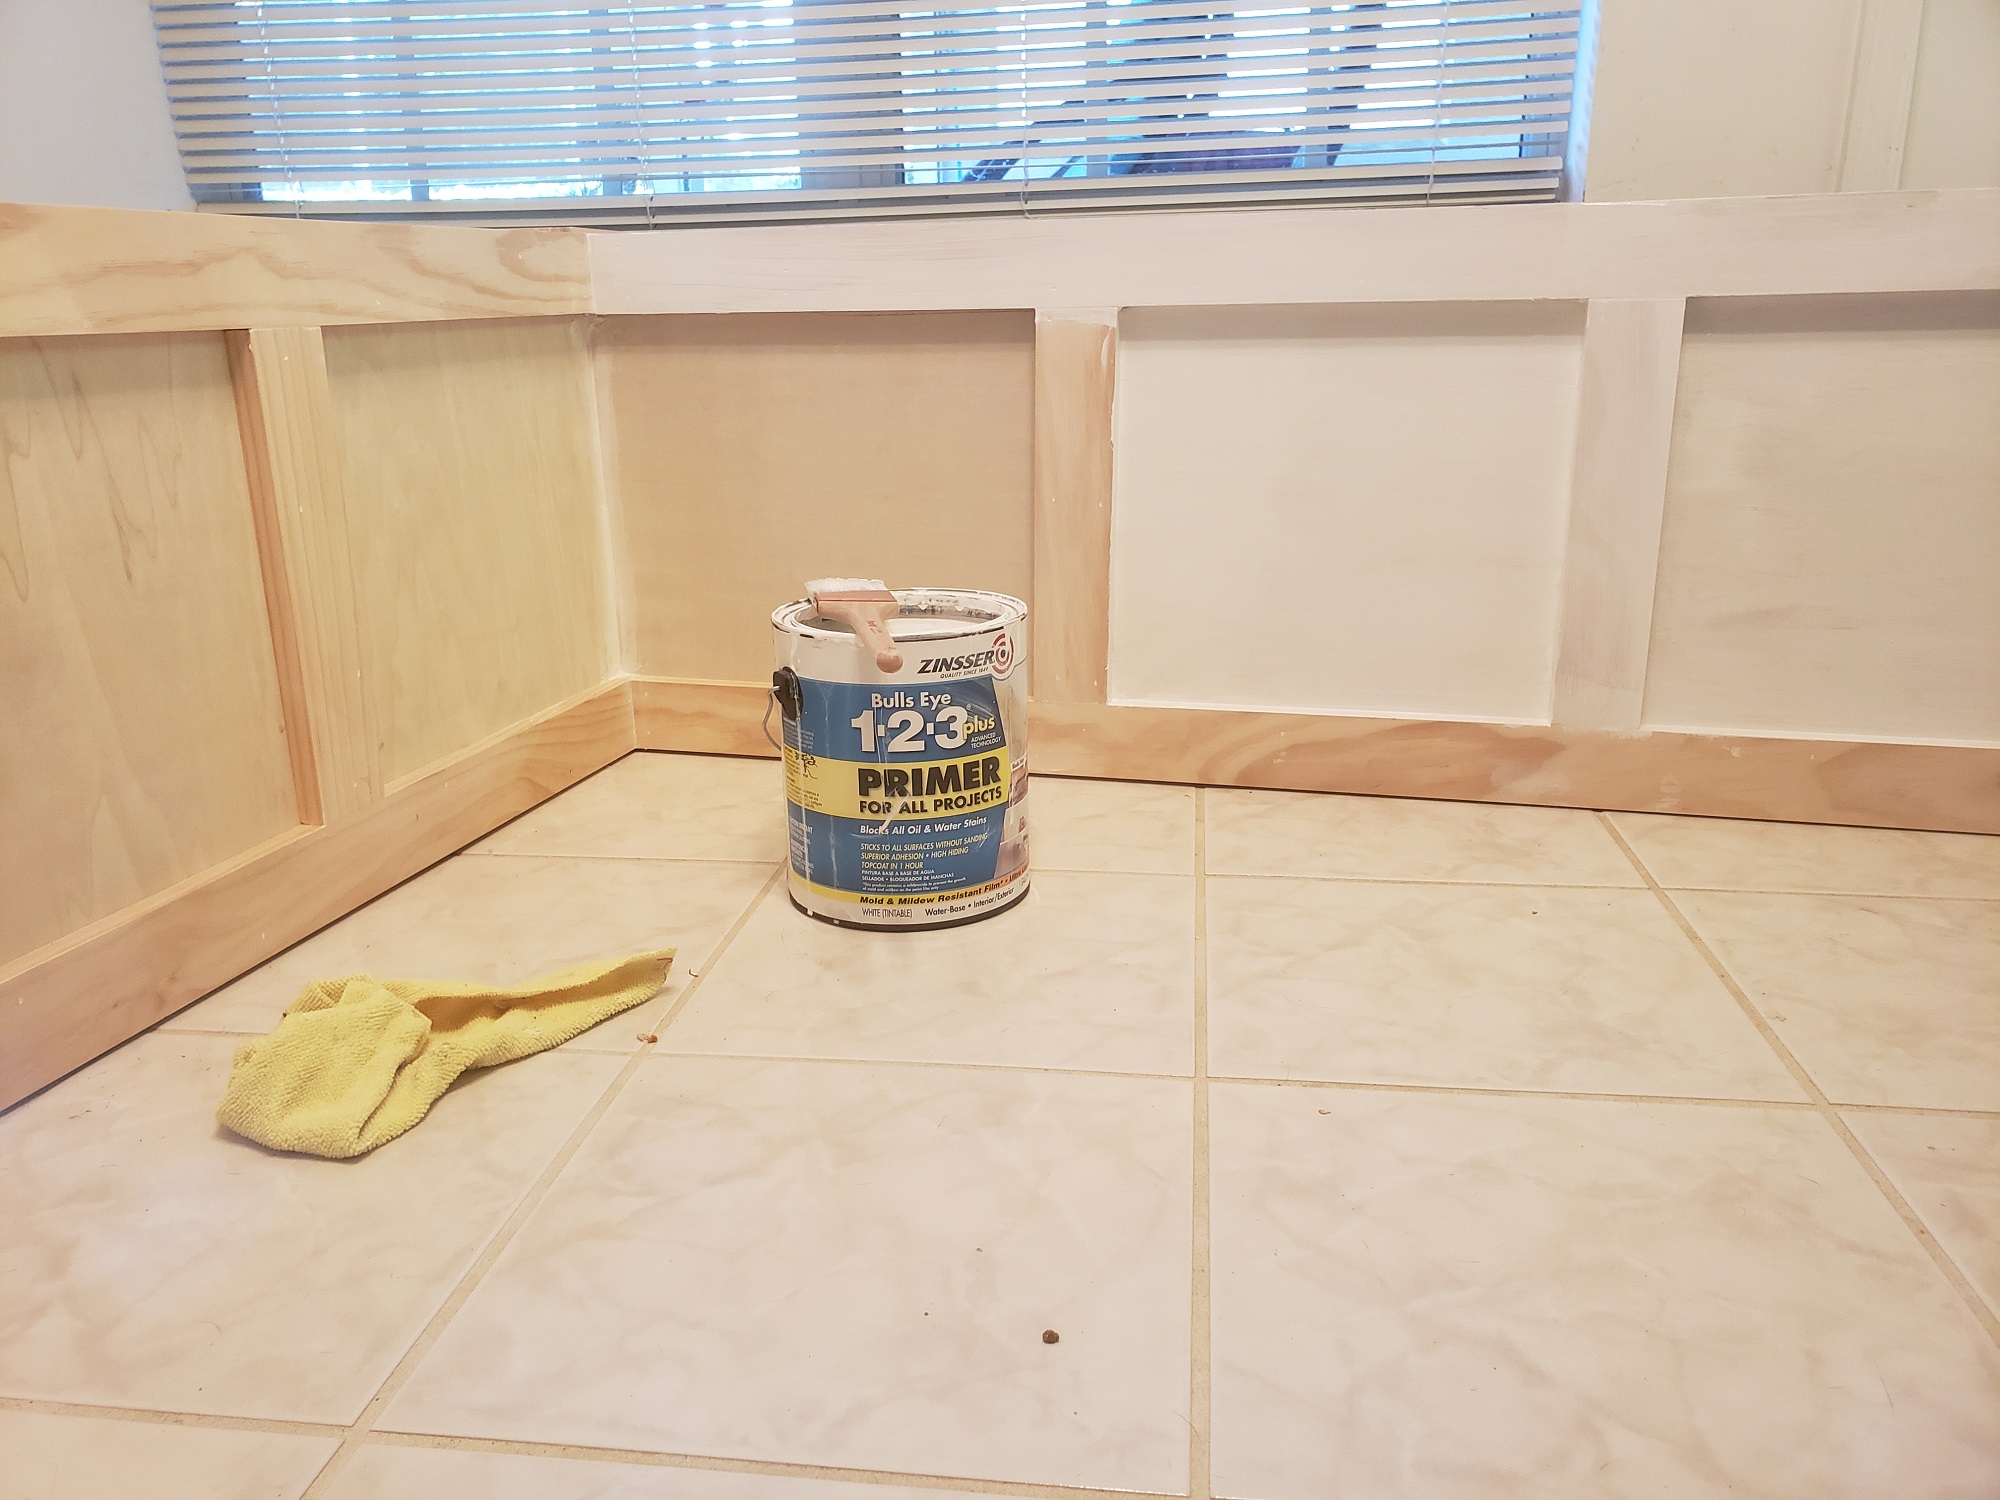
Next, I primed the wood to cover any knots or discolorations in the wood. I used Kilz brand primer. One of the best on the market in my opinion.
Now for the wallpaper! I must have been overly excited to get rid of that wallpaper because I forgot to take any pictures of removing it! Oh well…such is life!
I did, however get shots of all the patching I had to do once the wallpaper was removed. I used regular low dust drywall compound. You can buy it in small quantities for jobs like this or in 5-gallon buckets for larger jobs.
Now I know that the pictures don’t show it, but we used paint grade lumber so they really wouldn’t look good stained. Paint-grade is usually cheaper than stain-grade because of the imperfections in the wood.
add links here to breakfast nook makever
– Danielle
Hi, I’m Danielle!
I am the designer, writer and diy’er behind this blog. I enjoy decorating my home for practically nothing by doing most of the work myself, finding new and imaginative ways to make it beautiful and by watching for killer sales. I find humor almost anywhere and can laugh at myself through it all. I have learned that most projects don’t go exactly as intended, but can be more beautiful than the original plan.
Re-Fabbed Boutique – Beautiful, quality clothing for women of all shapes and sizes!!
We use cookies to ensure that we give you the best experience on our website. If you continue to use this site we will assume that you are happy with it.
You can revoke your consent any time using the Revoke consent button.