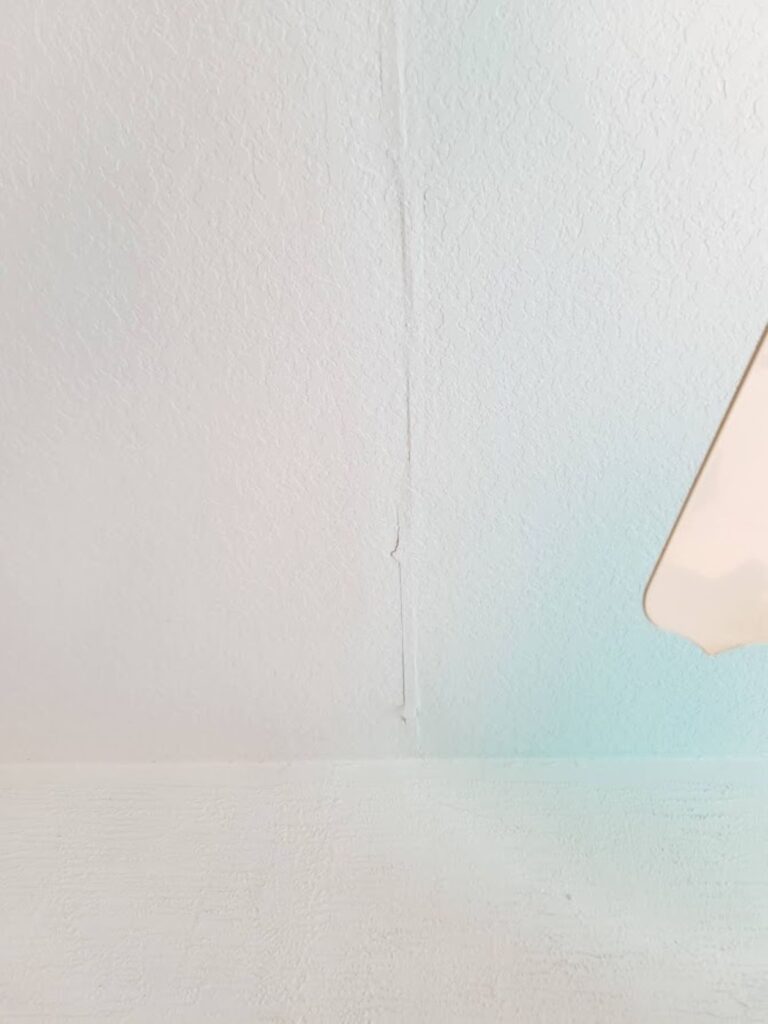
A few years ago, we decided to finally fix the seam tape (used to conceal the joining of drywall boards) that was coming loose and starting to buckle.
I love sitting on my back porch or lanai, as it is called in Florida.
It is my favorite way to relax in the evening, and the nights are lovely here.
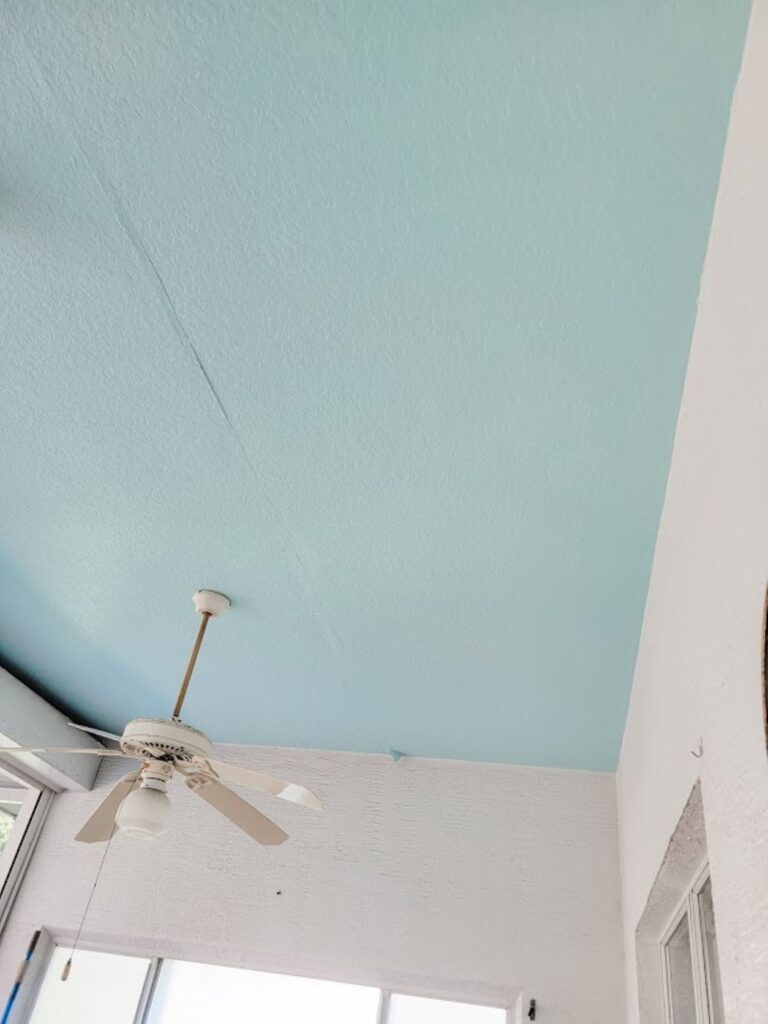
Sidenote: The blue on the ceiling in the picture below is a reflection of the pool and not paint.
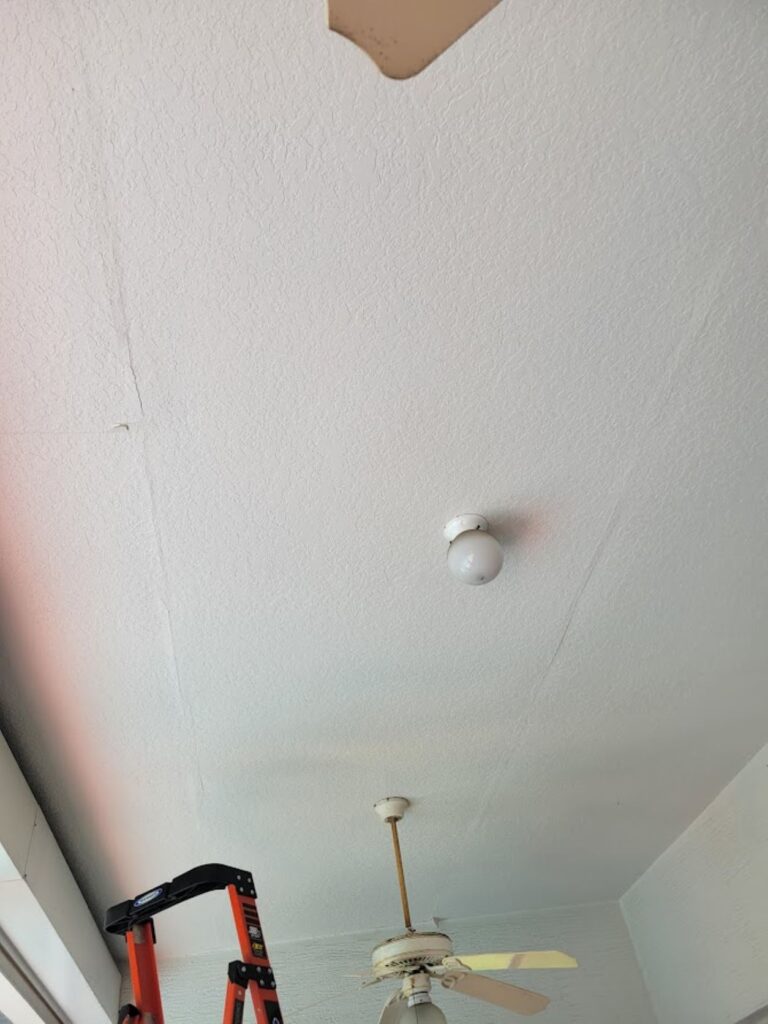
My lanai ceiling before with peeling drywall seam tape.
I knew the problem wasn’t structural, so it wasn’t urgent.
But after a while, that little tape issue started to mock me!
I no longer loved sitting out there in the evenings—sad!
Another view of my drywall tape coming loose.
After researching various options and looking at a TON of pictures on Pinterest, I installed a grid ceiling to support and hide the imperfections happening before my eyes.
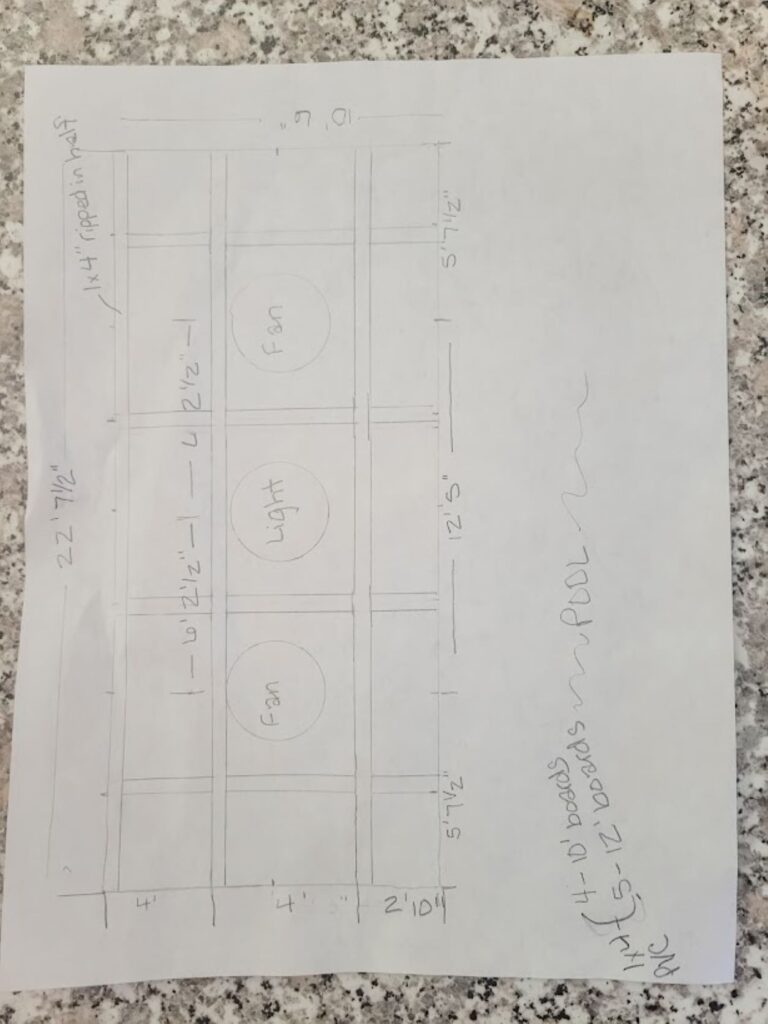
Below is a rough sketch of how I envisioned my lanai ceiling.
A sketch of my lanai ceiling
I wanted to paint the ceiling aqua-blue, so I went with Sherwin-Williams’ “Tame Teal.”
In the south, porch ceilings are painted blue for a reason.
Haint blue is any shade of blue used to ward off evil spirits. Cool!
Did you know that lumber made out of plastic was a thing? WHAT?! Game changer!!!
This is PERFECT for outdoor applications.
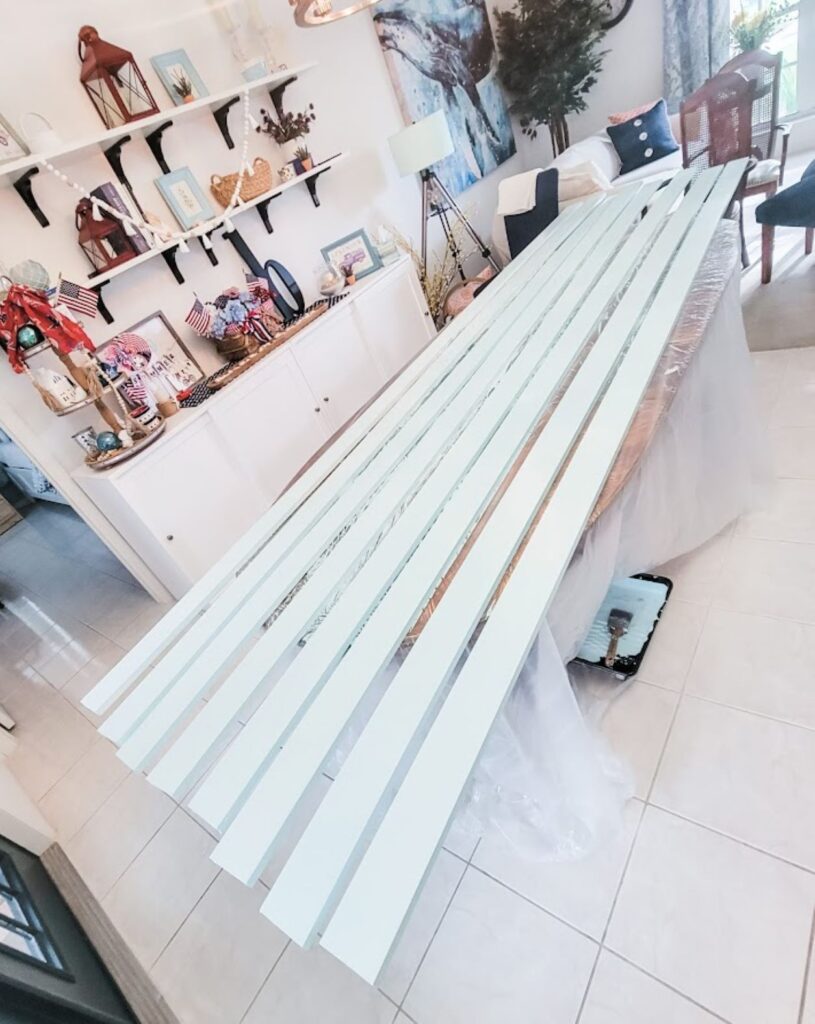
I bought ten 1×4 12-foot long pieces of PVC (plastic) lumber and painted them my ceiling color – Tame Teal.
I had to paint them inside because the Florida humidity would not let the paint dry.
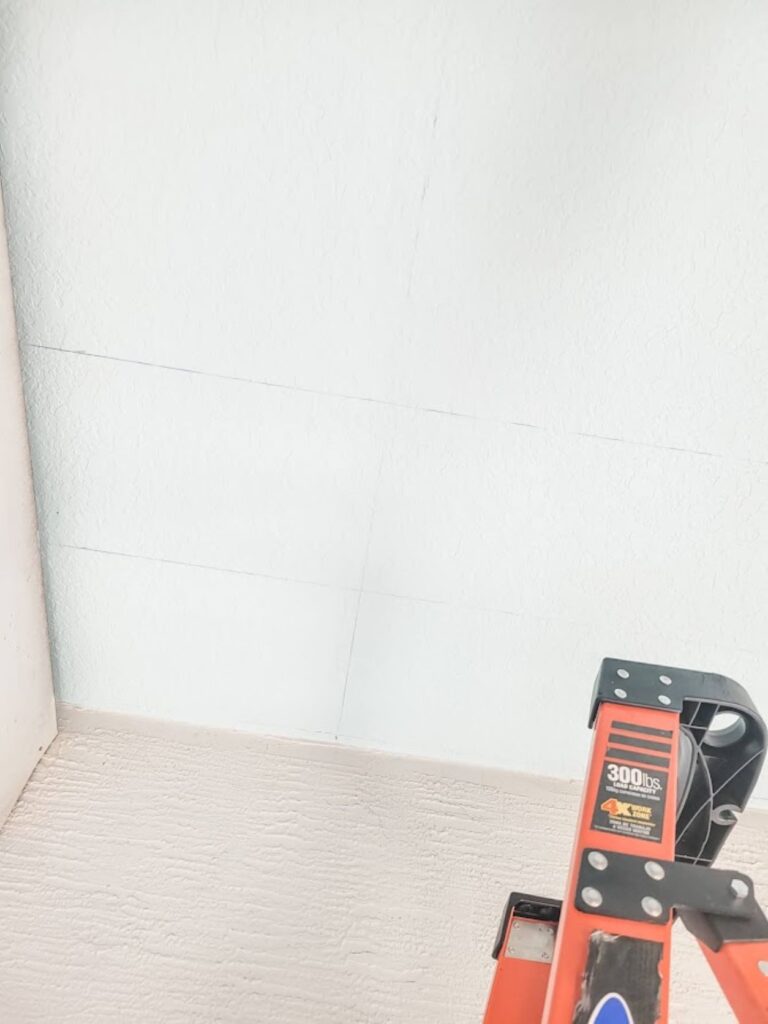
While the paint was drying, I used my favorite stud finder to find the roof trusses on the ceiling.
My husband helped me snap a chalk line across the ceiling where the trusses are.
Marking the ceiling with a chalk line
After we drew the lines, we held up one of the 12-foot boards and marked where the chalk lines were (I could not lift the long boards by myself due to the length).
We then pre-drilled the holes for the screws to fit. Pre-drilling keeps the boards from splitting.
Marking for screws
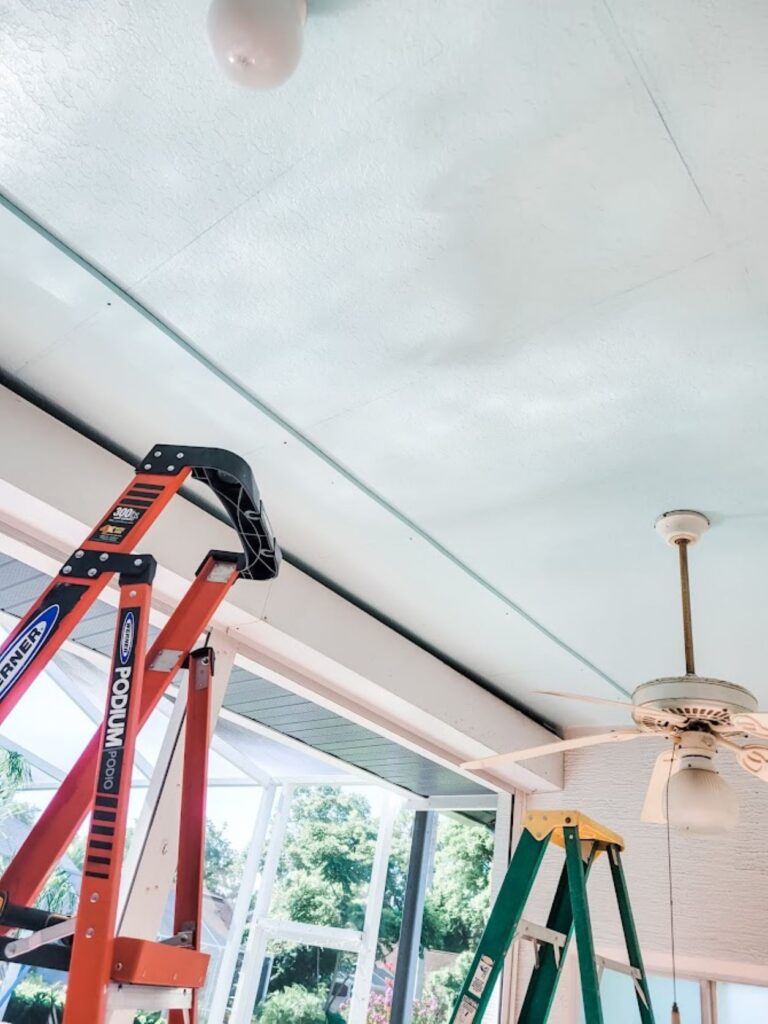
Here are the first few boards we put up.
Here is how it looked after the 2 vertical lines were installed.
After we installed the two vertical boards, I finished the rest of the ceiling myself.
Notice the difference in color between the two pictures?
It is the same color at different times of the day. 😉
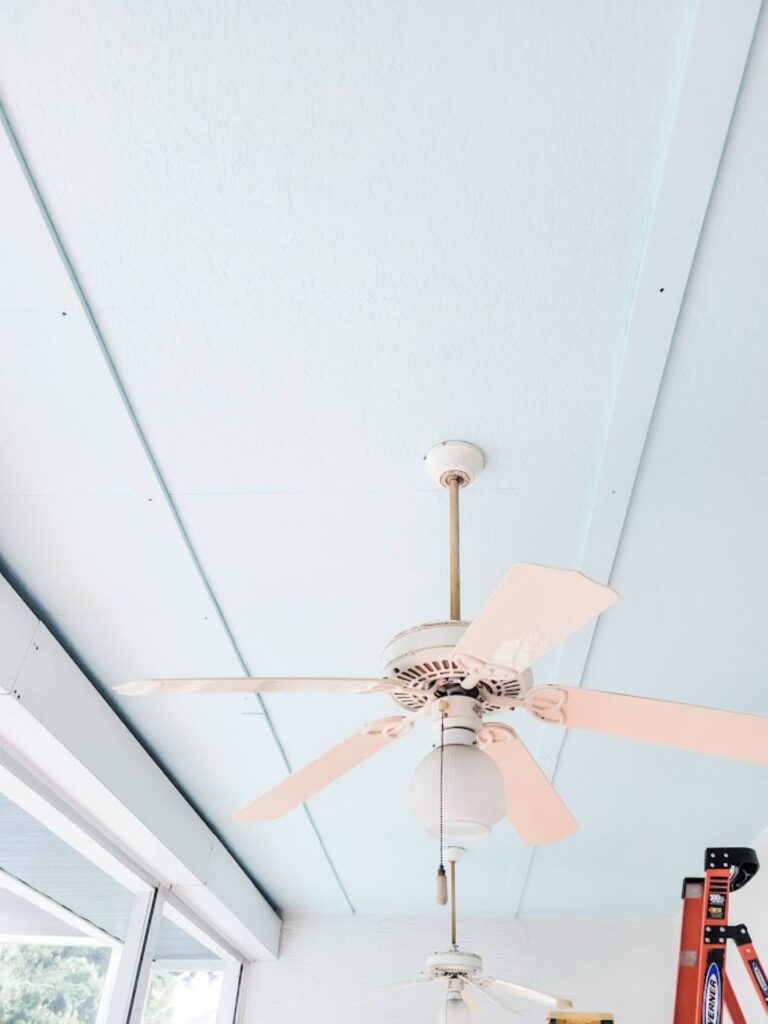
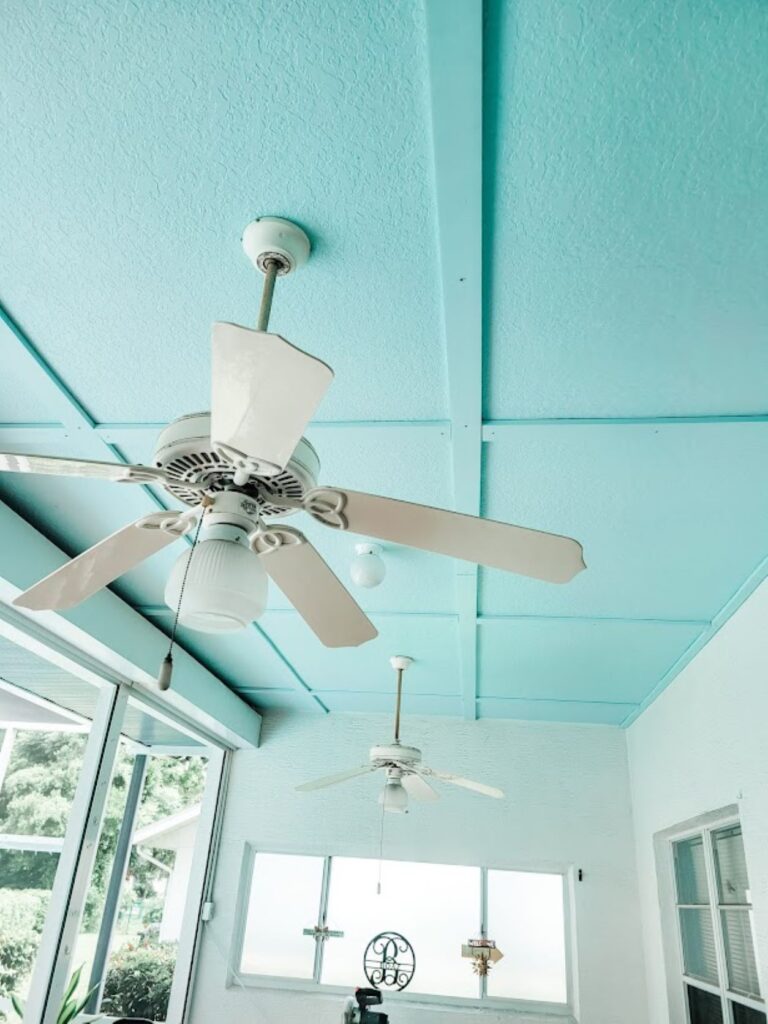
And here she is!
I filled the screw holes and caulked around the edges after this picture was taken.
It looks great, and I can now enjoy my time out here without looking at a peeling ceiling.😎
In the comments below, let me know if you enjoyed “My Lanai Upgrade.”
I would LOVE to hear your input! Yay!
Hi, I’m Danielle!
I am the designer, writer and diy’er behind this blog. I enjoy decorating my home for practically nothing by doing most of the work myself, finding new and imaginative ways to make it beautiful and by watching for killer sales. I find humor almost anywhere and can laugh at myself through it all. I have learned that most projects don’t go exactly as intended, but can be more beautiful than the original plan.
Re-Fabbed Boutique – Beautiful, quality clothing for women of all shapes and sizes!!
We use cookies to ensure that we give you the best experience on our website. If you continue to use this site we will assume that you are happy with it.
You can revoke your consent any time using the Revoke consent button.