Have you ever looked at those beautiful printables on Pinterest and wondered, “How can I use this in my home?”
I mean, It is just so pretty, but where do I go from here?
Let me show you how I made this reversed canvas 3d art piece!
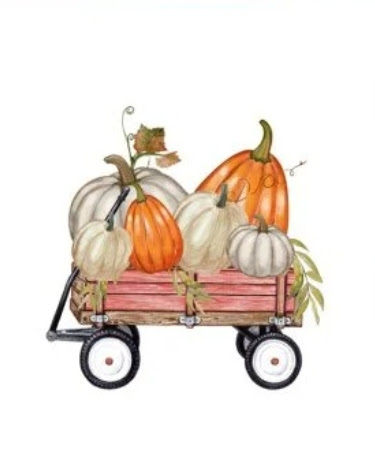
I am super excited to show you what I did with a printable I recently found on onsuttonplace.com.
Ann Drake, owner of On Sutton Place, has free, beautiful printable downloads on her site.
I love them all!
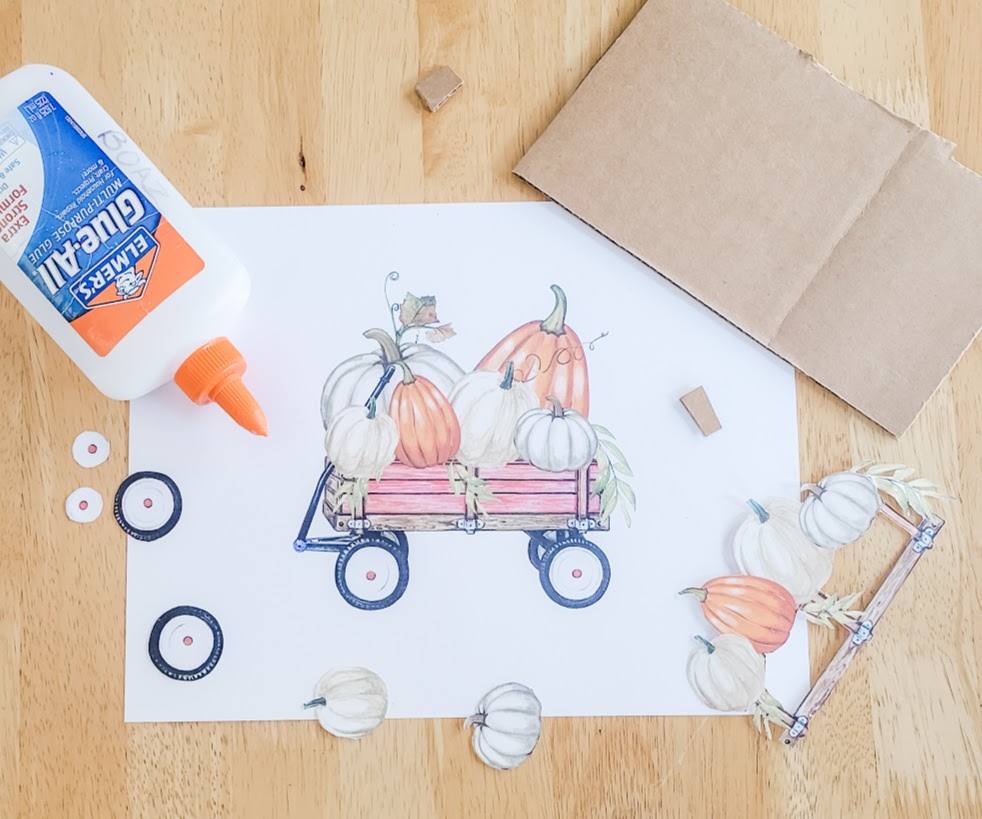
After you choose your favorite printable, download and print out the picture on cardstock.
Then, make 2 more copies of the same print also on cardstock.
Also, look closely at your picture and notice what parts of the print look closer to you and what parts look like background areas.
Leave one of your prints untouched. This one will be the background layer.
On the second copy, cut out the areas that seem closer to you and further away from the background.
I would say in this picture that would be the four front pumpkins, the wood trim on the wagon, and the two visible wheels).
On the third copy, cut out only those areas that look even closer to you.
In this picture, I would say it is the two smallest pumpkins and the very center of the wheels.
All you need is 3 copies of the print, a stretched, canvas frame and basic white glue.
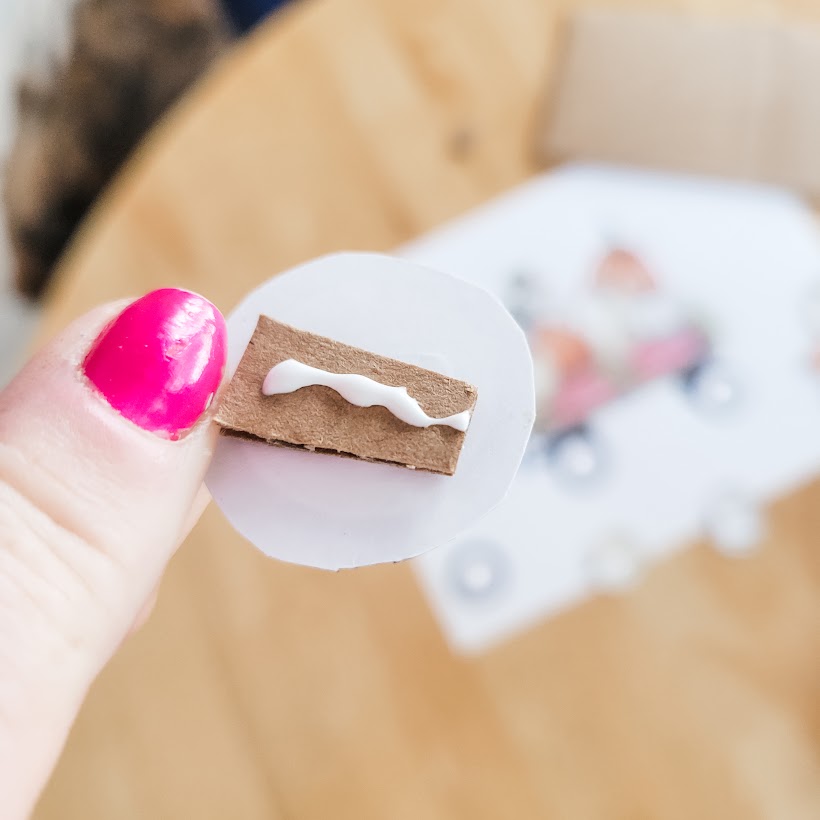
Glue a small piece of cardboard or foam to the back of the middle layer (second copy) pieces.
This will raise it up from the background and give the piece dimension.
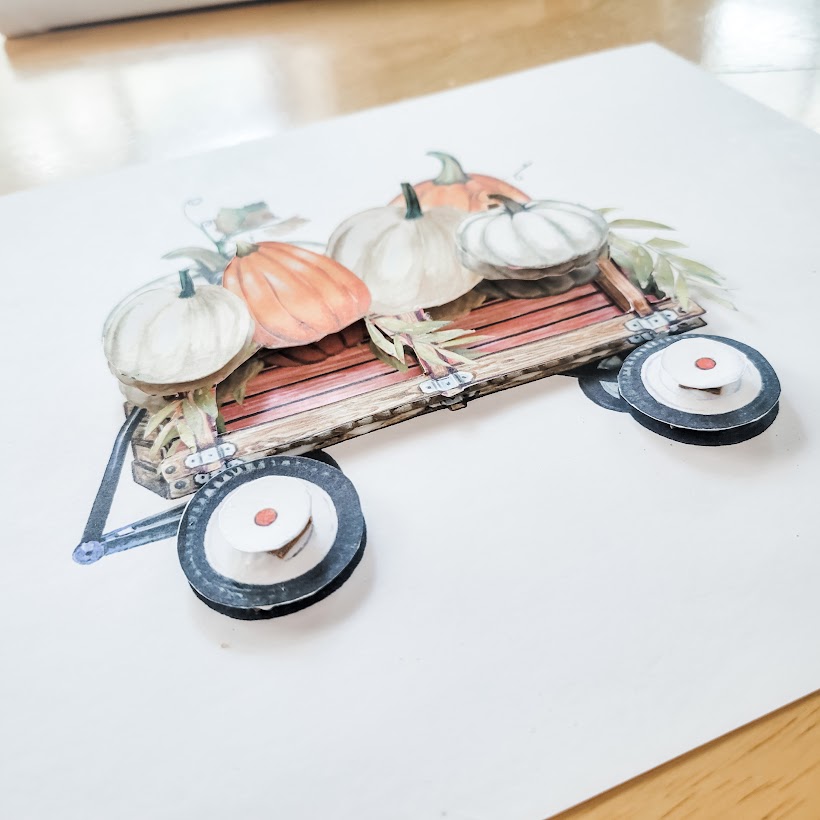
Continue with the top layer or third copy.
glue small pieces of cardboard in between the layers of your art piece for dimension
See how layering your piece gives it dimension and that 3d effect?
If you are adventurous, you could add a fourth layer (the vertical supports on the wagon and the red dots in the center of the wheels).
Three layers with cardboard in between
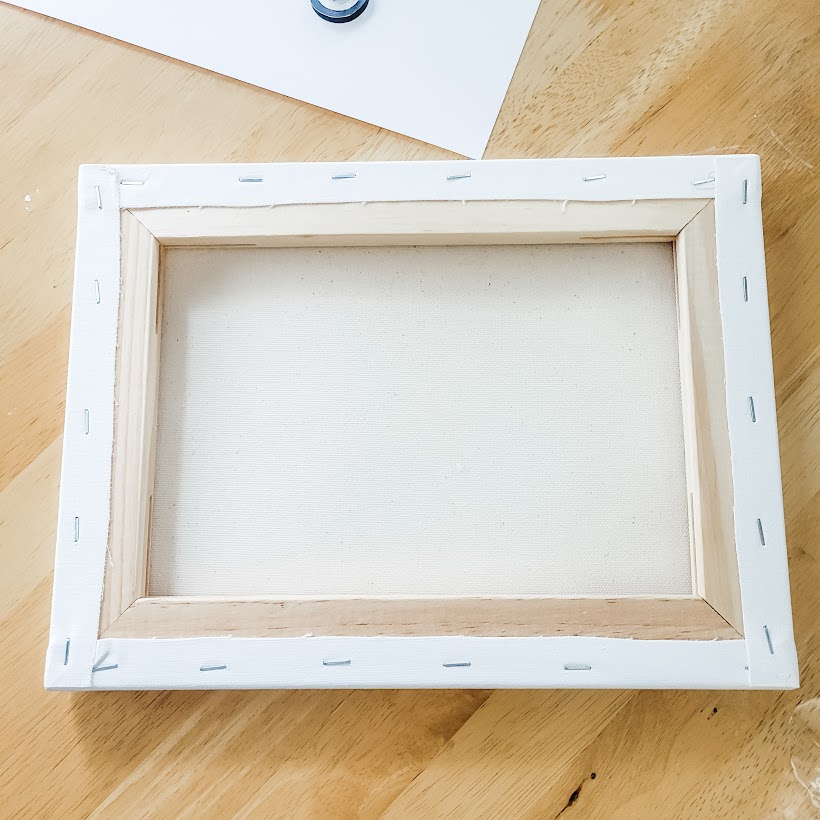
Flip your stretched canvas over with the staple-side up.
The backside of my stretched canvas
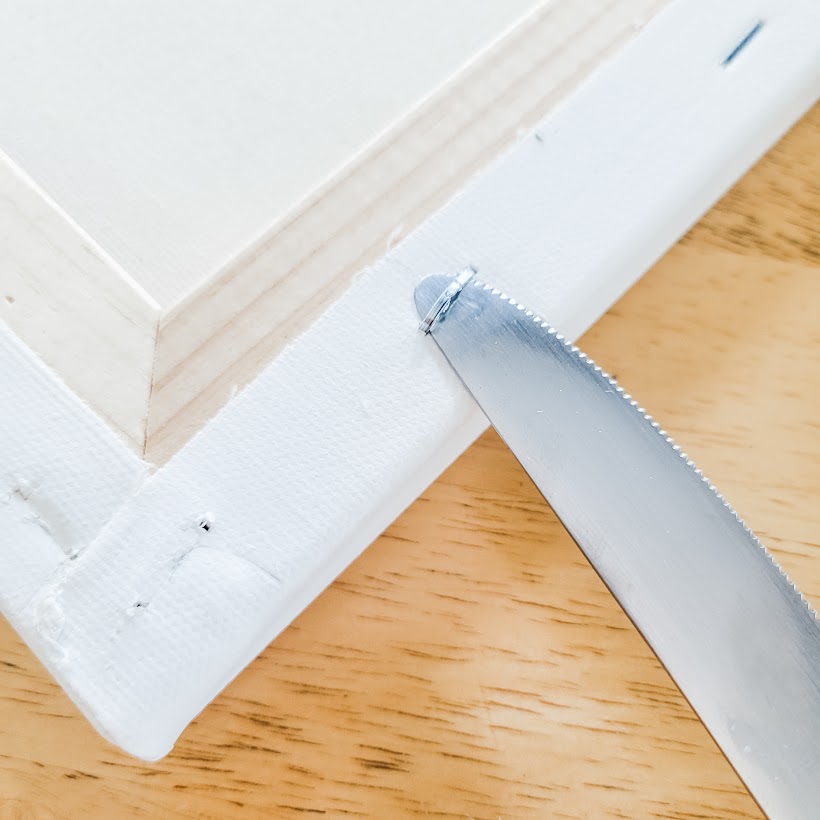
Remove the stretched canvas from the wood frame by pulling up the staples.
I used an old table knife, staple puller and needle-nose pliers.
Removing the staples from your stretched canvas
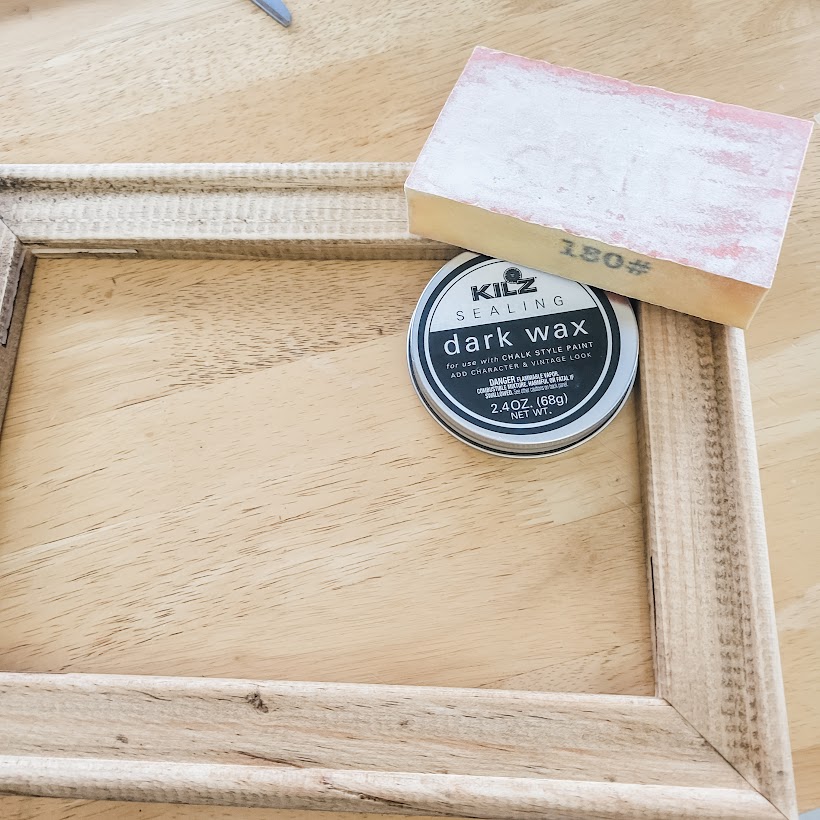
The wood frame had a great bullnose detail around the edge so, I decided to take it up a notch and stain the frame using Kilz Dark Wax.
Then, I applied two coats sanding in between with 180 grit sandpaper.
I used Kilz Dark Wax to stain the wood frame of the canvas.
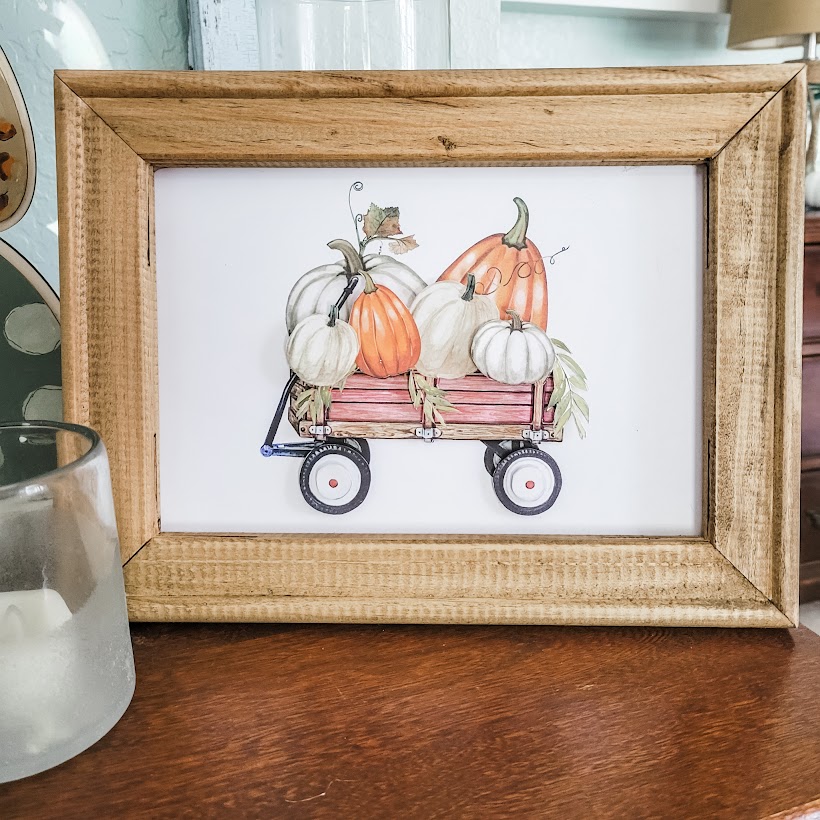
Now, a true reversed canvas piece actually uses the canvas by attaching it to the back of the wood frame.
I decided to glue the cardstock to the frame without using the canvas. Isn’t it gorgeous?!
Beautiful and ready for displaying
This reversed canvas 3d art piece project cost roughly $3 for the canvas.
I already had the cardstock and the printable was free.
It truly does add a touch of “wow” to the entrance of my home.
I hope you enjoyed this post on how I made this reversed canvas 3d art piece and that it sparks inspiration for you to have fun making your home your happy place.
Hi, I’m Danielle!
I am the designer, writer and diy’er behind this blog. I enjoy decorating my home for practically nothing by doing most of the work myself, finding new and imaginative ways to make it beautiful and by watching for killer sales. I find humor almost anywhere and can laugh at myself through it all. I have learned that most projects don’t go exactly as intended, but can be more beautiful than the original plan.
Re-Fabbed Boutique – Beautiful, quality clothing for women of all shapes and sizes!!
We use cookies to ensure that we give you the best experience on our website. If you continue to use this site we will assume that you are happy with it.
You can revoke your consent any time using the Revoke consent button.