For your convenience, this post may contain affiliate links. If you click & make a purchase, I receive a commission (at no cost to you)! Blessings! You can read my full disclosure policy here.
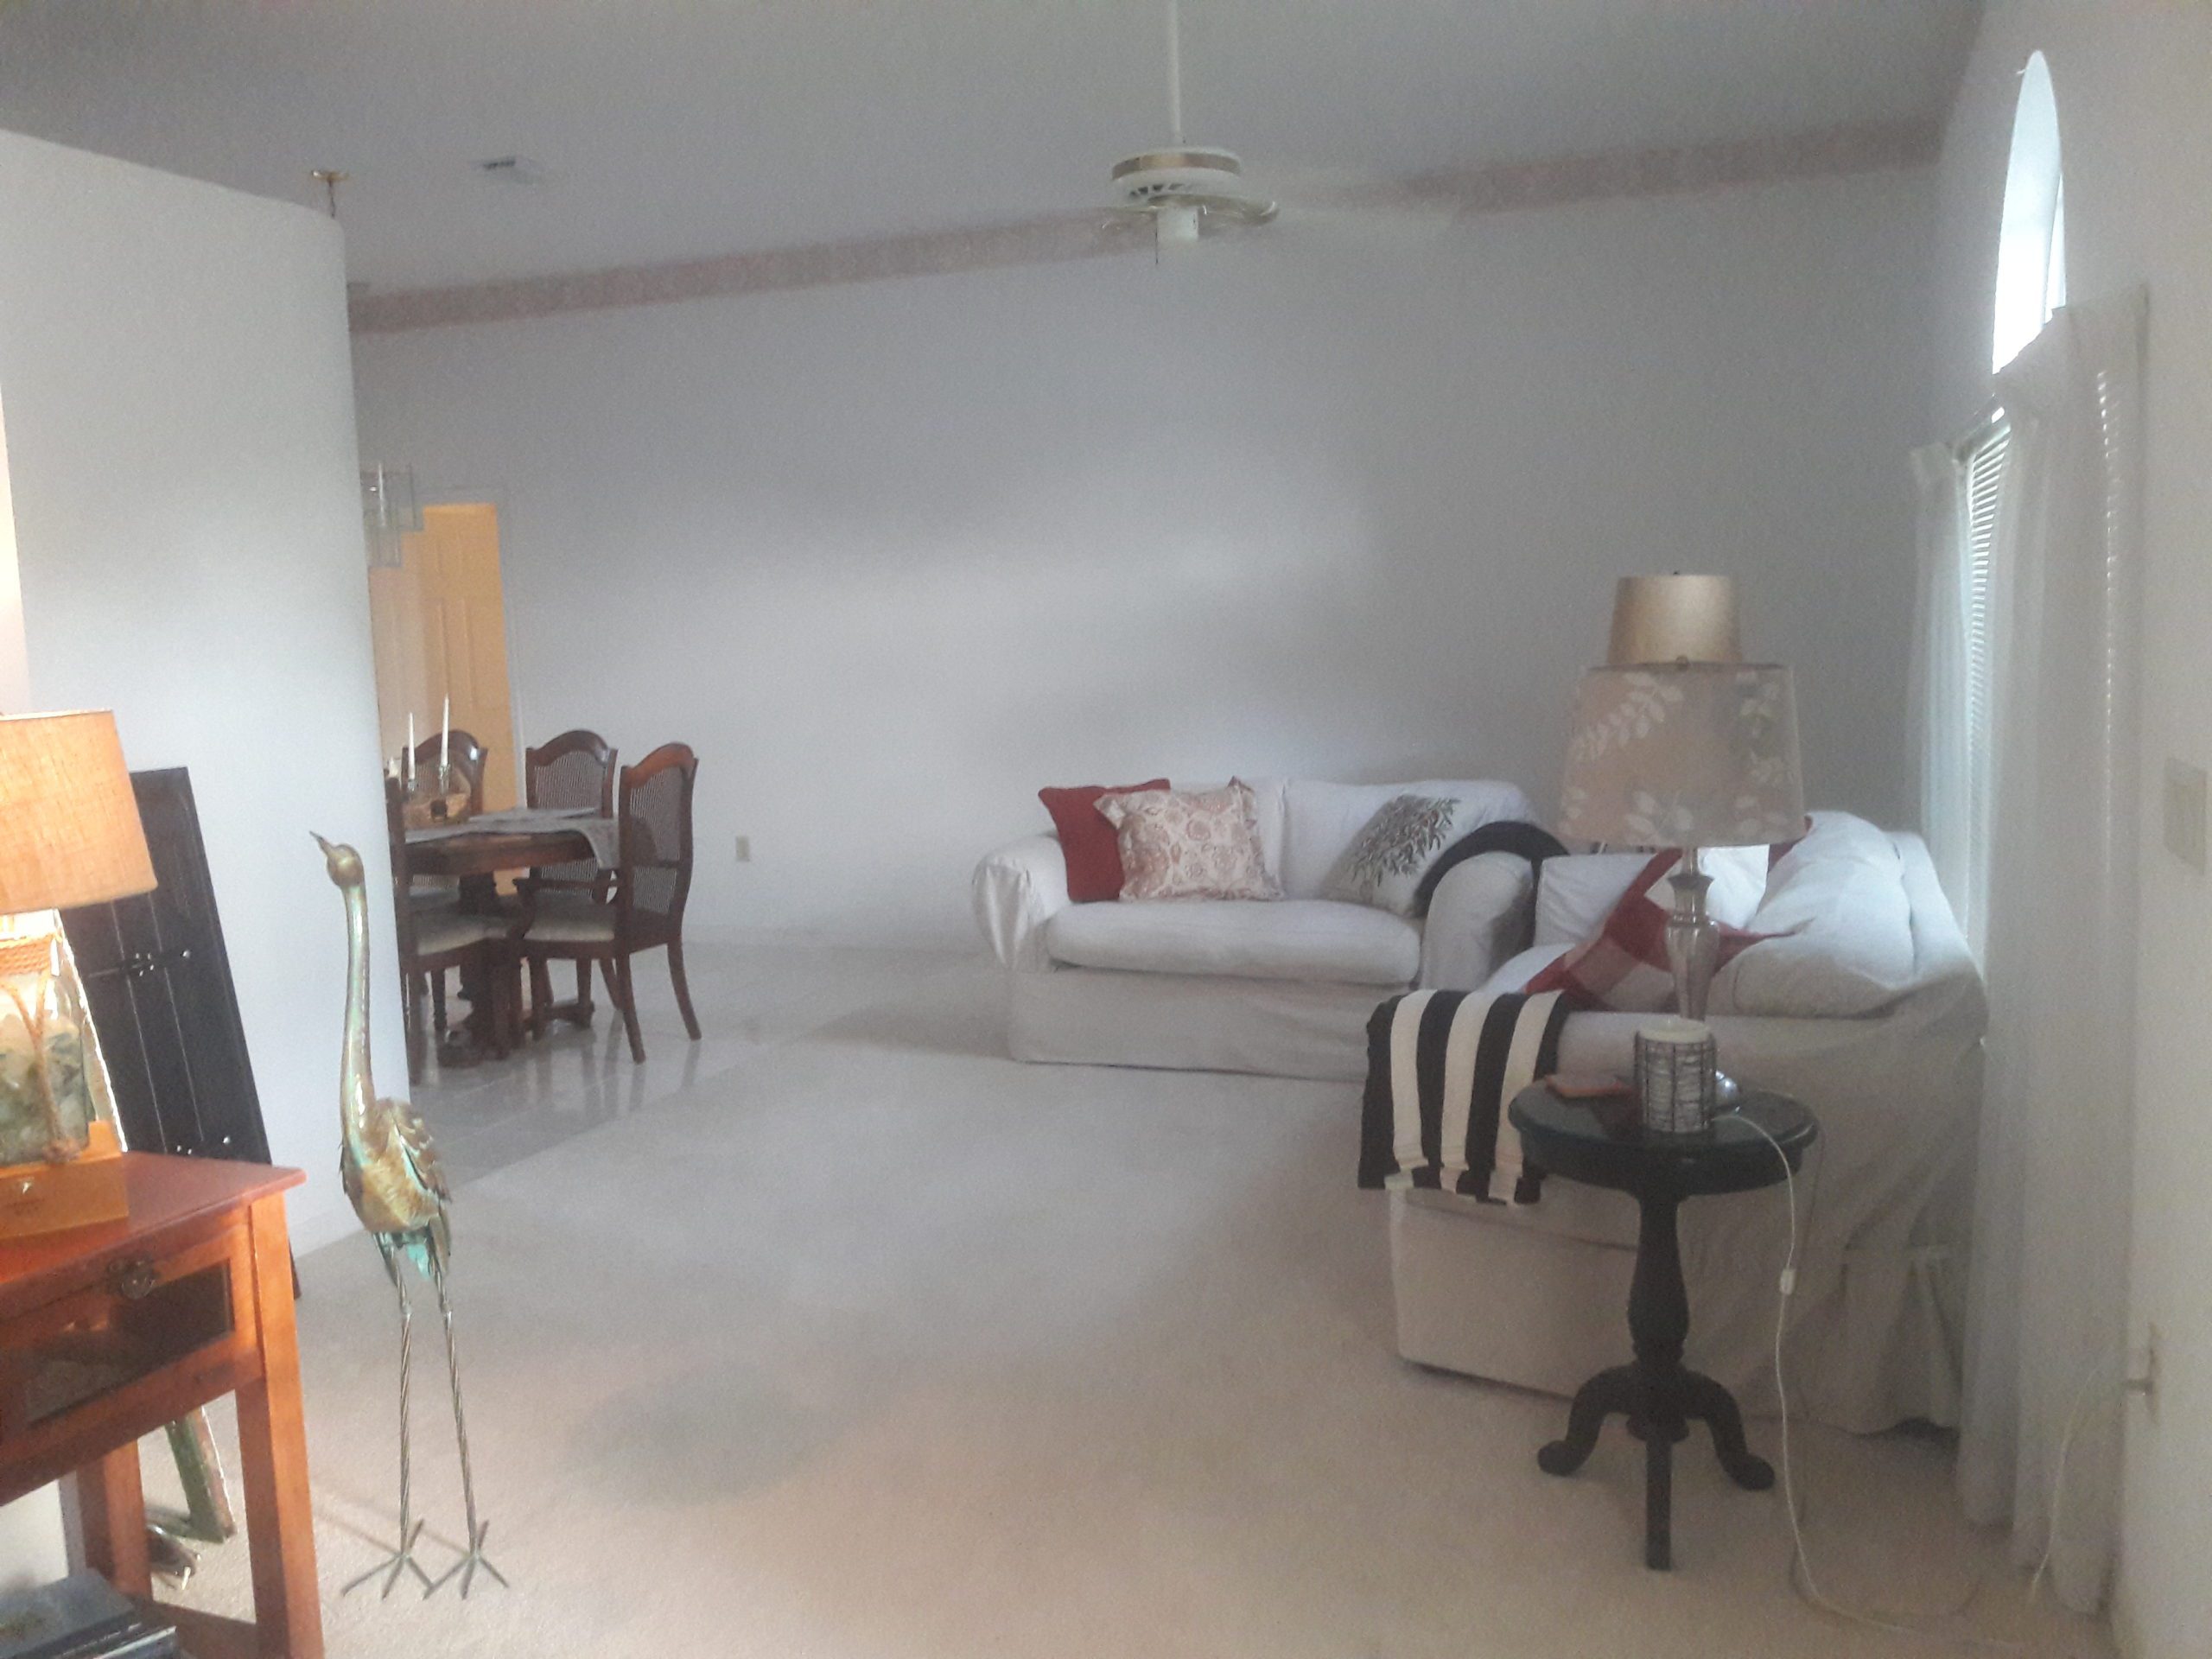
From a blank wall…
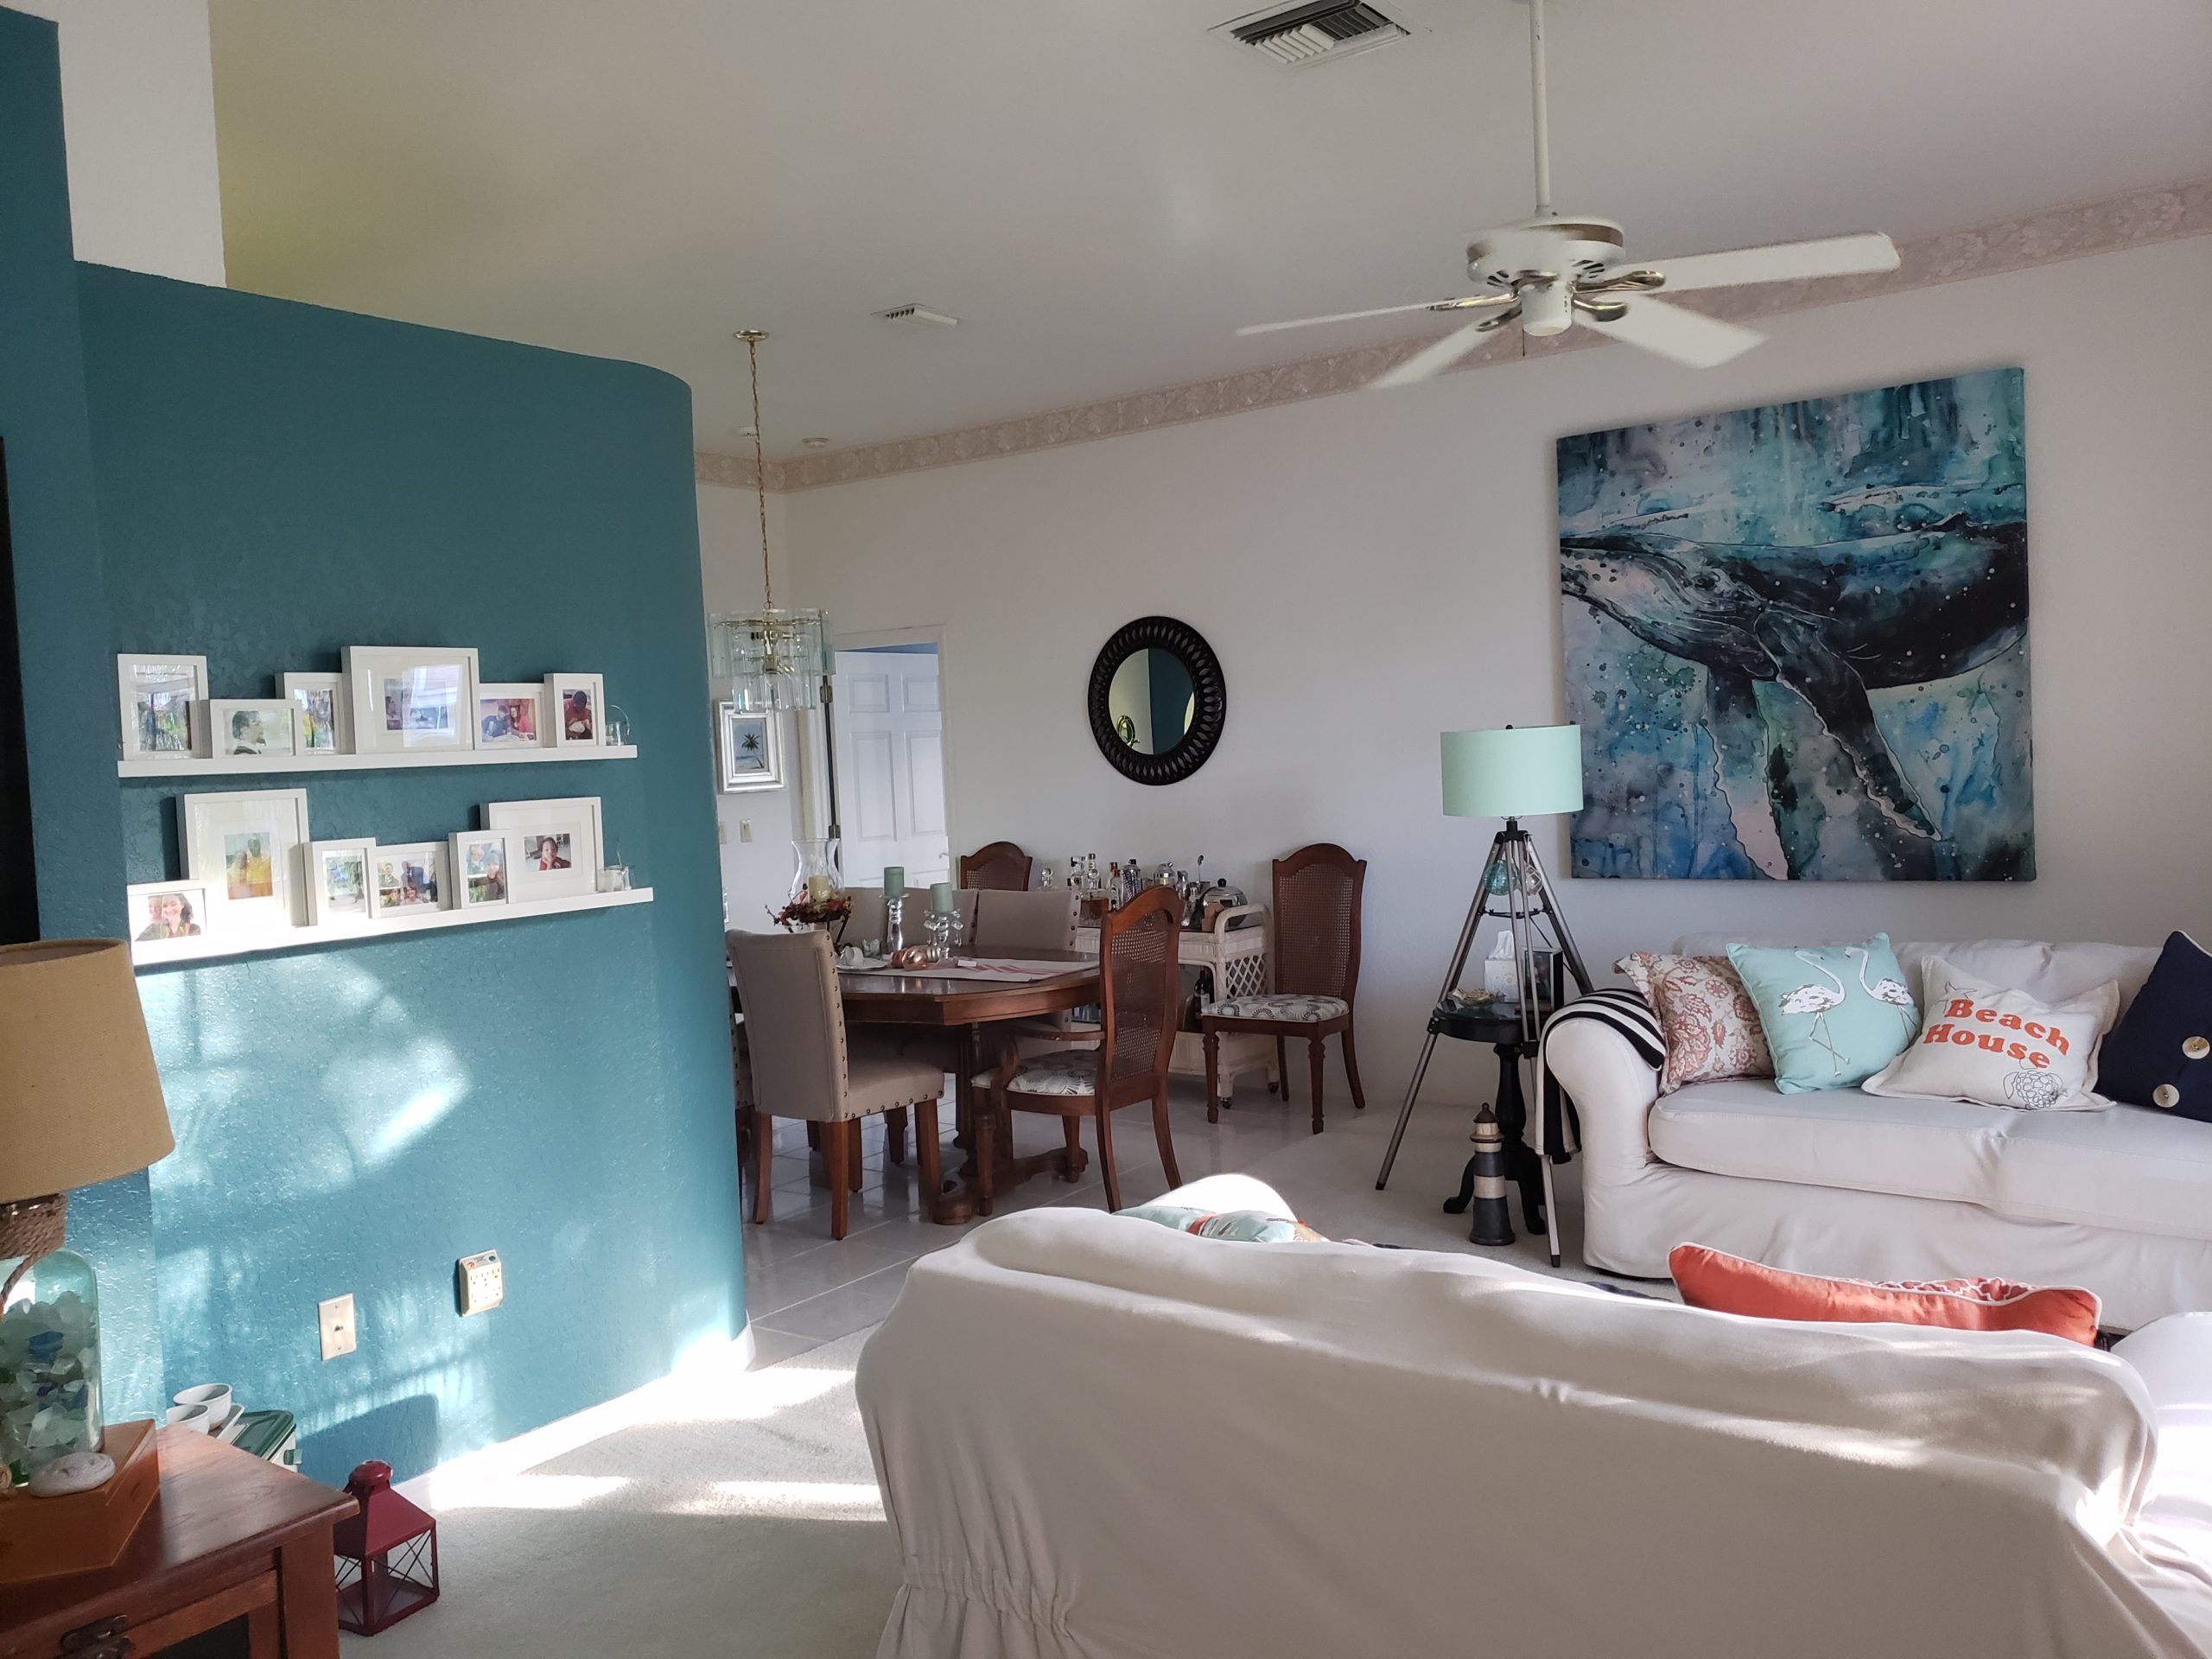
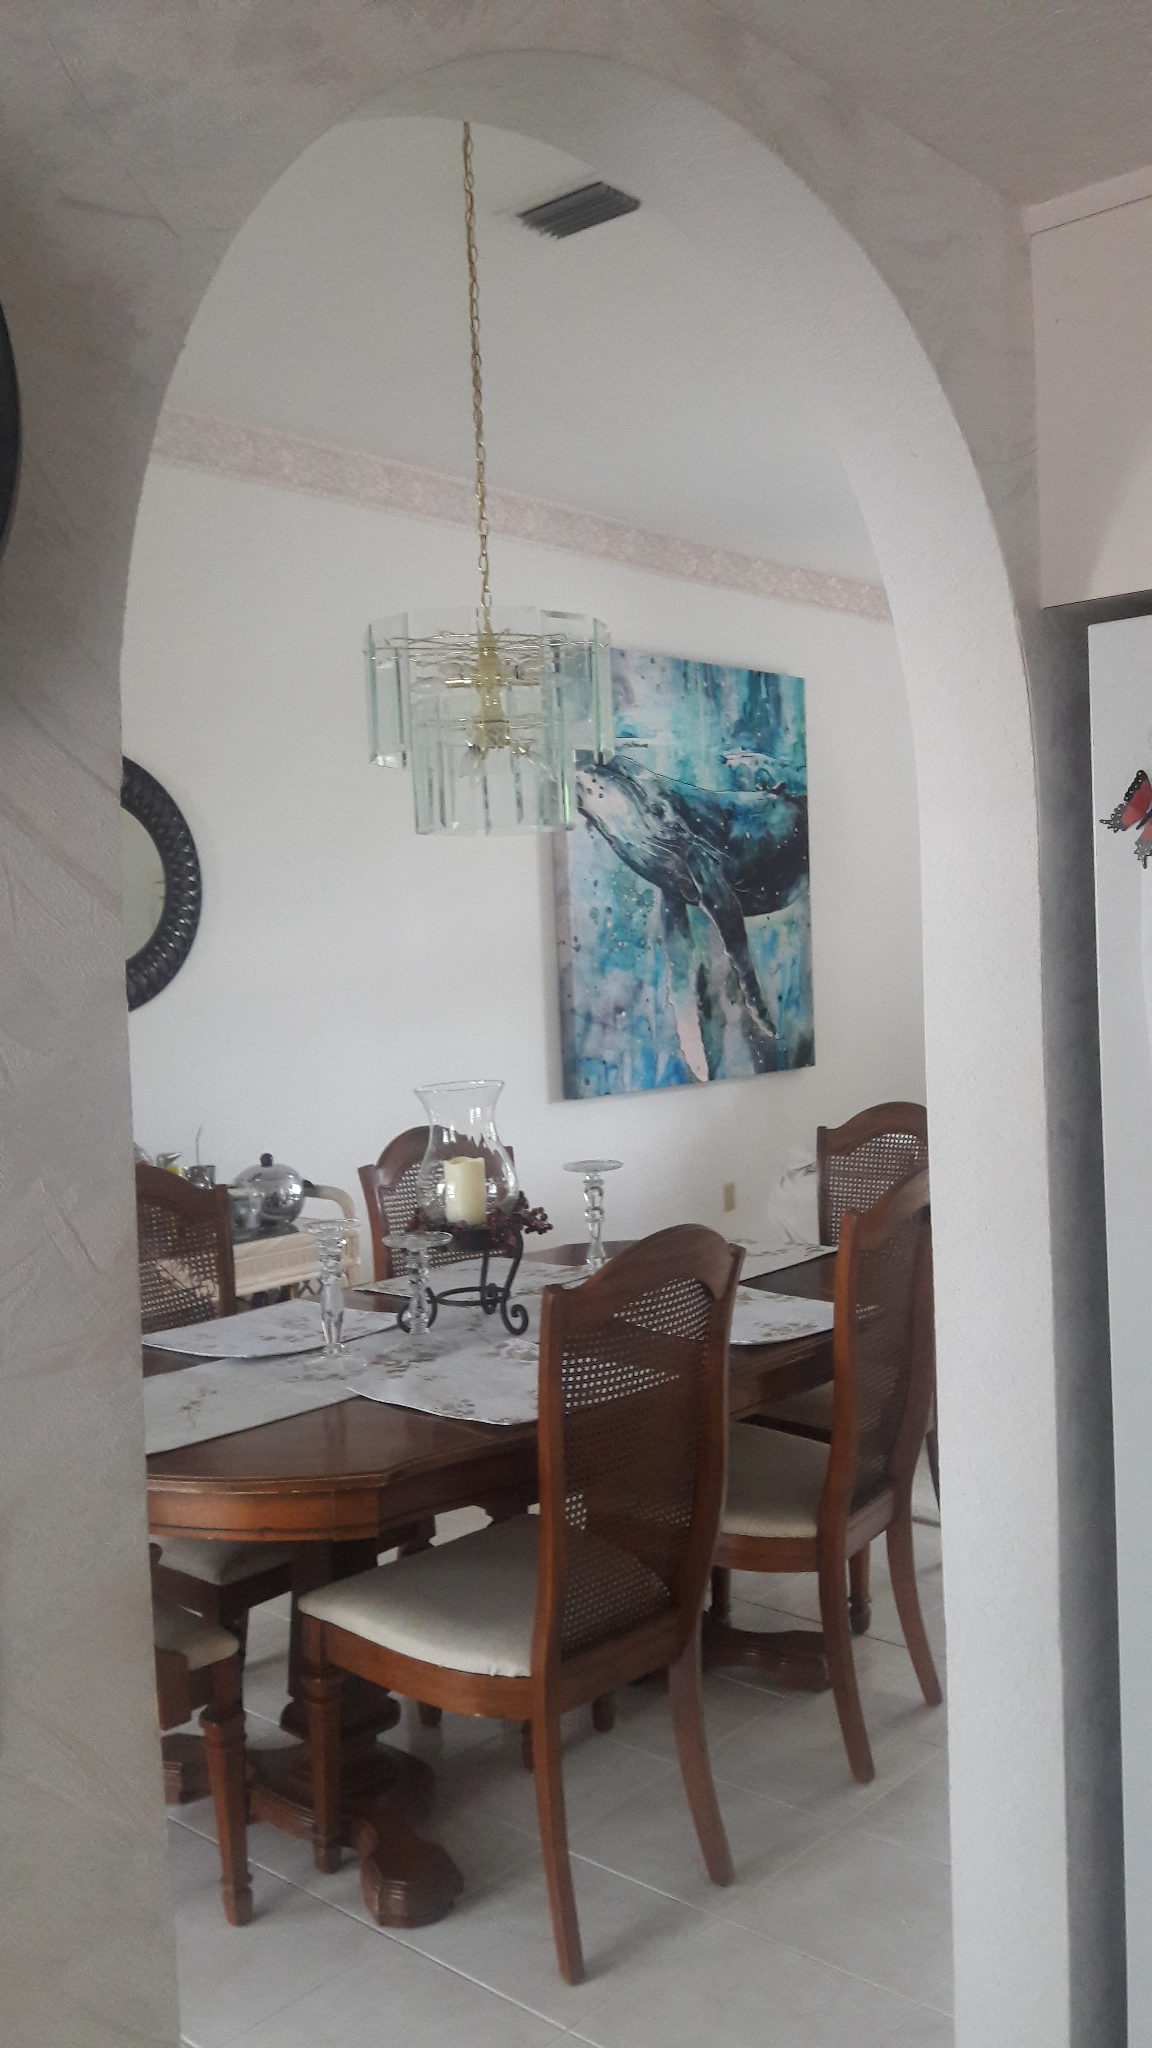
To dramatic wall art…
Two years ago when John and I moved into our next “forever” home, we were excited by the high ceilings and large windows in the back overlooking the pool. The place seemed so open and spacious compared to our 1,000 Sq ft home back in Ohio. What I did not think of, among many…many other things, was how to decorate these large walls with a next to nothing budget.
I tried a collage of family photos, but decided I liked them better on the smaller wall by the entry door. Art for such a large wall was going to be expensive if it was to look right…or so I thought. After a ton of hours on Pinterest, I found the perfect solution. By the way, hours spent on Pinterest are never wasted! 🙂
I found a pin where a homeowner stretched a shower curtain over a wooden frame…GENIUS!!! Now to find the right shower curtain! Amazon has like a zillion of them for descent prices.
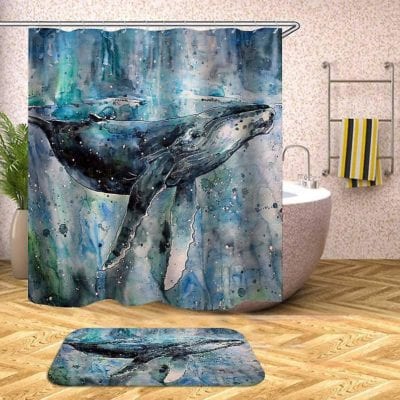
I settled on this one because I liked the watercolor look of it. It looked like an actual canvas after it was stretched over the wooden frame.
Disclosure: As an Amazon Associate I may get a small commission, at no extra cost to you, should you make a purchase using a link on this page.
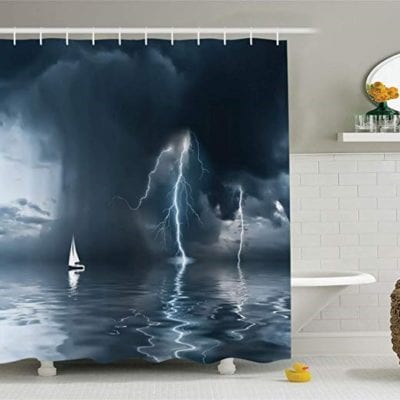
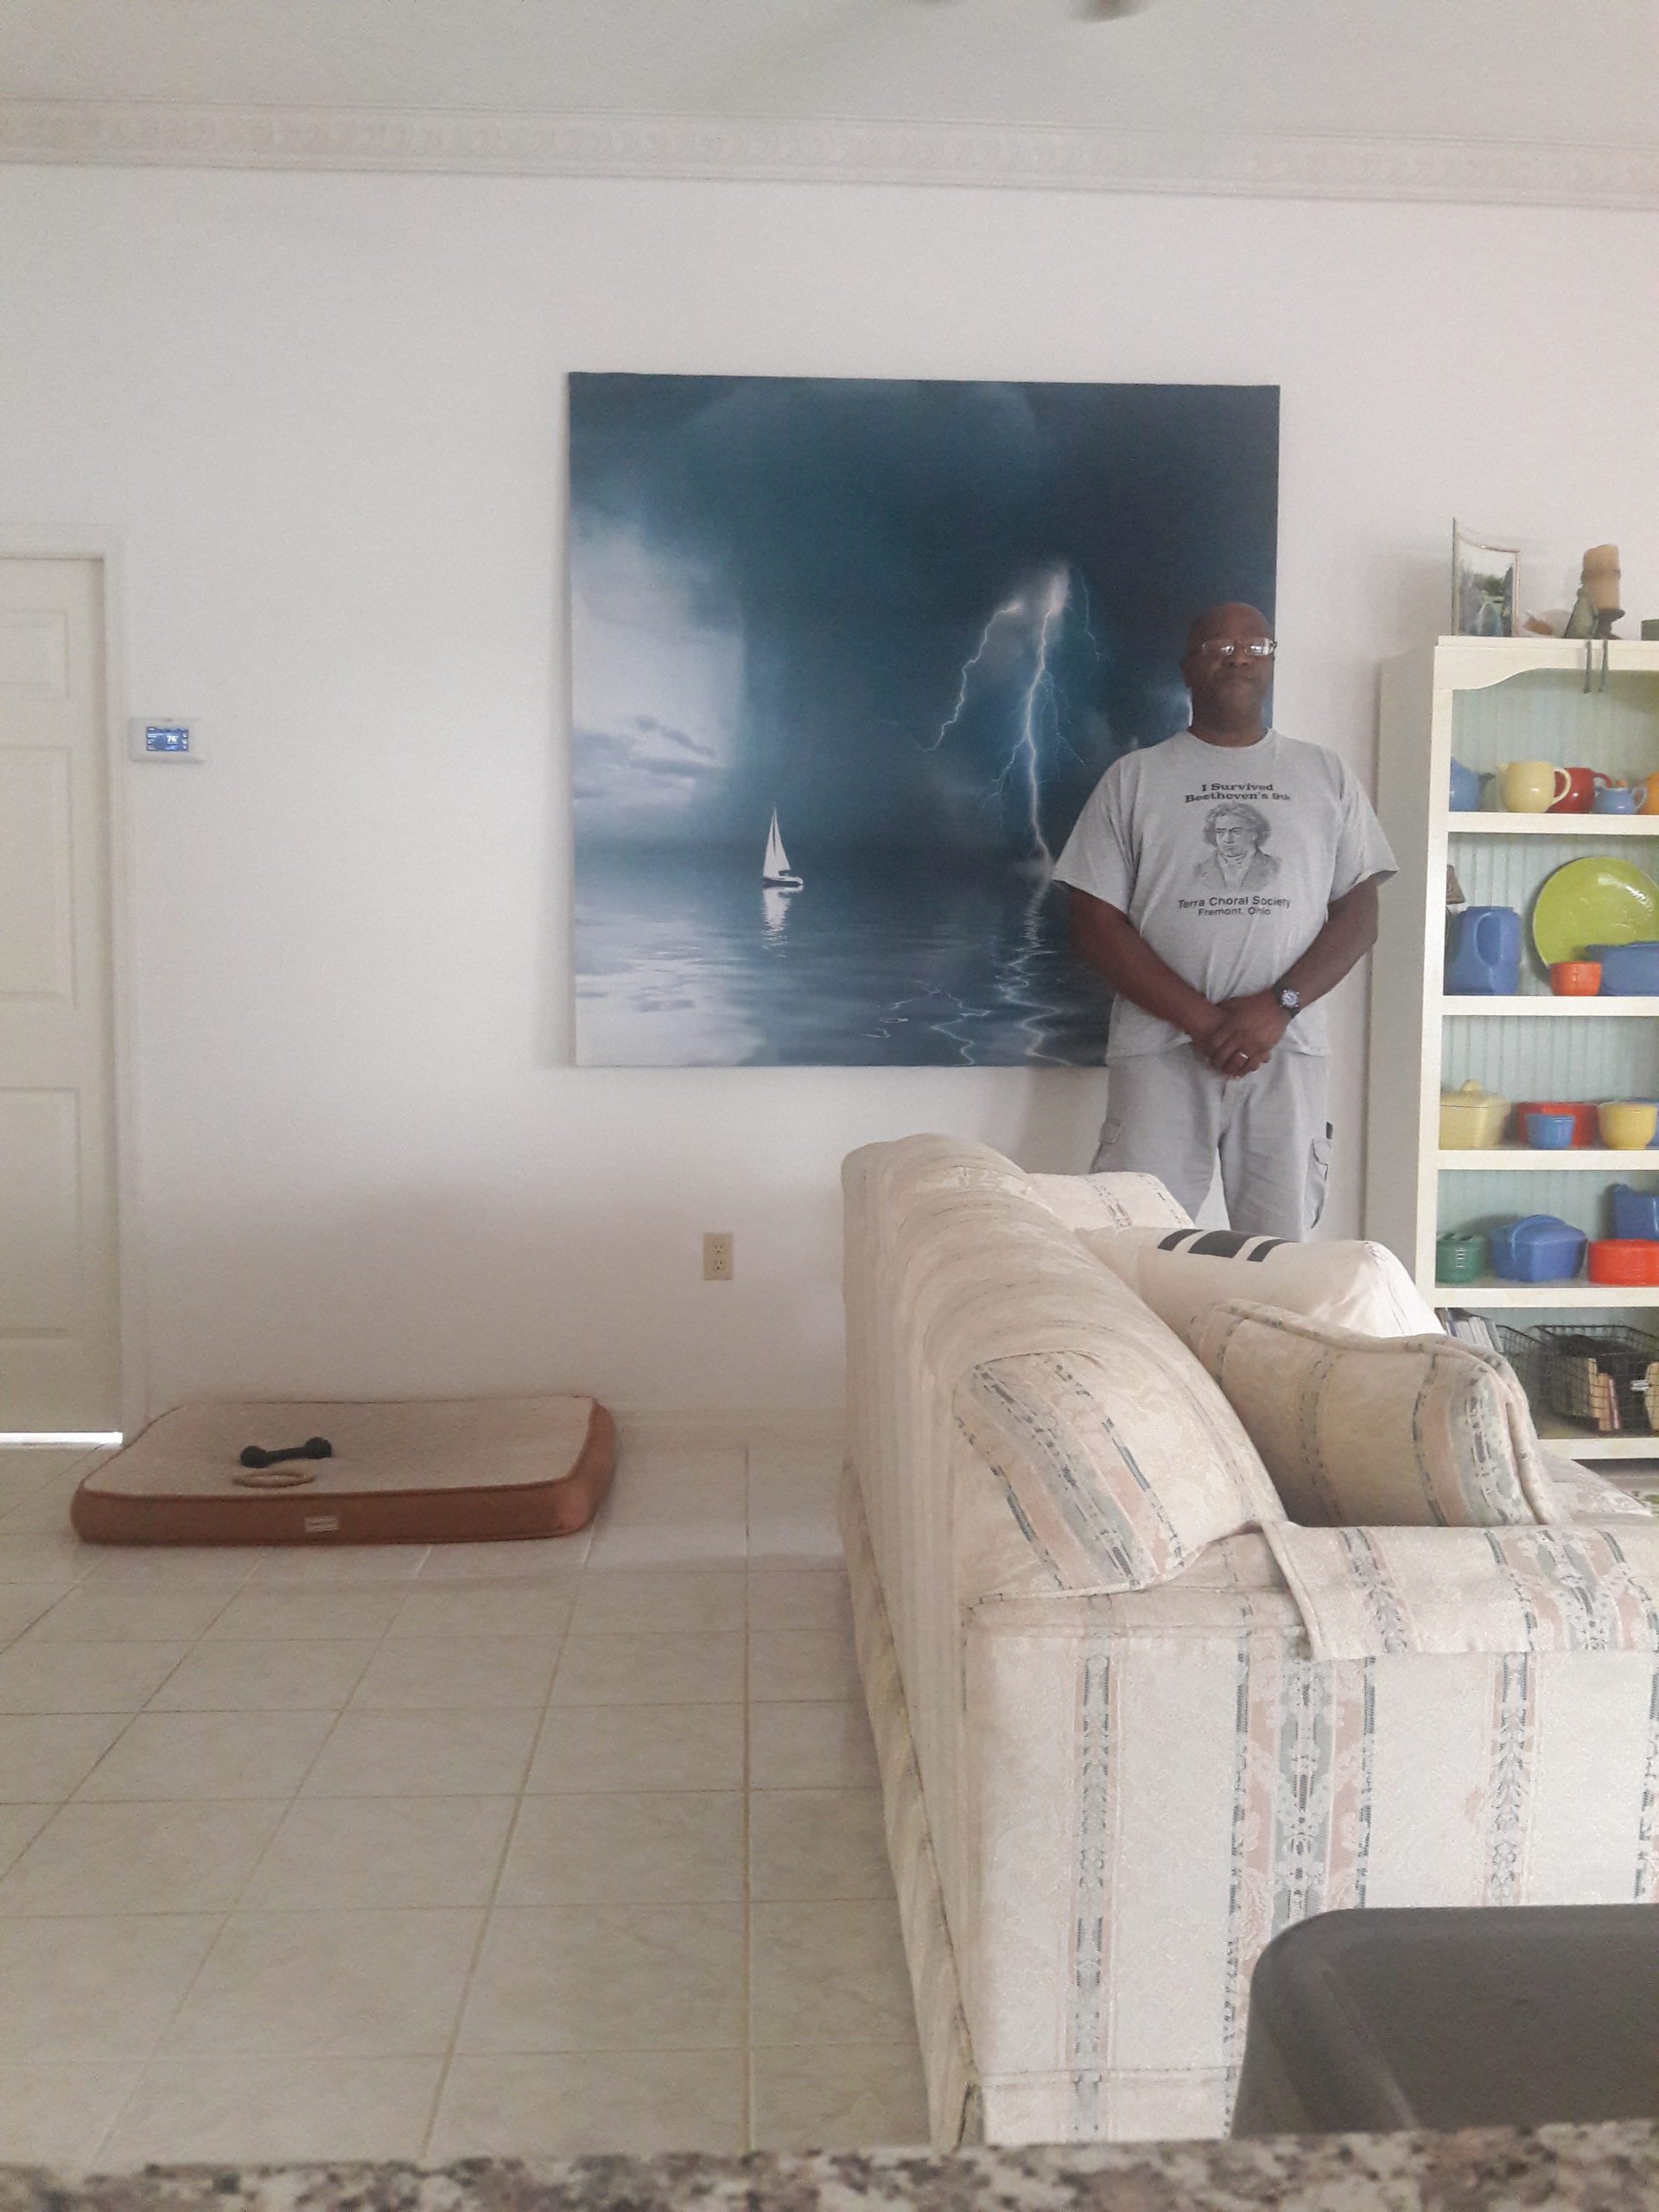
I was so happy with the way it turned out that I did another one for the family room. This one is of a sailboat in a storm. I do not like this one as much, but my husband loves it! If you prefer the sailboat in the storm, here is the link.
The curtains themselves were around $20-$30 each and the cost of the wood and hardware were around $20 with the total cost being around $40-$50 each. Ordinarily, artwork this large would be extremely expensive especially if you bought it already framed.
To make this you will need:
Shower Curtain
1”x 3” boards – go for the higher grade.(I used poplar) They will not be warped or twisted
(16) 2” wood screws
Electric drill
Countersink bit
Phillip’s screw bit
Heavy duty or pressurized (air compressor) Stapler
Measure your shower curtain and subtract 4” on each side. For example, if your shower curtain is 70”w x 70”h, it will be roughly 66”w x 66”h when stretched over the frame.
You will need two longer boards and four shorter boards to achieve this size (see diagram below). You can cut the wood yourself or have the guys at your local hardware do it for you.
Pre-drill your holes with a smaller (than your wood screw) drill bit. This will keep the wood from splitting when you put the screws in. I used two screws for each end of the boards so 16 total.
Use the countersink drill bit over the hole you just drilled. This will make your screw fit down inside the wood giving it a cleaner look when finished.
Screw your wood pieces together using the Phillip’s head drill bit attached to your drill (it looks like a “+”) according to the diagram below with two longer boards (5’6”or the height minus 4” of your shower curtain) on the outside and four shorter boards (5’4”or the width minus 4” of your shower curtain) down the middle like a ladder
Hopefully, your frame won’t look as wonky as this drawing does!
Lay your shower curtain face down on the floor and straighten out any wrinkles in the fabric.
Once your frame is securely fastened together, lay it on top of the shower curtain. Starting on one side only, staple the fabric to the back of the frame making sure no wrinkles develop in the fabric. Do not staple near the corners until all sides are fastened down.
After you have completed stapling the one side, begin stapling on the OPPOSITE side pulling tight enough to smooth any wrinkles, but not too tight or you will tear the fabric. Complete the last two sides smoothing the fabric as you go.
Now, for the corners. I find it easier to fold the fabric in and staple it down smoothly once the sides are already secure (Kind of like folding the sheets at the foot of your bed).
There you have it! I had John stand next to the piece to show the scale of the finished product. Of course, Karl the wonder dog had to get in the action also!
These pics were taken shortly after we moved in. You will see our home’s transformation in my upcoming blog posts.
We’ve taken our time developing our home’s style. The research has been fun and taking our time keeps us from having a big hit to the household budget all at once. We’ve also changed our minds half way through a remodel because it wasn’t turning out the way we visualized. That’s the beauty of working on your own home. You have the freedom to “tweak” things here and there.
Moving to Florida from Ohio has been quite a ride and a major life-style change, but we have zero regrets and are loving every minute!
Until we meet up next time, have an AMAZING day!!!
— Danielle
Hi, I’m Danielle!
I am the designer, writer and diy’er behind this blog. I enjoy decorating my home for practically nothing by doing most of the work myself, finding new and imaginative ways to make it beautiful and by watching for killer sales. I find humor almost anywhere and can laugh at myself through it all. I have learned that most projects don’t go exactly as intended, but can be more beautiful than the original plan.
Re-Fabbed Boutique – Beautiful, quality clothing for women of all shapes and sizes!!
We use cookies to ensure that we give you the best experience on our website. If you continue to use this site we will assume that you are happy with it.
You can revoke your consent any time using the Revoke consent button.